Master Miniature Gunsmith and Netsuke Carver
Joe Martin Foundation Craftsman of the Year Award Winner for 2006
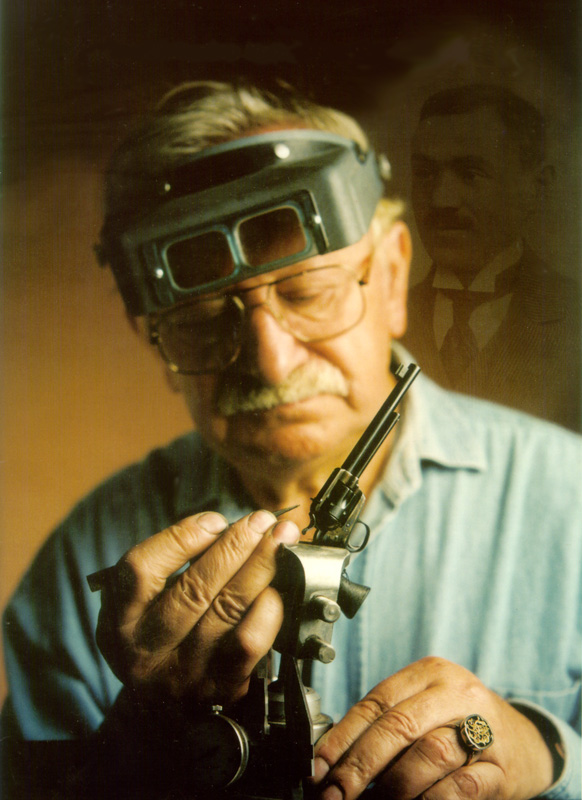
About David Kucer
By S.J. Gooding
(The following has been taken from David Kucer’s website and reprinted with permission here.)
In 1930, at the age of seven, David Kucer departed the town of Vilna in Poland and arrived with his parents at the port of Montreal, Canada—where he has made his home ever since. His father and grandfather practiced the metal worker’s art, so it was natural that he would continue in the trade. He took his formal education at Montreal Technical School as an apprentice toolmaker, and has never stopped his learning process.
In 1935, he visited New York City and saw Dr. Sibbald’s Smallest Show on Earth. That exhibit at the Radio City Music Hall, with everything in miniature, was to leave a lifelong impression on him.
At the outbreak of World War II, David took work in a Montreal armament plant, and in 1942 he joined the Royal Canadian Electrical and Mechanical Engineers. As he tells it, “In a month I was wearing three stripes and a crown as an armaments officer.” After the armistice, he served as a military interpreter in French and German.
On his return from overseas, David joined Artmetwork Inc., the family firm which soon employed 65 people. They produced almost anything in metal, but in small quantities. One product which will be familiar to many is the turnstiles used in the Boston and Montreal underground systems.
In 1969, a fire destroyed the building in which Artmetwork was housed, and the company effectively ceased to exist. The financial loss was too great to overcome. Nevertheless, it was that tragedy which generated the opportunity for David to develop the artistic talents that are featured here.
He opened a small shop on Mackay Street in Montreal to produce signet rings (rings carved and engraved with small coats of arms), which are used to leave a unique impression in sealing wax. In his present shop, David still has the little steel punches and dies which he had to make for that job.
The designs are too small to see with the naked eye, but they are in the shapes of the heraldic signs—shields, crown, coronets, stars, helms, and the like. All the while, he worked in his spare time on miniatures. This was the work that he had wanted to do since he saw his first miniature exhibit in 1935.
In 1946, there were very few miniature gun makers in the world, and each worked in isolation. Now, the Miniature Arms Society has produced a circle of craftsmen and collectors of miniatures, the membership of which is worldwide. The society produces a regular journal, provides a means of communication between miniaturists, and has developed a vocabulary which describes the field.
The late Joseph J. Macewicz, secretary and founding member of the Miniature Arms Collectors/Makers Society, outlined the criteria for miniatures:
- True miniatures and miniature arms of all sorts, as defined by our Society standards, must be considered as decorative works of fine art. This does not apply to toys, replicas, and the like.
- This is applicable to either antiquarian or modern-made pieces.
- True miniature weaponry is classified as one-of-a-kind, even when issued in very limited quantities; they are hand-made by artisans, and are not “manufactured” in the literal sense of the word.
David Kucer’s techniques have evolved over time. His first miniature, a Colt Model 1911 semi-automatic pistol, was made in 1/3 scale. However, he found that the tools he could purchase were too large and inadequate, so he then worked for a while in 2.5:1. David says he gained experience, and realized that he had to make a number of his tools. Soon he returned to the 1/3 scale which he is still using.
Miniatures have been somewhat of a crusade with David. He is always willing to share his knowledge and help to develop the interests of others. His arms have been displayed at many major institutions including:
The Place des Arts, Montreal, 1974; The Visual Arts Centre, Montreal, 1976; The Eli Whitney Museum, Connecticut, 1981; The David Stewart Museum, Montreal, 1988; The Royal Armouries at the Tower of London, England, 1989; and The Royal Ontario Museum, Toronto, 1991.
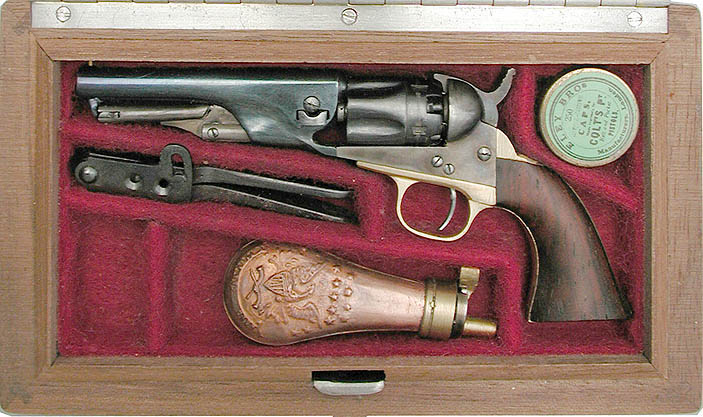
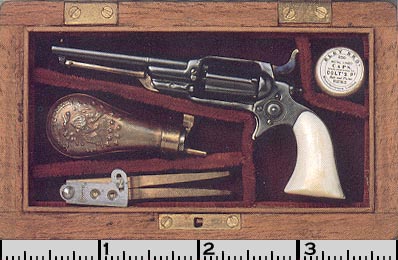
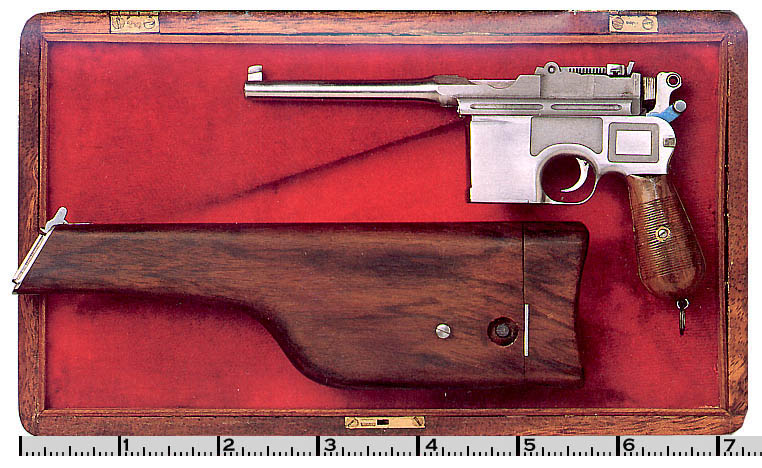
A 1/3 scale 1862 Colt Police Model cap and ball pistol set with walnut grips. The set includes a scale powder flask, bullet mould, cap box, and nipple wrench in a walnut box.
At the time of this writing, in the 1990’s, they are scheduled for a return to the David M. Stewart Museum in Montreal. This list does not include the fact that David has displayed at the National Rifle Association Annual Meetings each year since 1989, and in the past five years has won four silver medals for best in his class at those shows.
Mr. Kucer’s interest in sculpting miniatures has driven him to the ultimate challenge in the carving field—the making of Netsuke. This is an area of traditional Japanese art in which he has become so proficient that he was accepted as a member of the Japanese Carvers Association, one of only 12 Westerners with such an honor. David finds this especially relaxing, as it gives him the opportunity to design his own project, rather than using the designs and construction techniques used by early arms manufacturers.
His special interests and a search for knowledge have taken him to the communities where some of his models originated. He spent two weeks in the Brescia/Gardone val Trompia area of Northern Italy, where fine guns have been made since the 15th century.
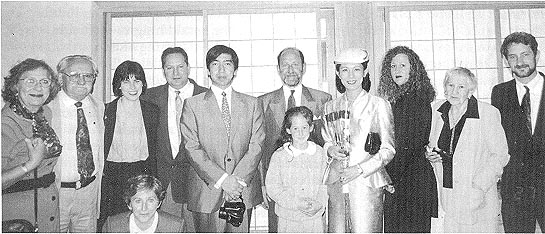
He also spent time in the bronze foundries of Pietro Santi in Florence, and recently, he spent six weeks in Japan in search of knowledge on his most recently acquired interest, Netsuke. David’s skill is such that His Imperial Highness, Prince Takamado of Japan, acquired two Kucer silver Netsuke for his personal collection in 1992.
2005 Update: At age 82, David Kucer is still active in the business with no plans to retire. His family has produced several craftsmen. Danny, David’s oldest son, is a former jeweler and engraver turned successful entrepreneur. Joel, Danny’s son and David’s grandson, worked for David making miniatures for two years before graduating as an industrial designer. He still makes custom jewelry on occasion in David’s shop. David’s other son, Zavie, quit his job after 8 years as an aerospace engineer to learn the miniature gunsmithing trade from his father, becoming a 5th generation metalworker.
Zavie has worked full-time as David’s apprentice for the past two years, learning all he can about miniature gunsmithing and metalworking in general. He has also attended Stockton School of Jewelry and Engraving in California to further his skills. His intention is to someday continue in his father’s footsteps, and to keep the Kucer name at the top of the list of miniature gunsmithing craftsmen.
The Making of a Miniature
By David Kucer
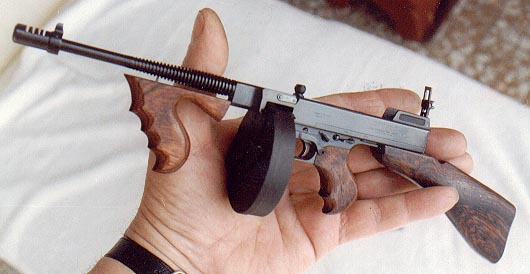
A miniature firearm, by definition, is identical to the larger weapon it is modeled after in every way except size. The metal is the same alloy, hardness and color. The hardwood grips are checkered in the same patterns. The interiors of the barrels duplicate the rifling. In short, every aspect of the original is recreated, down to barely visible engraving. Here, in his own words, is how David Kucer came to be interested in such miniatures, and how he goes about making them.
It was about 55 years ago that the disease struck me. I have not recovered and apparently there is no cure. Miniatures are a disease, so I decided to make the best of it and improve my condition as the years went by.
In 1935, or thereabouts, I first came across some “minies” in a show in New York. Since I was literally born in a metal shop, and spent my after school hours there while still in high school, I did have some knowledge of fine craftsmanship. It was a sheet metal shop, and the only equipment related to a machine shop was a huge Buffalo Drill, and a big grinder with an overhead transmission.
There were some hand tools: a hacksaw and a couple of files, a limited number of drill bits (the smallest being one eighth of an inch in diameter), and a few odds-and-ends. Bar stock was at a premium, but I had a friend in school whose parents had a junk yard, and there I managed to find a couple of pieces of 1/4-inch hot rolled iron bar. I had decided to try my hand at making a mini.
I came back to the shop with a fist full of metal and declared my intentions to my father. His reaction probably should have been expected: “YOU’RE NUTS.” It did not deter me, and working from a photograph of a gun (I cannot remember what model) I started hacking away, and this was my downfall.
Nevertheless, I did manage to make something resembling a mini, but I realized that it took a lot more skill and equipment than I had. The idea never left me, but high school and helping the family make a living were the priorities, so I shelved it until I came back from the War in January 1946.
Again, I joined my father in business, but I took another direction. I started tool making and general machine work. A small grant from the army helped me buy some equipment, such as a small Burke miller, a small Southbend lathe, a drill press, an Altas shaper, and of course measuring tools.
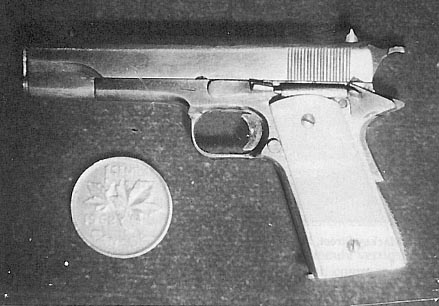
David’s first miniature, a 1/4 scale copy of the Colt Model 1911 that he carried as a service handgun in World War II.
While in the army I was an armament artificer, and worked on everything from the .22 practice rifle to the biggest howitzers. My personal sidearm was a M.1911 Colt semi-automatic pistol, and almost every time I took it in my hands I would dream of making a 1911 mini. It was sometime around 1952 when I decided that the time had come to start my adventure into minies. Of course, by that time I had a little more equipment and a lot more experience.
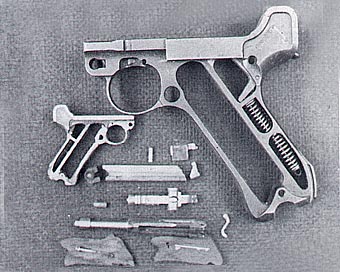
I stripped down my trusty 1911 (which was never fired in anger) to its barest, and started sketching and measuring the frame. My first step, as on any mini, was to surface grind a piece of cold rolled steel to its exact outside dimensions. The scale of that mini was one third of the original, and my problems began: cutters of the size I needed were not available. I managed to get some 1/16 inch end mills, which were pretty expensive for me at the time as I was just starting in business.
After many heartbreaking nights, I managed to do most of the machining of the frame except for the opening for the magazine. For this, I had to drill two holes in the magazine opening from either side, and smaller ones in between, in order to remove most of the material. I then surface ground a file to the same size as the magazine, and used this to complete the opening.
After many more back-breaking evenings, I had the slide on the frame, and knew that the piece was setting in. When I started making the other parts, I realized that my existing equipment was not designed for making minies, and I started to work in the direction of equipping a shop at home just for minies.
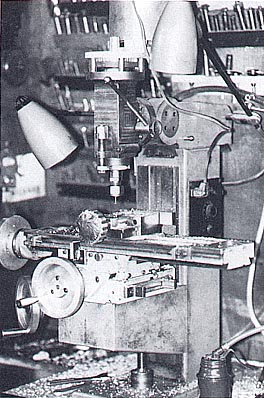
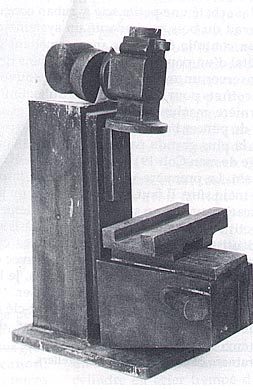
My first requirement was a miller. I examined my Bridgeport at work and started on a set of wood patterns for a one-third scale Bridgeport type miniature. After several weeks of work, I finished the patterns and had a local foundry produce the parts for me in cast iron. This was a wonderful adventure in the making of a machine. I used a motor from an electric lawn mower which ran at about 10,000 rpm. I used some timing belts and pulleys with a three to one ratio tied into a Dremel hand-tool-type control, which gave me speeds for a half-inch end mill up to 1/32-inch at full speed.
I completed the machine, including a small 40 to 1 dividing head, and I adapted it to take jeweler’s lathe collets. I also attached the dividing head to the lead screw on the table, and this gave me the equipment to make the broaches for rifling the barrels.
David’s first vertical milling machine—a Bridgeport miller at 1/3 scale—which he had built from homemade patterns around 1950.
This machine and the dividing head are still in use, and I consider them to be my most important pieces of equipment. However, I still had problems with duplicating the small parts, and after some thought I realized that I needed a small pantograph.
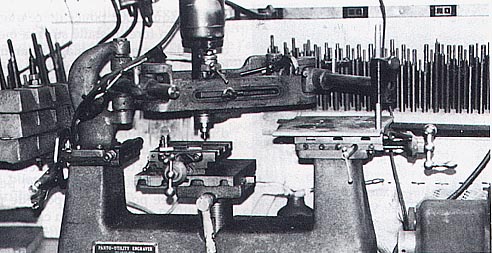
After searching the used machine dealers’ stores and warehouses, I found a box of parts for a Preis Pantograph Utility Engraver made by the Preis Engraving Machine Co. at Hillside, N.J. It was a table model, and after several months of night work I completed the machine. With a few of my own innovations, such as cross slides on both tables to set the positions of the pieces accurately, I was closer to being efficient.
I usually find ways with wedges or screws to hold the pieces down on the table. I sometimes hold the raw material in place by soft soldering it to a piece of sheet copper, which I then melt off when the operation is finished. Almost any piece can be made in 2 dimensions with the pantograph, except for those with sharp corners which have to be filed by hand.
I made a set of fingers from 3/8-inch round, cold-rolled steel with increments of 0.0025-inch, from 1/16-inch up to 3/8-inch. The cutters are set to the same ratio as the “panto.” The cutter sharpener can be adapted to any grinder with a small slide and rotating chuck.
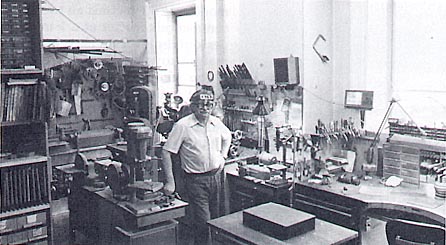
As I have said, these two machines are my most important pieces of equipment, and they look after almost all of the machine work. I still use a 10-inch bench lathe for bigger turning, such as barrels and cylinders. However, some time ago I bought a small jeweler’s lathe with a cross slide at a flea market, and on this I make most of my screws and small round parts under 3/16-inch diameter. For threading, I use a set of Swiss-made jeweler’s taps and dies with metric threads.
One other important piece of equipment is a drill press. This I also made to my own requirements. It has the capacity to handle drills from 3/16-inch down to the smallest, at high speed. The rheostat and motor which control it came from a flexible shaft.
After many years of making minies, one learns how to improve one’s lot. But it has reached a point now where I spend more time on details, and have become much more critical of my work.
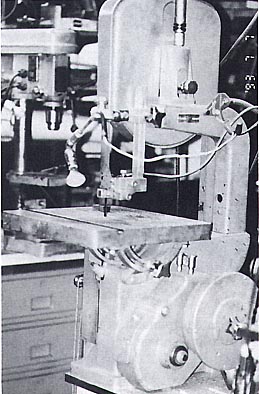
Returning to equipment, I have to go back to a very basic project—how does one cut a number of pieces of 3/8-inch thick, cold-rolled steel and not get too tired to continue working? For this, I acquired a small bandsaw designed for woodwork, and put on a reducer with an electric control so that I could then cut up to 1-inch of steel or 3-inches of wood. The wood requirement is because one often has to make boxes for the minies. To compliment this machine, I bought a combination belt and disk sander for both wood and metal.
After acquiring most of this equipment, I managed to complete my machine work on the M.1911, and proceeded to do the hand fitting. The number one requirement is patience and good hand-held tools. A set of small Swiss files, a flexible shaft, or the small electric hand pieces of a dental technician, a set of dental burrs, and some small rotary grinding wheels are a necessity. I make most of my mechanism parts in tool steel, and when they are almost fitted, I harden the parts and finish fitting by stoning on a whetstone.
Another important piece of equipment is an electric furnace with a pyrometer. This is important if you want to have good springs, and there is really no alternative. Even when I make a coil spring from piano wire, I always harden it to make the coils more lively. I usually use annealed, water-hardening steel (rather than the more usual oil-hardening).
The temperature to harden this steel is 1525°F and quench in water. Then for tempering, heat to 710°F for 6 minutes and quench. This covers the hardening of all springs. I always buy annealed material, but some configurations have to be bent hot by heating to a cherry red color, and going through the bending and shaping process using my furnace. The furnace has a 4x4x4 inch capacity, and is designed to be used in the jewelry trade for burning out the waxes used in lost-wax casting.
Having arrived at the point where I have the frame, slide and mechanism, I must look to the barrel. The barrels are turned on the lathe and drilled. Then they’re reamed, with a reamer placed in the lathe tailstock to about .002-inch smaller than I want. Then I proceed to make my broach on the miller. This will be used to cut the rifling grooves in the bore.
I set the gears to the right twist, and use a small mounted saw to cut grooves at the right twist in the broach (or bullet). It is tapered at both ends after it’s cut off, hardened and given a high polish. To get a mirror finish inside the barrel, you simply put on a little oil and hammer the broach through the barrel with a drift punch, or in a small arbor press. This will produce the grooves and give a mirror finish inside the barrel.
The magazine construction is not easy, unless you have some experience in sheet metal work and oxyacetylene welding. The material that I have been using is cold-rolled steel shim stock, and the thickness is of course to scale with the original. The first thing I do is make a mandrel, or form, for shaping to the size of the opening less than the thickness of the material. This mandrel is usually hardened, as I must hammer the shim stock around the mandrel with a wooden mallet.
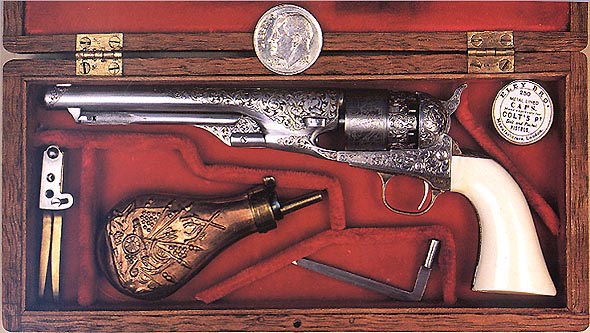
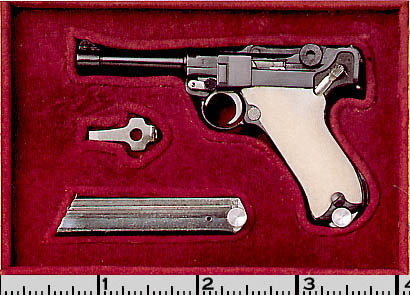
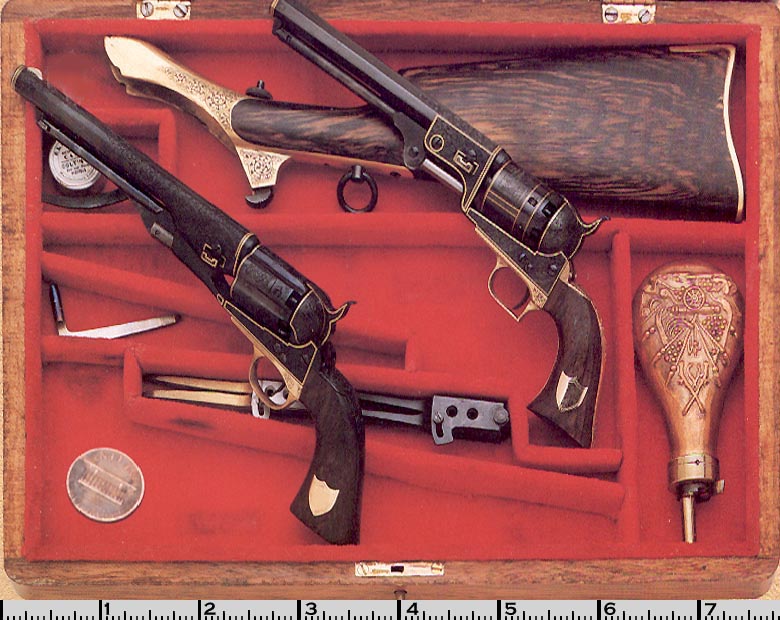
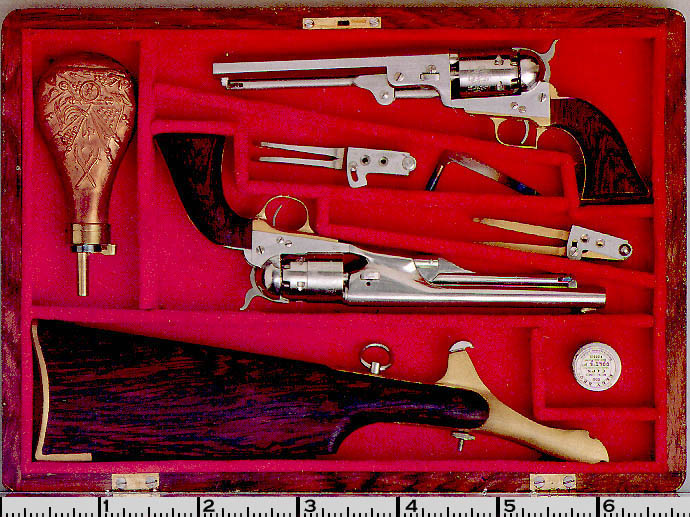
A cased set of Colt Pistols in 1/3 scale. The pistols were engraved by Roger Sampson. The Colt Model 1860 Army revolver includes a detachable shoulder stock. The set includes a scale model copper and brass powder flask with decoration in low relief. It also includes bullet moulds and a percussion cap canister, with an accurate copy of the paper label from the full-size original. The Colt Model 1851 Navy revolver cylinder is only about 1.5 cm (or 5/8 inch)! Both pistols, the shoulder stock, and the accessories are fitted into an exquisitely hand-crafted wooden case. The case is less than 15.5 cm (6-13/16 inches) in length, and 12.4 cm (4-7/8 inches) width. This is about the size of a small paperback novel!
The jaws in the vise in which this is held are either smooth or copper covered, and I put masking tape wherever it is needed to avoid any unnecessary scratching. I usually weld the back edge of the magazine and file the residue material from the inside. By the way, the mandrel is also prepared to act as the anvil for bending the lips on the magazine.
The angle on top and bottom of the magazine is marked with a protractor, and cut with a one-inch cutoff wheel—which is 1/32-inch thick, operating on the flexible shaft. The bottom of the magazine is then silver soldered in place. The next step is to bend a sheet metal channel to fit over the magazine to produce a drill pattern or jig for the holes.
The springs are also bent on a mandrel, and again hardened in the furnace to make them lively. The platform is straightened if necessary and put into the pantograph. I often have two parts handy, one bent and the other in the flat. I also like to have two guns handy—one assembled and the other in parts, so that I can check the operation of the mechanism. Although, this is not always possible because of the rarity of some of the pieces I make.
Last, but not least, are the grips. These I also shaped on the pantograph, but the checkering is done by hand, and many of the checkering tools I make on the milling machine.
This is a somewhat composite summary of how I made my first Model 1911 automatic, with refinements that were added as different models of guns were produced. I have made many since that first one, but my methods have not changed too much. I should note that when making the moving parts, I usually make more than I need in case I make a mistake. On each part I leave a piece of material to hold it by in the vise until finished fitting, then I cut it off. This idea of leaving a piece of material for gripping is especially useful when a part is to be shaped by hand, as was done on the flint lock mechanism from the Museum Restoration Service “Logo Gun.”
Actually, machining and fitting all the parts to the finest tolerance still requires hand finishing. This operation is very critical, as it is the first thing one sees before trying the mechanism. There are many ways to polish, but I will record my way.
The first thing I did was make emery boards. I bought water proof (wet/dry) emery sheets with paper back in six grits: 80, 120, 220, 320, 400, and 600. I then bought, at the local hobby shop, some 1/16x3x24 inch wood used by model makers. I then sprayed the emery cloth with spray-on contact cement, and glued the wood to the emery. After a few minutes, the board can be cut with a knife into 1/4×11 inch boards for “emery sticks.”
With these, I can polish all flat surfaces starting with No. 80 grit to remove all machine marks. I then proceed to the finer boards until arriving at the 600 grit for a super-smooth finish. I always keep a razor blade handy to sharpen a point onto the sticks when it is necessary to get into difficult corners. The finish obtained with 600 grit is usually what is found on the best commercially finished weapons.
I never use a polishing wheel of any kind on flat surfaces. On the other hand, I use rubber wheels in various grades of coarseness on the contours. Here again, there is always a progression from coarse 80 grit through 600 grit, as with the emery sticks. If I want a finer finish I can use a polishing or crocus cloth on the flat surfaces, and a small felt buff with compound on the contours.
After many years in the machine shop and die-making business, you learn to improvise and create methods within the restrictions of your capacity and equipment. The exercise of producing a miniature is an adventure in metalworking. It is not possible to recreate the methods that were used originally in mass production—the jigs, fixtures, and holding devices used for each operation is out of the question when you are called upon to make a few minis.
But the adventure continues when it is necessary to make miniature holding devices or special contour cutters. By examining the parts you can sometimes find a clue about the methods used originally; but alas, for minis you must substitute a dental bur for an end mill, and an emery stick for a surface grinder.
If I may repeat, after more than half a century the disease appears to be worse than ever. Nevertheless, I have enjoyed it and will continue as long as I am able.
—David Kucer
A Brief History of Miniature Firearms
(The following information about the history of miniature firearms was taken from a promotional booklet on David Kucer’s work, and reproduced here with permission .)
The finest contemporary miniature firearms find their roots in the apprentice systems of Old World Europe. The earliest of these miniatures (a wheel lock musket) dates from Elizabethan England, a half-century before the Mayflower landed at Plymouth Rock. It was probably the creation of a highly skilled gunsmith working for his own advancement, and for the pleasure of royal patrons.
Throughout the Middle Ages and the Renaissance, European craftsmen and some artists (da Vinci and Vermeer among them) were organized into professional guilds that regulated their trades, and ranked the skill levels of their members as they progressed from apprentice to journeyman to master. A journeyman would be permitted to make rough parts that were finished and completed by his master. He would be skilled in his field, and capable of making the tools he needed to practice it.
If his master permitted it, a journeyman might attempt to qualify for the highest rank of his profession by passing the last of numerous tests required of him during his training. Only upon completing his “master piece” would he be granted the status of master craftsman.
Armorers and gunsmiths were often required to produce a fully accurate miniature firearm as their master piece. The guild system trained craftsmen capable of breathtaking achievements in the art and craft of miniature firearm, but it also restricted ownership of these rare jewels to an exclusive few at the highest levels of European society.
American gunsmiths, working in a younger and less regulated market, did not develop their skills in a system that required them to produce fine miniatures. In addition, the firearms marketplace of early America was oriented more toward utility and function than toward art and design. As a result, there are few historic American miniature firearms available to the collector.
Miniatures do figure in American history, though. In 1862, during the second year of the Civil War, Abraham Lincoln had a Union Army uniform made for his son Tad. This gift was followed by another—a fully functioning miniature cannon.
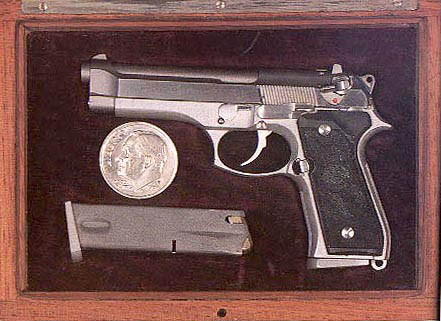
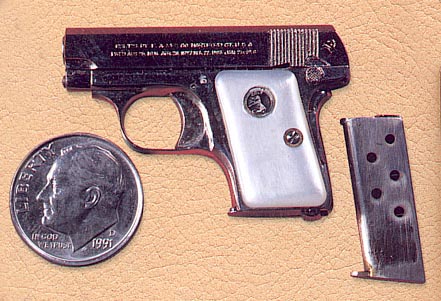
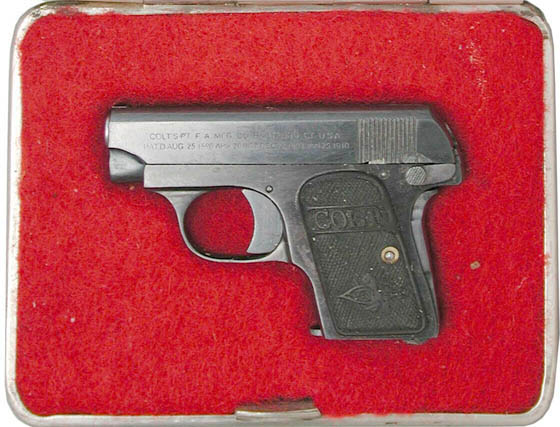
This Colt .25 automatic pistol was also built in 1/3 scale. It is completely functional. The handgun has nickel plated finish and mother-of-pearl grips with the rampant Colt logo.
Legend has it that Tad interrupted a presidential meeting by firing miniature cannon balls at the Cabinet Room door. However, while Lincoln, a doting father, undoubtedly wanted to please his son, the President had asked for a cannon, “that (Tad) cannot hurt himself with.”
Miniature cannons, unlike miniature handguns and rifles, were inherently simple and easy to manufacture. The creation of miniature small arms, on the other hand, required manual skills backed by decades of training and practice, and craftsmen who were utterly dedicated to excellence and quality.
To the artist/craftsman of any era, mass production is unthinkable because it rejects the standards of the master and embraces the second rate, or worse. Now, more than ever, modern technology and manufacturing are squeezing out traditional craftsmanship of all types, and even threatening its future!
The existence of quality miniature firearms has always depended on three factors: a design to work from; master craftsmen who possess a sense of beauty as well as technical brilliance; and a community of patrons and collectors who understand the artisan’s work. In our time, we have the entire history of firearm designs to draw from. The guild system has disappeared, but a few master craftsmen labor to keep the very idea of mastery alive. The royal patrons of the Old World have disappeared as well, but a new group of connoisseurs have replaced them. These are men and women who collect miniature firearms for their intrinsic beauty, for their astonishing workmanship, and for their value.
The exquisitely crafted miniatures of masters such as David Kucer are, in their distinct way, monumental, but easy to own and display. And, to echo Lincoln’s words, they can’t hurt a soul.
Articles on David’s Work
Read an article on David Kucer from Parcours ART & Art de Vivre magazine (French).
Read an article from Miniature Arms Newsletter, October, 2006 that recognizes David Kucer, Michel Lefaivre, and Xu Yan for winning craftsmanship awards from the Joe Martin Foundation.
Another article from Miniature Arms Newlsetter, April, 2007 features a Queen Ann pistol made by David.
For more on David Kucer and his work you can also visit his personal website.
Additionally, David was kind enough to contribute a PowerPoint slideshow of his work.
David Kucer Selected as 2006 Craftsman of the Year
It was announced in November, 2005 that David Kucer was selected by the Joe Martin Foundation as the 2006 Craftsman of the Year. Mr. Kucer attended the North American Model Engineering Society Expo in Toledo, Ohio that year to accept his award and show some of his work. Mr. Kucer was the tenth recipient of this award. He also received an award plaque, a gold medallion, and a check for $1,000.00 at the show.
View more photos of David’s award winning miniature craftsmanship.

