Building a Fully Functional 1/8 Scale 1936 John Deere “D” Tractor
From the start, Jerry’s original goal was to build a model to absolute scale in every respect—and to still have a functional four-stroke, spark plug ignition engine that would run on gasoline like the original. The idea was to have the tractor run at under 1,000 rpm, and start by rotating the flywheel in the same manner as the full-size version. Starting by hand and running under 1,000 rpm is generally not a problem if you can enlarge the flywheel until you achieve your goal. However, in this case the size of the scale flywheel had to be maintained.
A flywheel at the diameter needed to maintain the desired performance would have been hopelessly oversized, and would look ridiculous. The problem was solved by reducing the compression ratio to just under 4:1 (normally it would be 6 or 7:1) so a scale flywheel could be used. Several other things were also done to reduce friction, as well as making improvements in the air/fuel mixture. Ultimately, Jerry succeeded in getting the tractor to start by rotating the flywheel by hand, as on the original.
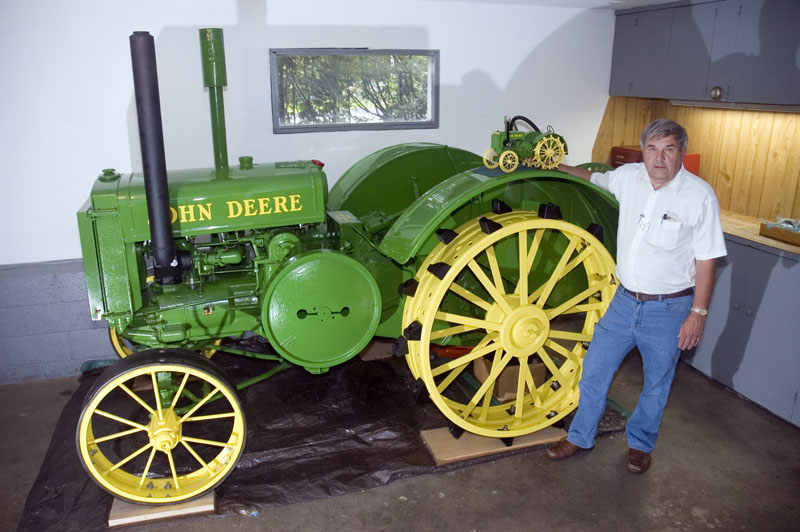
Jerry submitted photos of his 1/8 scale tractor during several stages of the construction process. These images show some of the progression on the functional miniature John Deere. Sitting on top of the tractor is the scale grease gun, which also works.
Jerry submitted this video of the tractor running—operating between 600 and 800 rpm. It will rev up to 2,000 rpm, although this would not be desirable, as that’s well above the speed of the original full-size tractor. Jerry hoped that once the engine was broken in, it would idle down to 500 rpm or slower.
In the video, Jerry starts the motor and runs the tractor in both forward and reverse. He then throttles it down to idle speed. Note that all of the electrical components are fully contained within the tractor itself. No external connections are needed to fire up the engine.
The next process was to completely disassemble the tractor and paint each individual part. Scale decals were made and applied, and then the tractor was reassembled. Jerry demonstrated the tractor at shows from 2005–2006. Watch another video of the tractor being run.
Now that the tractor is painted, it probably won’t be run very often. That’s because, like the real tractor, this is an oily, messy process that can be hard to clean up. So enjoy the video, or see it in person if you get the chance.
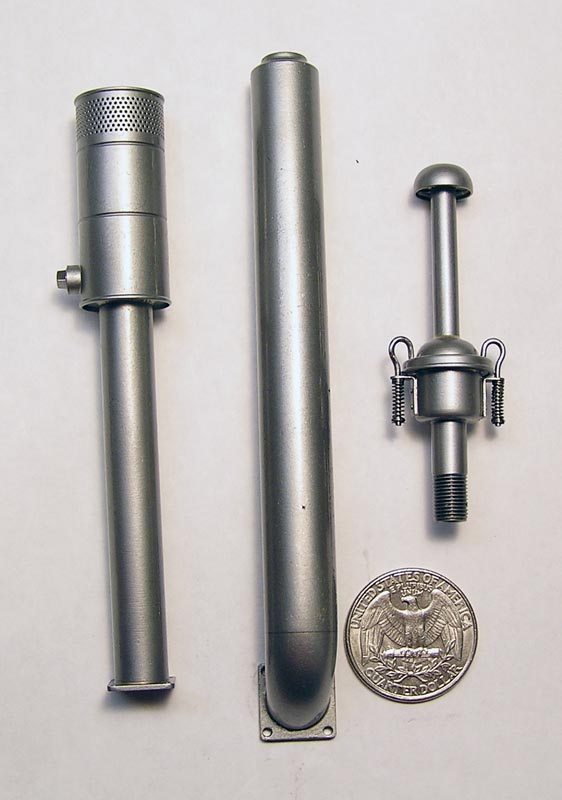
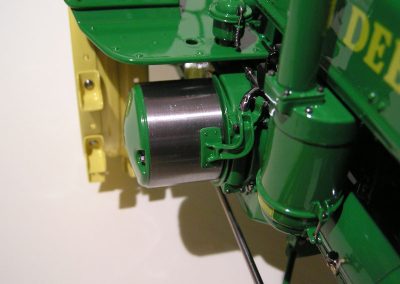
The air cleaner (left) has 496 holes drilled at .012” in the same pattern as the original. The exhaust pipe sits in the center. On the right is the engine breather.
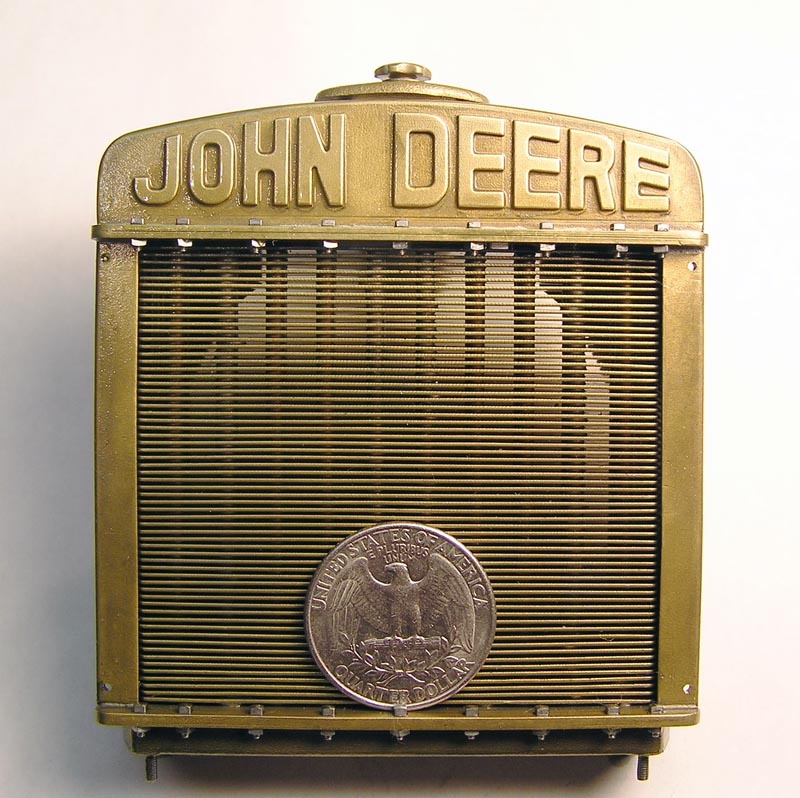
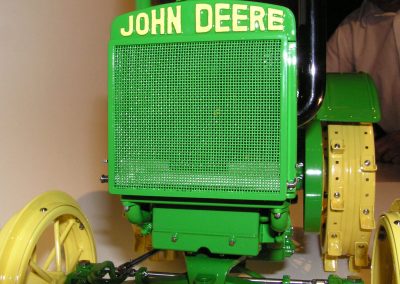
The scale brass radiator for Jerry’s tractor is fully functional. It has 20 tubes and 72 fins just like the original. The small radiator has 33 square-headed bolts and nuts (.038” diameter, 120 tpi) to keep it together. In total, there are 167 separate pieces in the radiator, with 146 solder joints. The logo was scribed and cut freehand with a .022” end mill on a Sherline mill.
Jerry also intends to make a scale tool kit if it can be determined what originally came with the tractor. A scale owners manual, and possibly a scale shop manual will also be made if possible. The final painted version of the tractor was featured as a centerfold in the Nov/Dec 2007 issue (#14) of Model Engine Builder magazine.
The building that housed the original John Deere dealership still exists. In 1936, they sold the prototype from which this model was built. One of the original tractors was purchased by Jerry’s grandfather, and had remained in the family. Jerry fully restored the tractor while taking dimensions of each part to build his replica.
Jerry is thinking about eventually building a replica of the original dealership showroom as a display for the model. Although, he noted that making small greasy manuals for the shelves may be a challenge. Jerry recalled visiting that dealership as a kid, and coming home happy, but “dirty as a pig” after visits with his grandfather.
In September, 2009 Toy Farmer Magazine wrote an article on scratch-built farm toys, which featured Jerry’s tractor. Below you can view more photos of Jerry’s fully functional 1/8 scale John Deere tractor. Click on images to enlarge.
1/8 Scale John Deere Tractor Construction
John Deere Tractor Parts
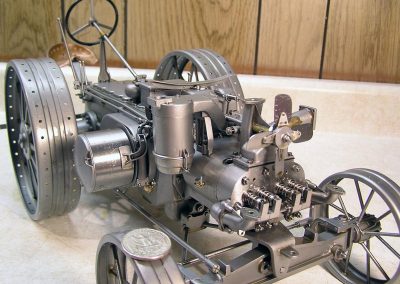
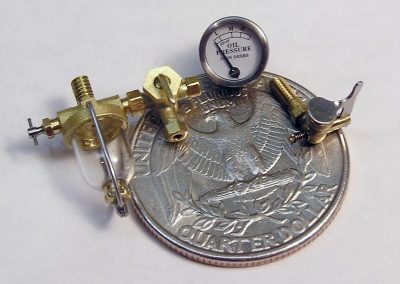
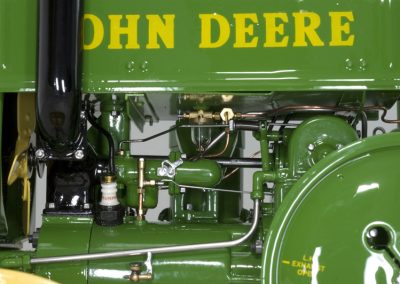
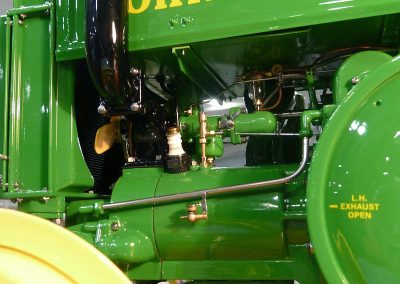
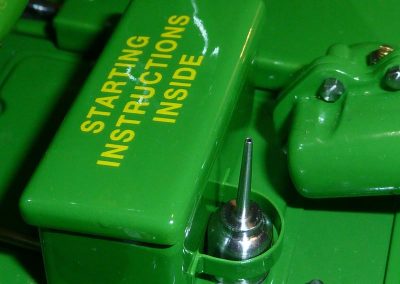
The fuel bowl with shutoff, and the two-way transfer valve are also functional. The glass bowl was ground and polished on the lathe. The functional oil pressure gauge took around 80 hours to construct and calibrate. The working compression release valve on the right has a primer cup and cover.
John Deere Tractor Construction
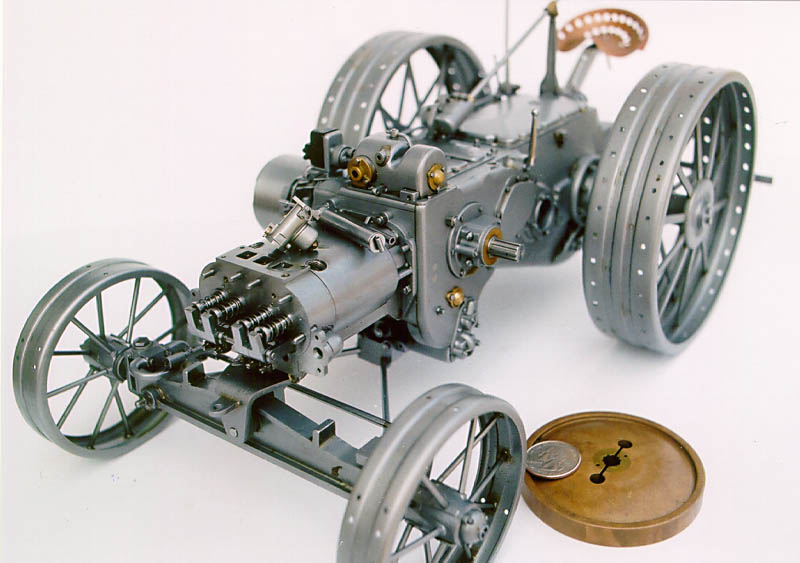
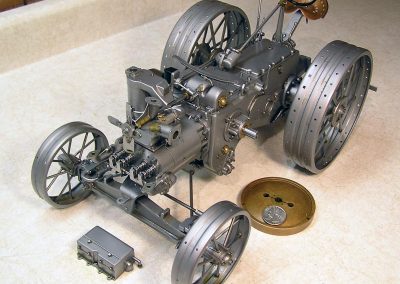
The flywheel sits on the ground between the front and rear wheels. Lying in front of the tractor is the valve cover.
John Deere Tractor Grease Gun
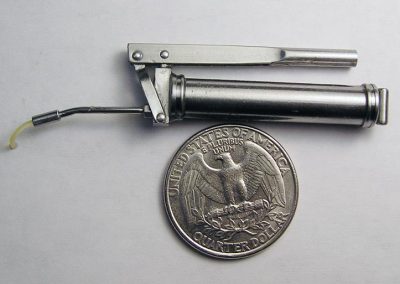
When people see the tiny spring-loaded grease fittings on the tractor suspension, the first thing they say is, “Ok, but where is the grease gun?” That’s when Jerry pulls a small case from his pocket, and shows off this fully functional scale grease gun. It pumps regular grease, a bit of which can be seen coming out of the nozzle here.
Finished 1/8 Scale John Deere Tractor
1/8 Scale John Deere Tractor
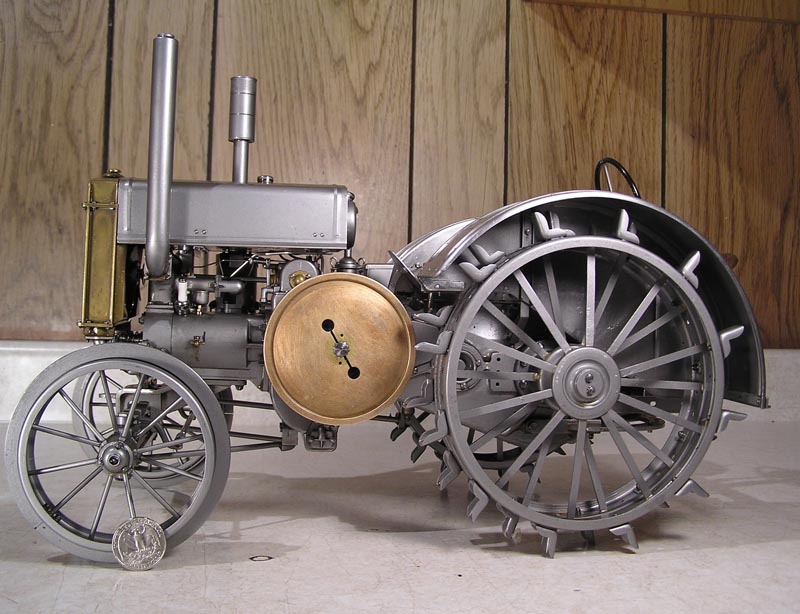
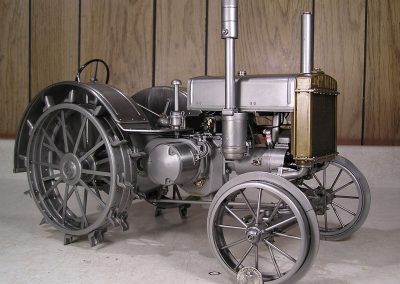
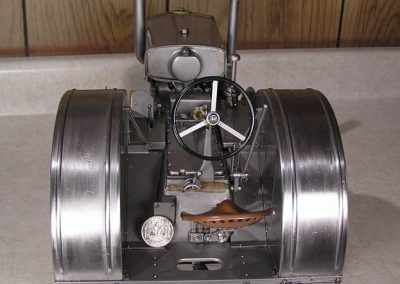
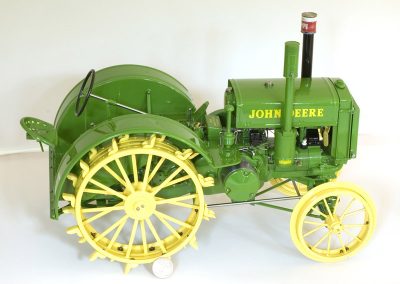
The finished but not yet painted scale tractor. From the right side, the radiator is visible. The next step was to completely disassemble the model and paint each part. Scale decals were also added before reassembly.
1/8 Scale John Deere Tractor
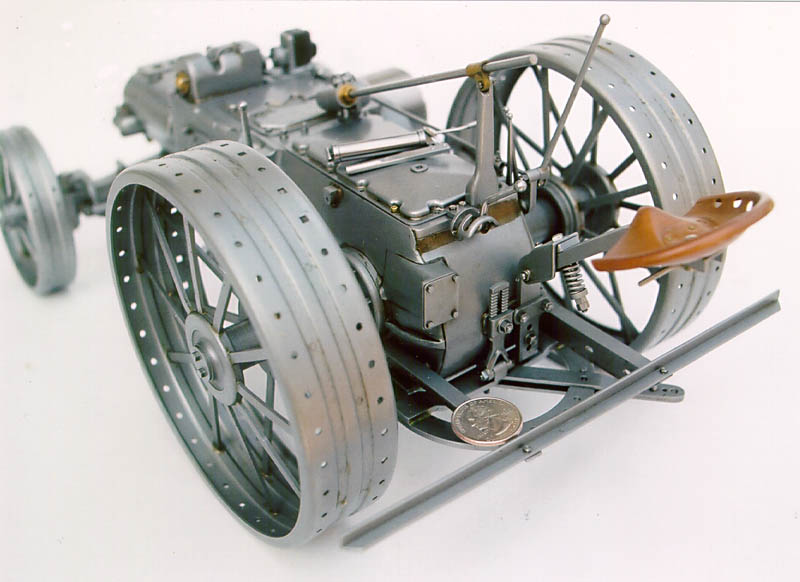
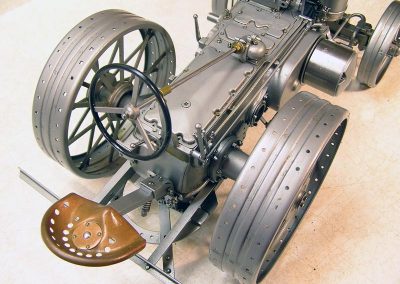
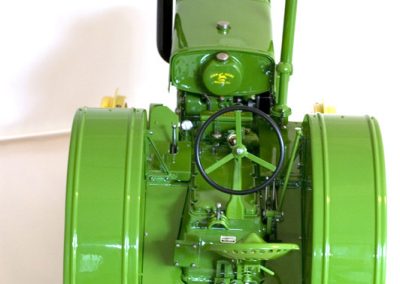
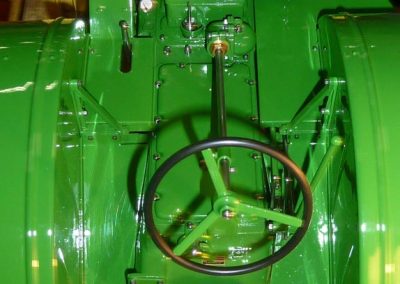
A rear view shows the finished steering wheel, seat, controls, and hitch bar. Details of the fender beading can also be seen.
1/8 Scale John Deere Tractor
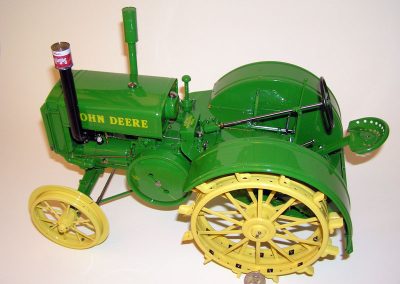
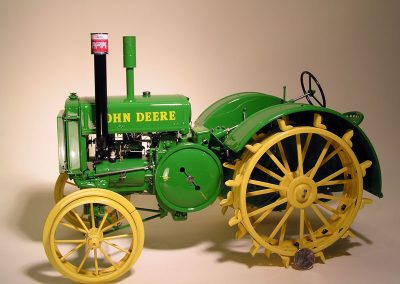
The final look is stunning when compared to the real tractor. Jim Clark saw the finished model at the Black Hills model show in September, 2007, and noted that the original tractor had a raised timing mark cast into the flywheel. When asked about this, Jerry took out his jeweler’s loupe and handed it to Jim. He said, “See the painted lines on the flywheel? Those are the scale thickness of the original timing mark.” Once again, Jerry had insisted that even the smallest detail should be reproduced at absolute scale—whether visible or not. (Photo courtesy of Mike Rehmus.)
1/8 Scale John Deere Tractor
From the rear, various controls for the model can be seen in greater detail. The scale Butter-Nut coffee can is also visible over the exhaust pipe. This was a low-tech but effective way to keep rain out of the exhaust pipe in the old days. (Photo courtesy of Mike Rehmus.)
Full-Size John Deere Detail
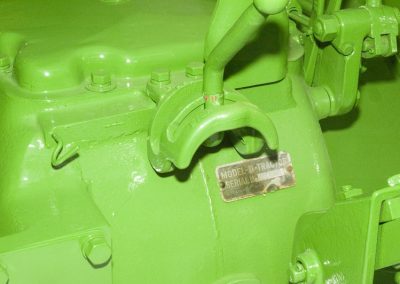
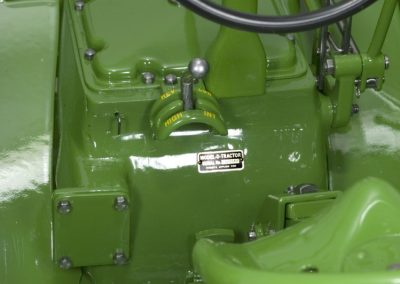
This photo and the following image illustrate the comparison between scale model and original. The full-size tractor’s serial number plate is shown here. Jerry left the plate in original condition on his fully-restored tractor, while the plate on the model in the following photo looks brand new. (Photo courtesy of Mike Rehmus.)
1/8 Scale John Deere Tractor
This image shows the same serial number plate, but for the scale model. In this case, the distinction between model and full-size tractor is easy to see, because the model actually looks better! (Photo courtesy of Mike Rehmus.)
1/8 Scale John Deere Tractor
One part of the tractor that is particularly notable is the .200” diameter glass fuel bowl. It was actually machined, drilled, and ground from solid glass before polishing. The fuel bowl took seven attempts and three weeks to complete. In reality, the part could have been made from acrylic and nobody would have known—except for Jerry. (Photo courtesy of Forrest Atkinson.)
1/8 Scale John Deere Tractor
The tiny oil can and oil pressure gauge are also functional. (Photo courtesy of Mike Rehmus.)
1/8 Scale John Deere Tractor
The raised John Deere lettering was machined freehand on the mill, and then painted. Behind the grill is a radiator that replicates every brass fin and tube from the original. (Photo courtesy of Forrest Atkinson.)
1/8 Scale John Deere Tractor
If you are lucky enough to see this remarkable model at a show, please don’t ask Jerry if it was made by Ertl. (Photo courtesy of Forrest Atkinson.)
1/8 Scale John Deere Tractor
Jerry brought his finished tractor for display at the 2011 NAMES Expo in Southgate, MI. The following photos were taken there, and show more fine details of the functional scale model.
1/8 Scale John Deere Air Cleaner
According to Jerry, it was difficult to drill the perfect pattern with 460 tiny holes in this air cleaner. However, even more challenging was painting the part without filling in the tiny holes!
1/8 Scale John Deere Engine
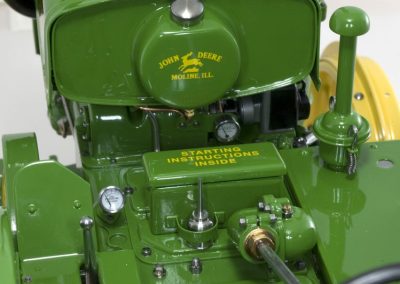
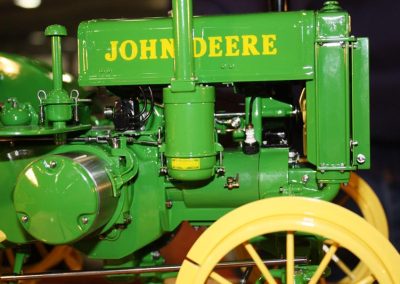
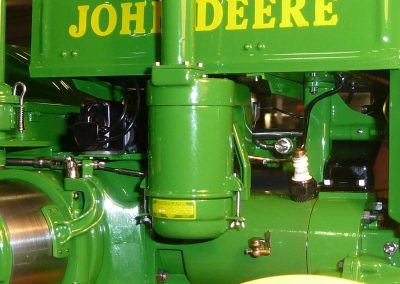
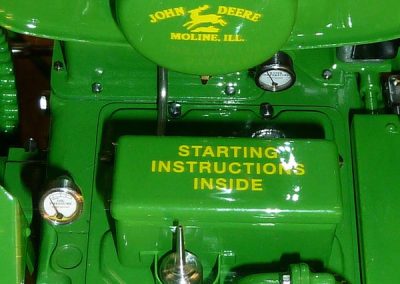
Decals were scaled down from the real thing, and are correct word for word in 1/8 scale. Jerry’s lone compromise to total scale replication was a slightly oversize spark plug, which was necessary for the model to idle and run properly.
1/8 Scale John Deere Engine
The high voltage involved would travel over the surface of a smaller spark plug, rather than down the tiny electrode. Unfortunately, electricity does not scale. It takes a hot spark to fire a small, low compression engine. You can only reduce scale so much before the laws of nature intervene.
1/8 Scale John Deere Engine
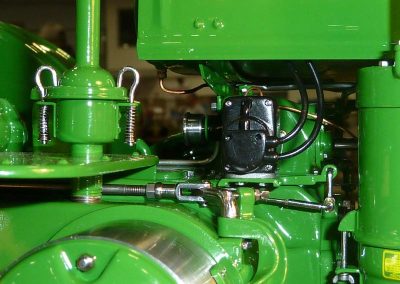
The beautiful paint job includes a clear top coat, something that was probably not considered at the John Deere factory in the 1930’s.
1/8 Scale John Deere Tractor
A closer view of the driving area shows the tiny working gauges, and a functional oil can.
Return to Jerry Kieffer’s main page.
This section is sponsored by:
Makers of precision miniature machine tools and accessories. Sherline tools are made in the USA.
Sherline is proud to confirm that Jerry Kieffer uses Sherline tools in the production of his small projects.

