Australian Model Engineer Builds Historically Correct Live Steam Engines.
Introduction
When the term “model engineer” is mentioned, one of the first things that might come to mind for people is a miniature railroad locomotive. Even though miniature model engineering has always included more than just steam engines, locomotives have been synonymous with the hobby for a long time. Model engineer Ross Bishop has built a number of live steam locomotives over his time as a hobbyist, with the model featured later on this page (Steam Locomotive No. 5148) being his tenth. Having an early interest in models, machining experience gained under his father, and training as a toolmaker, Ross puts a lifetime of experience behind his projects. His expertise shines through in the fine execution of his work.
Getting Started Early
Born in 1961, Mr. Bishop began modeling machinery at the early age of eight. He used plastic kits, Meccano sets, and was encouraged by his parents to pursue the hobby. Following a fairly natural trajectory, Ross started gaining the skills to scratch build models around the age of 11 or 12. His father, a civil engineer, purchased a small lathe and drill press to compliment the range of hand tools in their home workshop. From an early age, Ross often started with elaborate and ambitious plans. Some of these were doomed to end in disappointment, but the complex projects taught him lessons in perseverance. After a few years of steady improvement, Ross was starting to smoke up the work shed with fairly accurate coal fired stationary steam plant models. His interest in making better steam models grew larger after he rebuilt a 5-inch gauge locomotive with his father. Eventually, Ross would fully design and build his own locomotive, a narrow gauge 0-6-2 model, around the age of 20.
Furthering his experience, Ross’ training as a toolmaker helped him build a knowledge of materials, heat treatment, and more efficient ways to produce parts. He would ultimately purchase his own machine tools, and started to move toward more ambitious projects. One of these early projects entailed restoring a full-size traction engine which required major boiler and mechanical reconstruction.
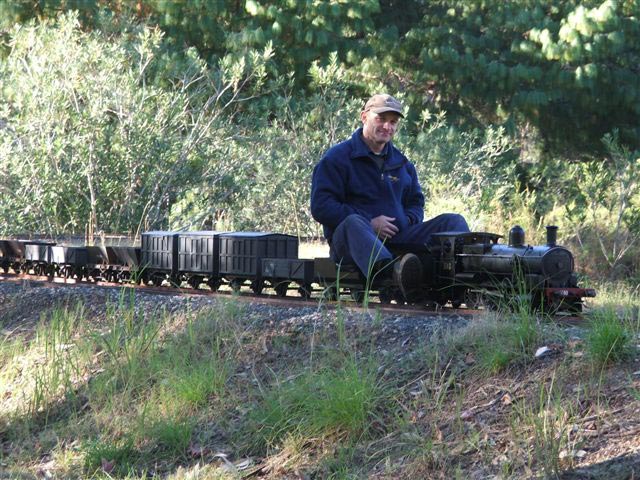
Ross enjoying an unhurried ride on one of his Standard Goods locomotives.
However, Ross felt unfulfilled with this “repair” work—he wanted to build! So he returned to modeling, completing several locomotives, rolling stock, and a garden railway over the 20 years to follow. Ross stated, “My favourite models connect me with a personal experience that I want to keep fresh in my memory, and relive at will. Having other people relate to my models is a vital component of the reward.” He went on to note that, “The model has to be many things combined: an authentic miniature, a well engineered workhorse, and a personal expression of a much loved machine. Any of these in isolation is not nearly enough.”
The following descriptions of the processes for building his 5148 steam engine, as well as his Traction Engine, were submitted by Ross himself.
Building No. 5148
By Ross Bishop
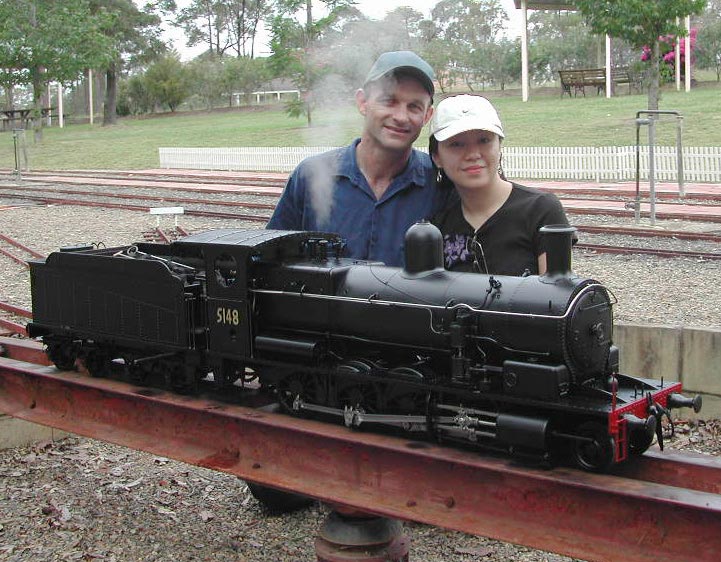
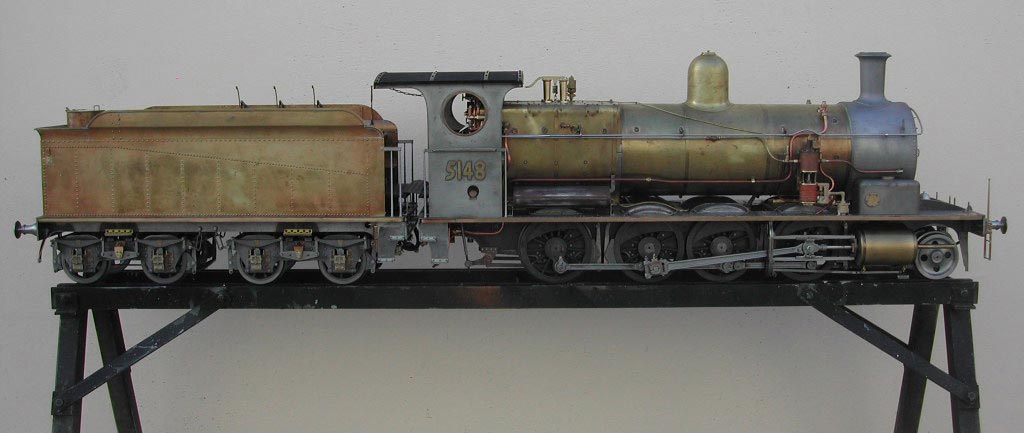
The 2-8-0 steam locomotive No. 5148 nearly completed and ready for paint.
About The Model
The “Standard Goods” locomotives of the New South Wales Government Railways (Australia) were introduced in 1896 by Chief Mechanical Engineer, Mr. William Thow, to a Beyer Peacock & Co. design (Great Britain). Some of these locomotives remained in service for over 70 years. Among 280 engines, various boilers, smokeboxes, crossheads, tenders, brake cylinders, compressors, electric lighting, ladders, couplings, and other modifications were undertaken in that period. In order to authentically model a locomotive, you have to select one in particular and then model it from a specific period of its life.
Authenticity
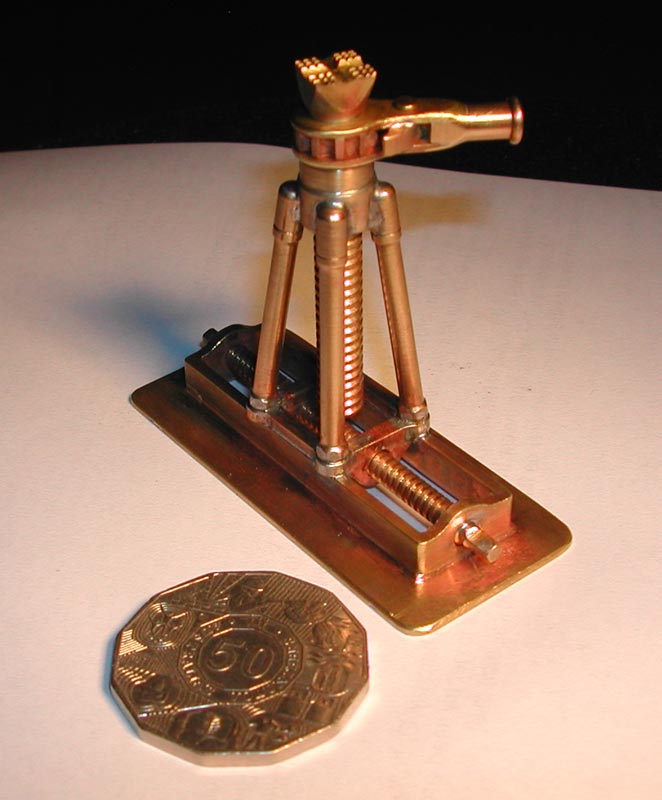
The original 5148, which is now scrapped, worked in Albury (mid-way between Sydney and Melbourne) during the 1960’s as a yard shunting engine. My model is an externally accurate portrayal of the 5148 during those days, with attention to riveting, pipe runs, brackets, and all other visible features. For example, the tender was equipped with electric lighting, but the engine was not. An unusual “flat top” tool box was located on the tender, and the re-railing jack remained in place even though most went missing because they were too heavy to put back after use. In addition, air receivers were welded, not riveted, and the “small” brake cylinders remained unchanged. Tail rods, which were mostly removed by then, remained as well. Reference material for the model included published photographs, museum exhibits, and copies of original drawings signed and dated by W. Thow, from 10/9/1896.
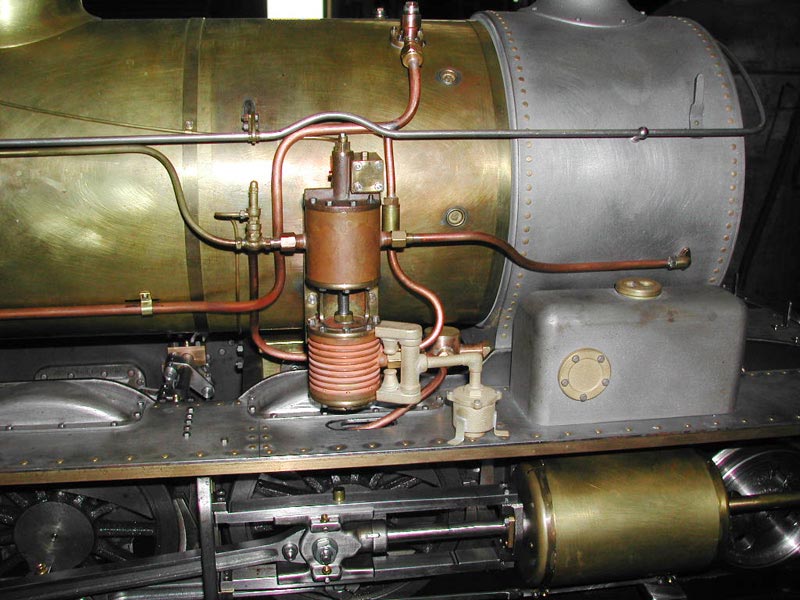
The steam powered air compressor (Sandberg) is configured to pump water, with the exhaust steam making suitable sounds in the smokebox.
Engineered to Work
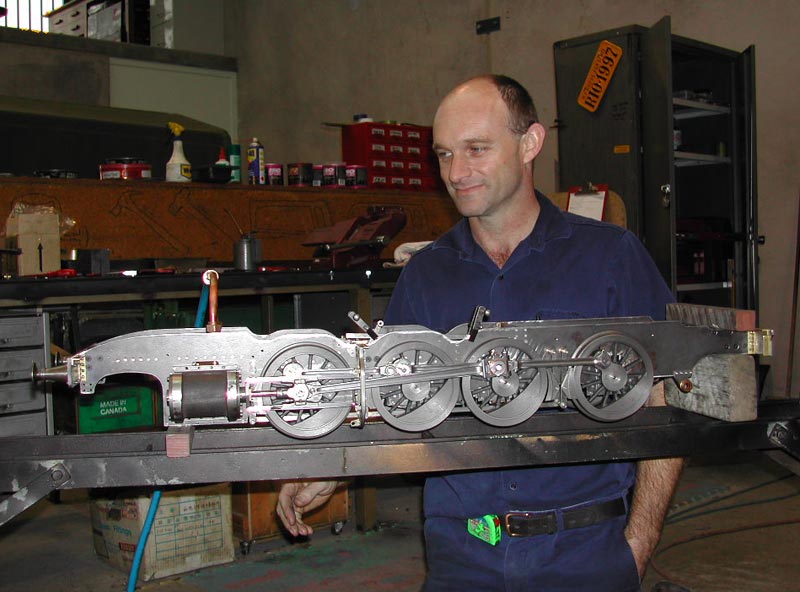
Beneath the model’s “externally authentic” facade lies a machine designed to work. Weighing only 75 kg, the model can haul 1000 kg forward or backward, and will do so for hundreds of hours/kilometers. The coal-fired boiler is designed to supply sufficient steam continuously, without difficulty, and under any conditions. The driver can also ride without causing any damage. Mechanical movements, faithful in principle, are designed for precise function. Any non-authentic components essential for hard work are either disguised or surreptitiously hidden from view.
Non-scale structural strength and weight for adhesion was built in without compromising the model’s appearance. Assembly or dismemberment is made possible by design, with the major assemblies remaining independent aside from a few fasteners. Where necessary, special fasteners and fittings have been developed to overcome access, manufacturing, or functional design problems.
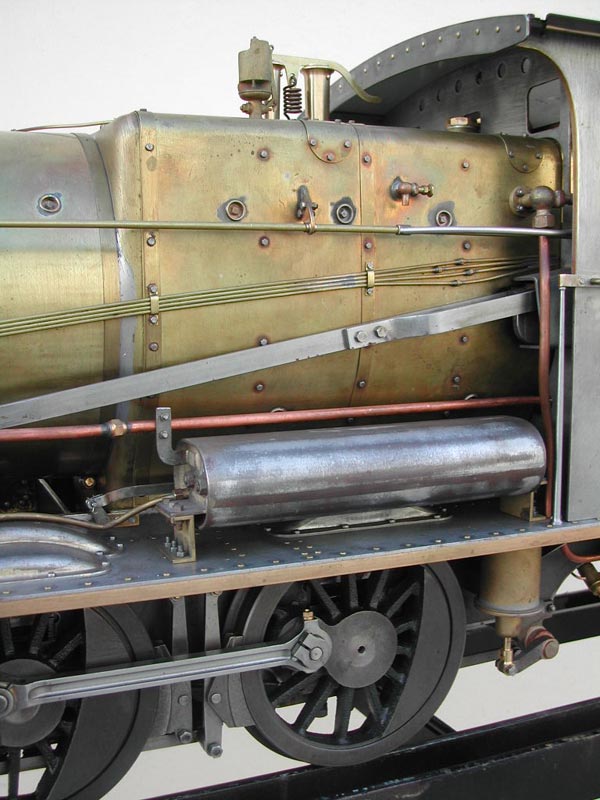
The boiler cladding was not smooth. Detail on the firebox sides includes bolts, washout plugs, and a mix of dummy and functional piping for oil, steam or water.
Artistic Expression
Now, this aspect of a model is far more subjective. Capturing the “appeal” of a particular locomotive as seen through someone else’s eyes cannot be articulated in purely engineering terms. If anything, this is more of a challenge than both the research and engineering. The matter seems to require considerable sensitivity to aesthetics, appropriate choice of materials, finish, and a sharp eye for shape. A dome shade without a slight taper looks top-heavy. The cab sides curve in a slightly parabolic arc, not a radius, as commonly supposed.
The paint finish is critical. It requires a durable, industrial strength finish that fully covers and protects without drowning the details. A deliberate shade of “dull” is applied to get the look of “weathered metal.” Black is mixed into colors to make them look “dirty.” Wood grain is darkly accentuated for a “worn by dirty boots” feel. Chemical blackening is also used for a “bare iron” look. Curiously, some bright work is still needed to retain the charm of a miniature.
The prototypical appearance, feel, and function of the controls is vital to the driving experience. When making a small handle, I imagine my hand giving the real one a shove, and the engine reacting beneath my feet. However, some compromise is necessary for functional parts like sight glasses, etc.
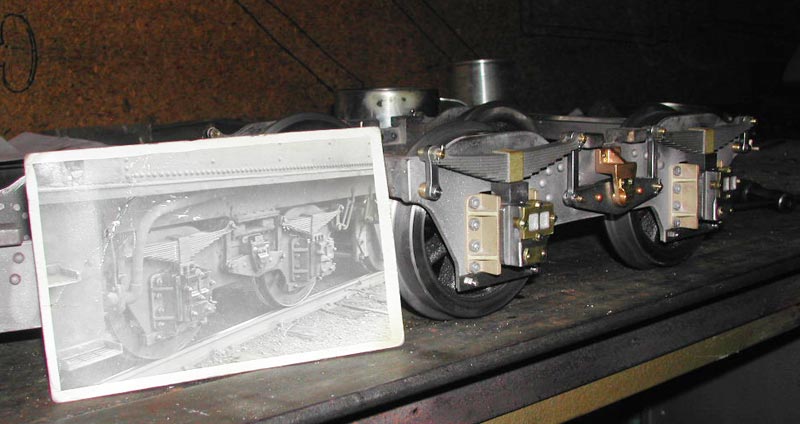
An old photograph helps get the tender bogies looking right. The springs have sagged on the real one!
With most artistic expression, success or failure is often measured through another person’s response. One fellow, a former engineman, spent several minutes peering into the cab of my model. Clearly, memories of his working life played out in his mind. Finally, he said, “You got it just about right in there, but your brake handle might be a bit high.”
“Oh?” I said.
He went on, “I used to sit there between fires with my leg up over the handle. I don’t think it would be comfortable on yours.”
—Ross Bishop, 8/17/09
Building a McLaren Road Locomotive
Also contributed by Ross Bishop
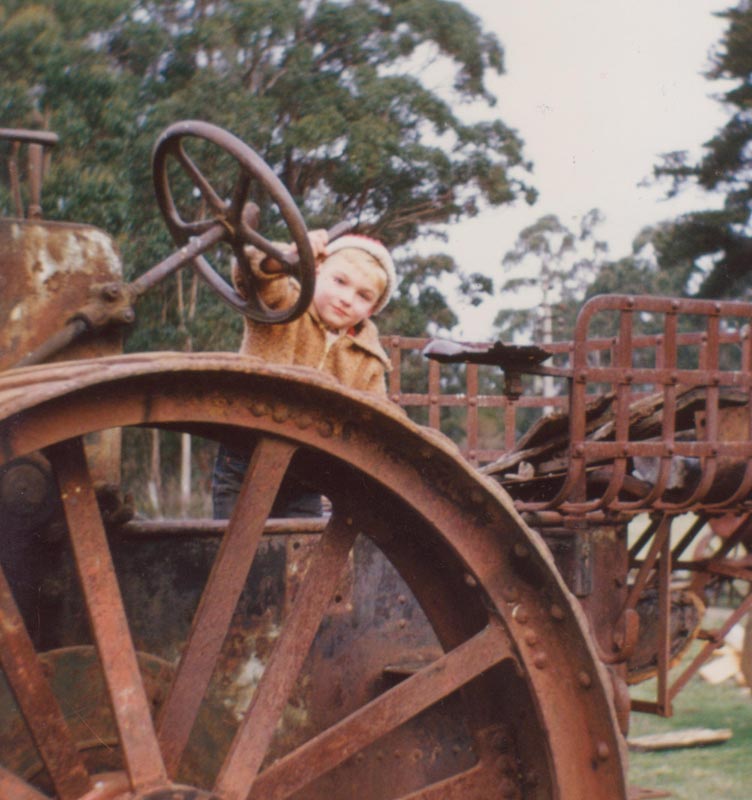
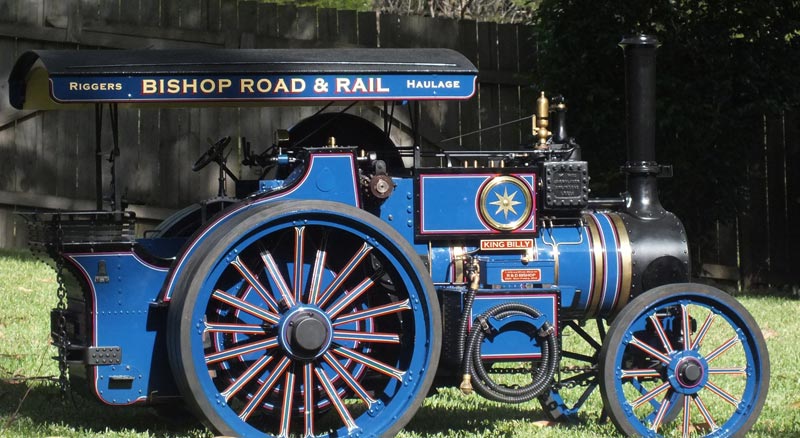
My affiliation with traction engines dates back to early childhood. Family photographs show me enthusing about them from a young age. Here, 45 years on, I am delighted to share with you my most recent model: a 1/4 scale McLaren Road Locomotive.
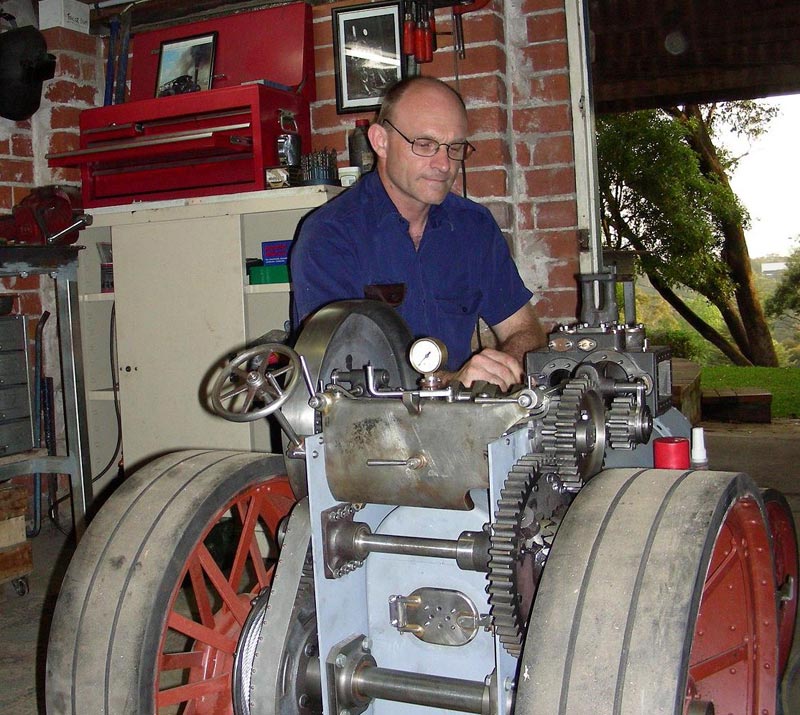
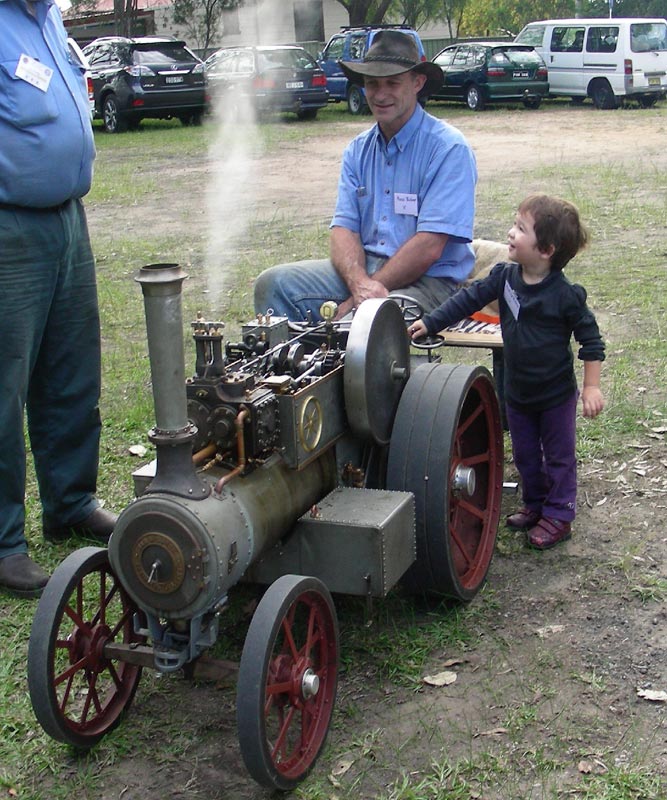
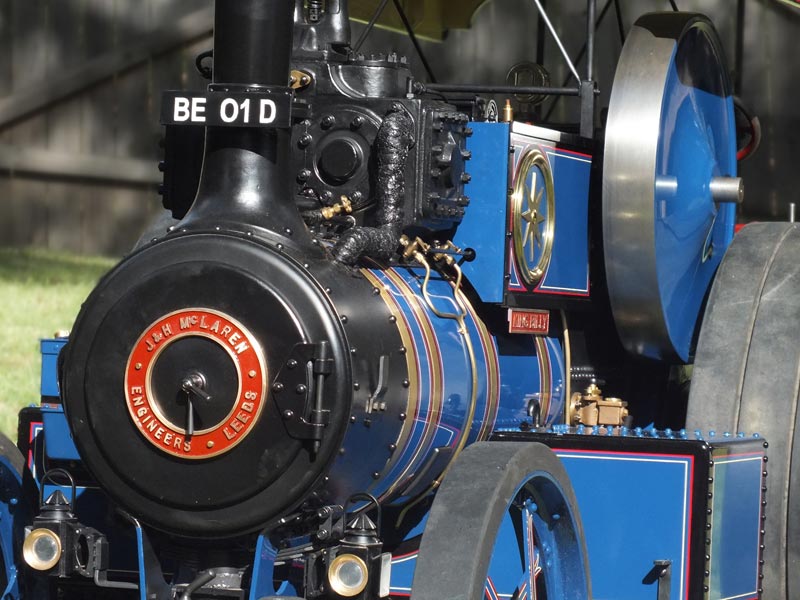
The fully functional model, of which some details appear below, was completed in February 2012 after 7 years, and an estimated 4,000 hours of work. It is representative of a 10 nominal horse power, 3-speed Road Locomotive. The original was supplied to the British War Department (WWI) by J&H McLaren of Leeds, England, and was used for hauling artillery. Now, I say “representative” because unlike the locomotive described previously, I have not modeled a specific individual machine. Rather, this is a compilation of machines, faithfully McLaren in form, but also including some authentic “owner modifications” (e.g. the bunker railing), which were evident from historic photographs.
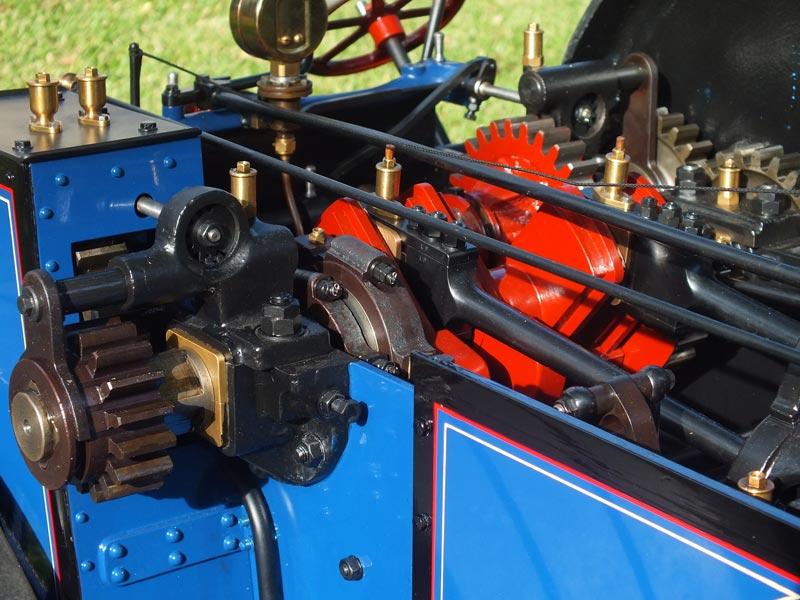
The model measures 63” long x 29” wide x 27” high, and weighs 500 pounds. The rear wheels are 22” in diameter. The compound cylinder arrangement first uses steam in a cylinder of 1-7/8” bore x 3” stroke, and then again at a lower pressure in a cylinder of 2-7/8” bore x 3” stroke. Actual measurements confirm that both cylinders are functioning as intended, and equally sharing the load. The valves are operated by 2 sets of Stevenson’s Link Motion, with which the driver may vary valve travel for economy, and compression braking to control hill descents.
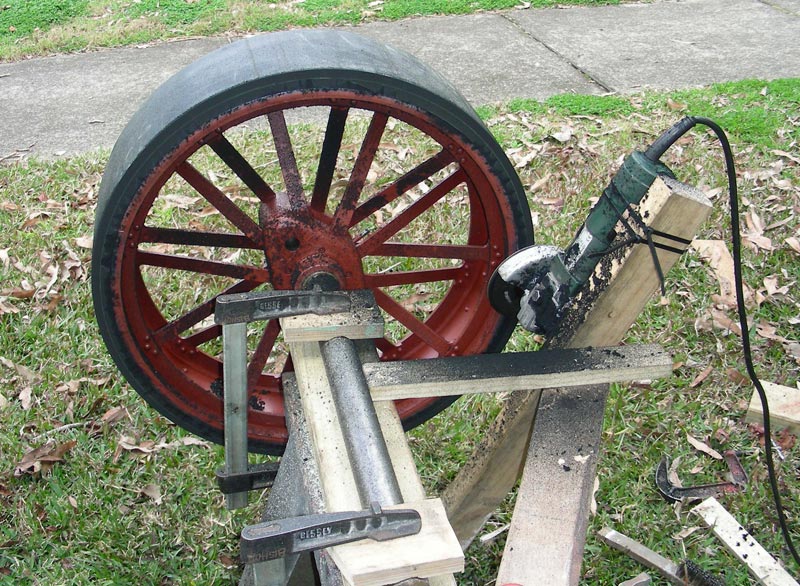
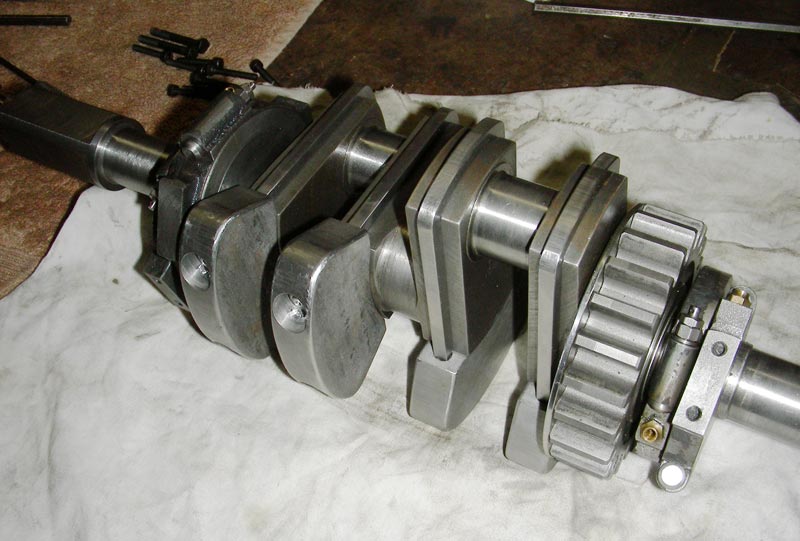
Traction engine models provide some interesting variety from other steam models. There are differences in the wheel making, gear cutting (over 20 gears in total), double throw crankshaft, and the general challenge of building a precision mechanism around the piece of black pipe which is the boiler!
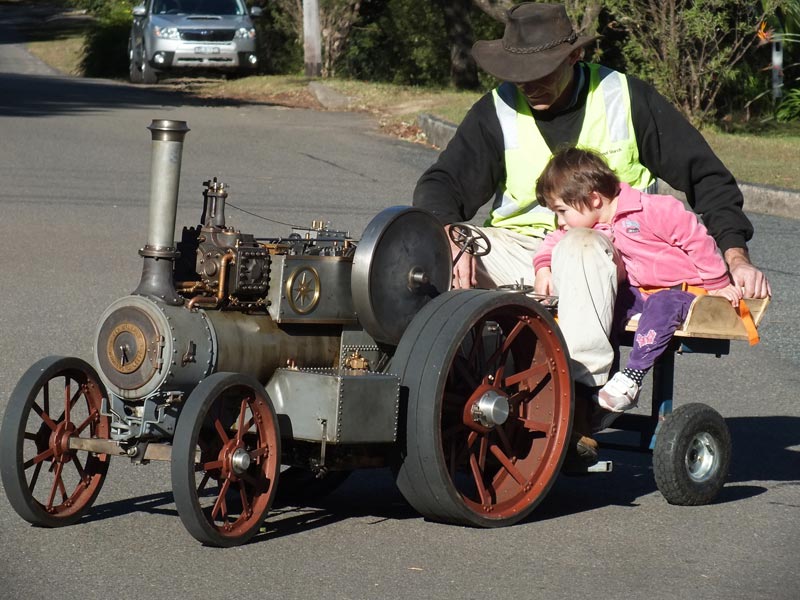
Gear changes are made with the engine stationary, and as appropriate to the conditions ahead. One must remember when changing gear that the crankshaft is disengaged from the drive train before the next gear slides into mesh. Should the engine start rolling during this process, there is no means to use compression braking to stop it! Wheel chocks and use of the handbrake must be religiously followed for safety.
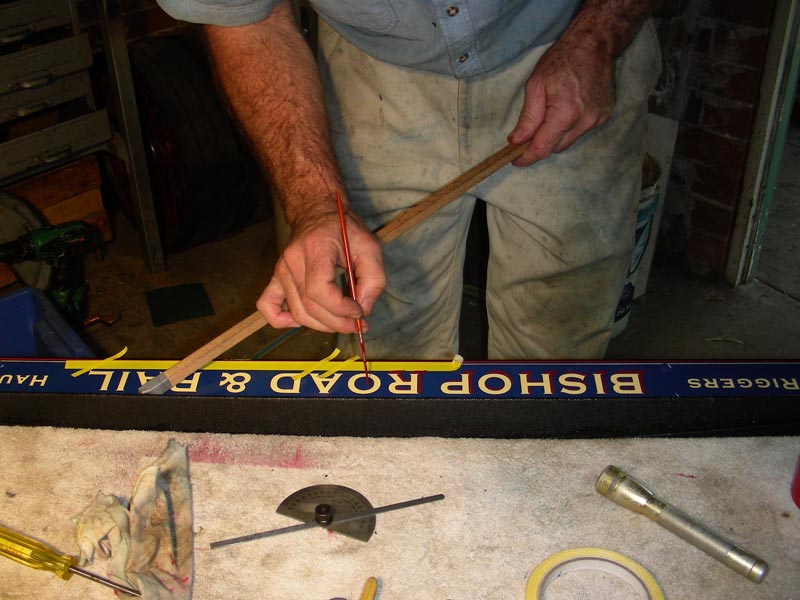
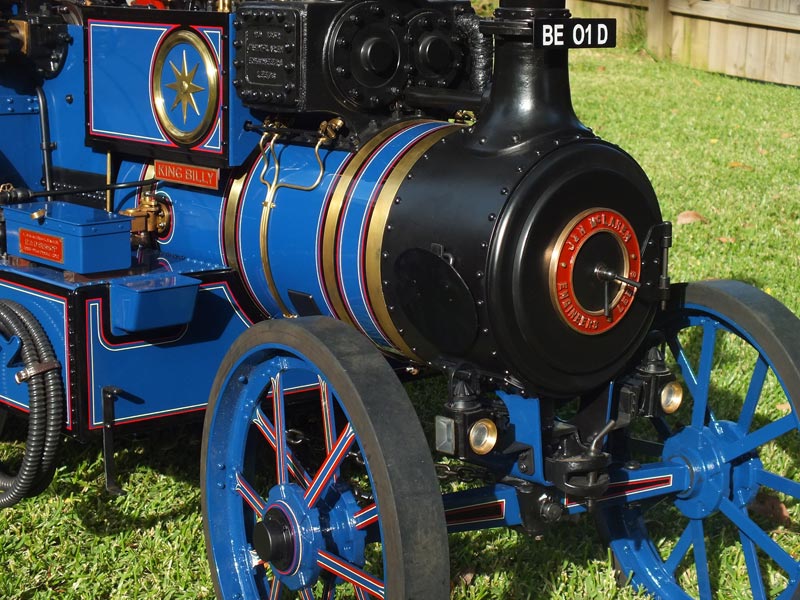
The most recent achievement, the paint finish, proved quite demanding for someone such as myself—with deteriorating eyesight, and little artistic flair. Some areas lend themselves to spray painting, while others (e.g. the wheels) had to be hand brushed. Reproducing line work in 1/4 scale was an exercise in extreme patience, and it required the development of tools and techniques to compensate for scale and my lack of natural ability! The cream lines are about 40 thousandths in width, totaling over 120 feet in length on the model! You want to be able to reproduce the same standard with reliability on different days. A simple pen specially made for the job, templates, and using paint with consistent viscosity was the answer.
Testing the Engine
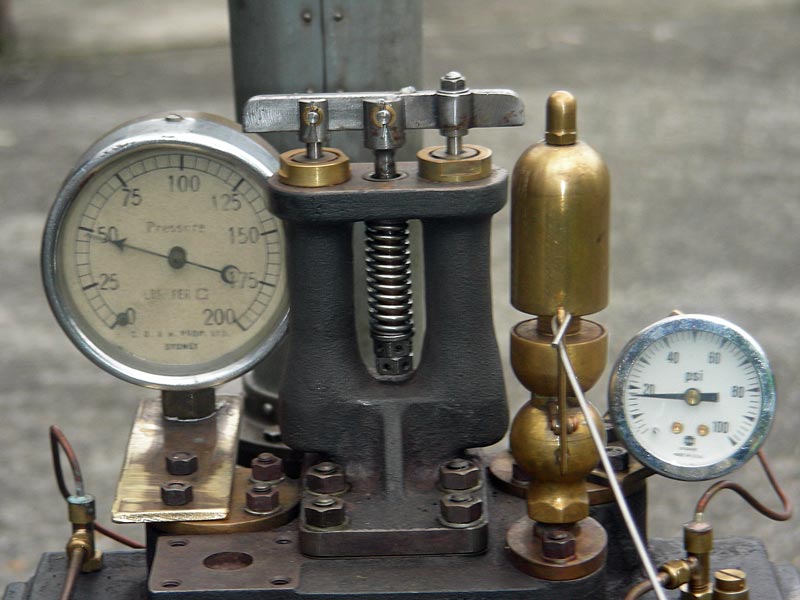
Before committing to painting and final finishing, we ran the engine several times to confirm that everything worked, and lubrication arrangements were adequate. We also fitted some temporary instrumentation to measure steam temps, pressures, and to learn the best way to operate the compound steam cylinders.
The photos below show the first “test” steamings. Additionally, some temporary gauges were fitted to indicate steam chest pressure for primary and secondary expansions of steam in the compound cylinders.
The Finished Engine
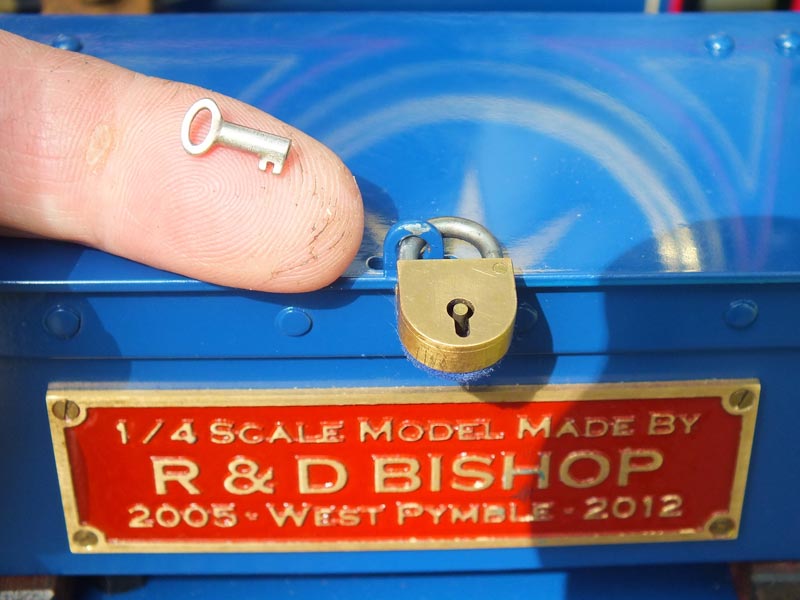
After successful testing, the finishing touches were applied. Below are several views of the completed machine. The working padlock with key and railing around the coal bunker are among many delightful features.
Footnote: Castings for this model were purchased from a supplier in the UK, and full credit is expressed for the excellent pattern making and foundry work.
—Ross Bishop, 3/2/12
View more photos of Ross’ Engines, and the detailed processes leading to their completion.
Additionally, Ross has posted a video from the perspective of the engineer on his 5148 as it steams around a scenic park layout.
View a slideshow featuring photos of Ross’ work.

