Below you can view more photos of Roger Zimmermann’s scale model cars, and the construction techniques he used to build them. Click on images to enlarge.
Model Chrysler New Yorker and First Attempt at the Avanti
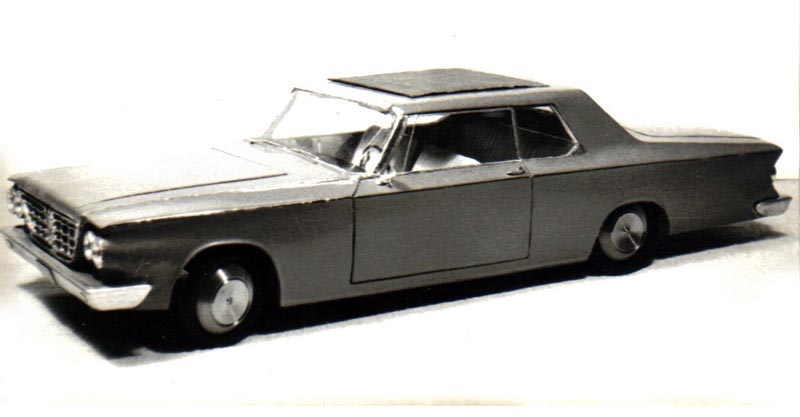
1963 Chrysler New Yorker
Roger’s first model car, a 1963 Chrysler New Yorker.
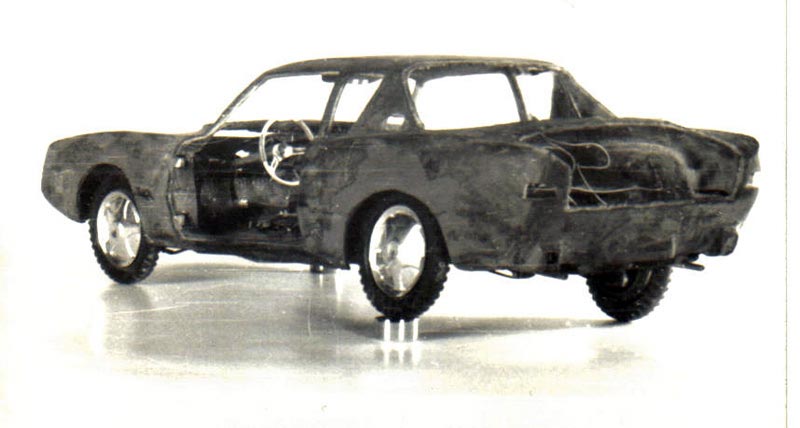
Model Avanti Progress
Early progress on Roger’s first version of the scale model Avanti.
The Revised 1/12 Scale Studebaker Avanti Model
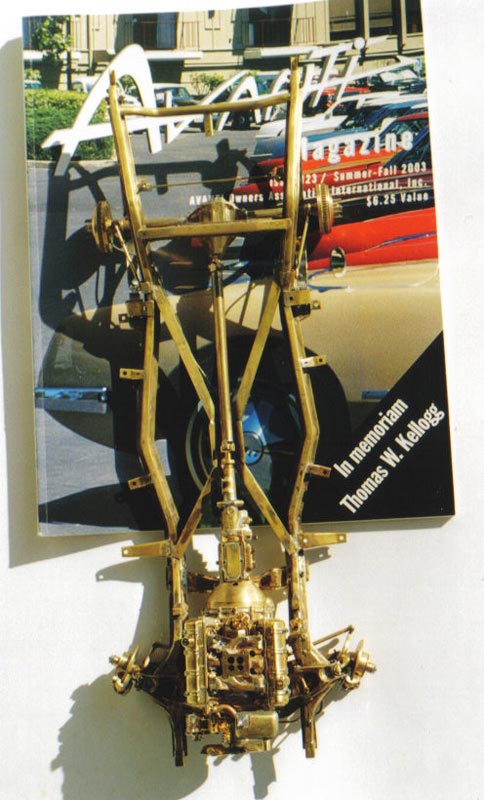
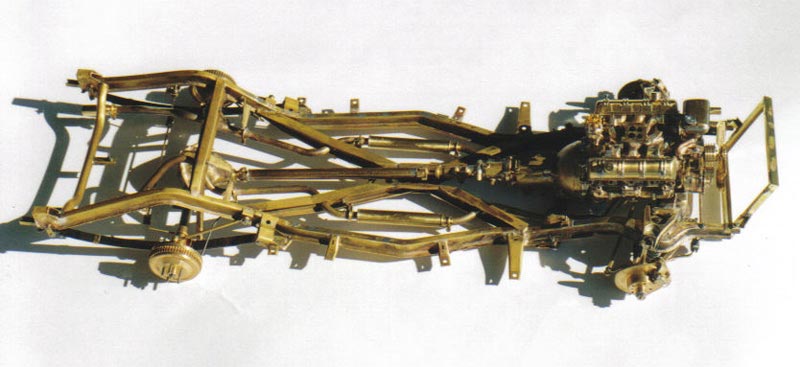
Avanti Frame
Roger’s upgraded frame for the scale model Avanti.
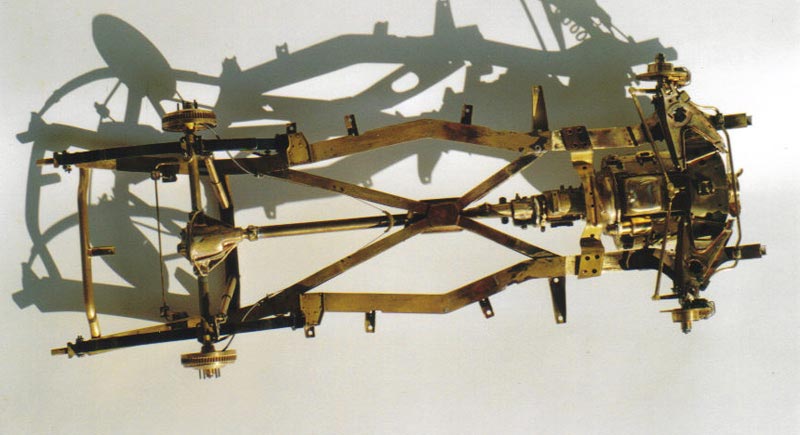
Avanti Frame
Avanti Frame
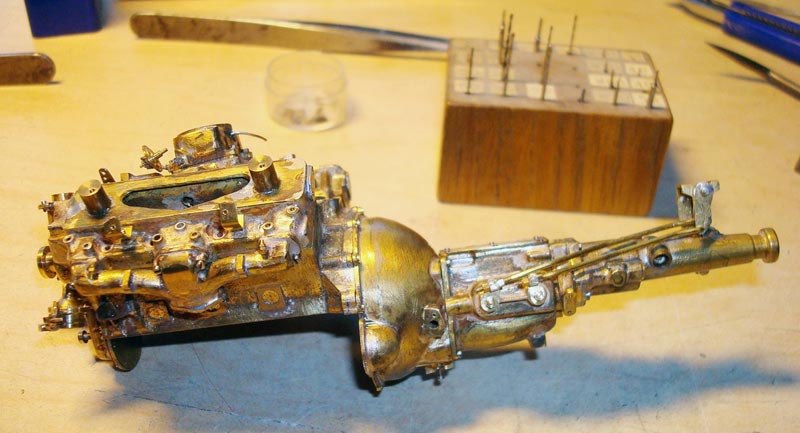
Avanti Model Engine
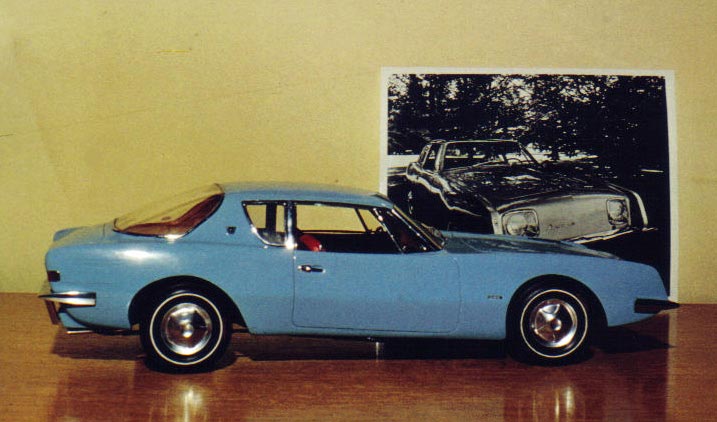
Original Avanti Model
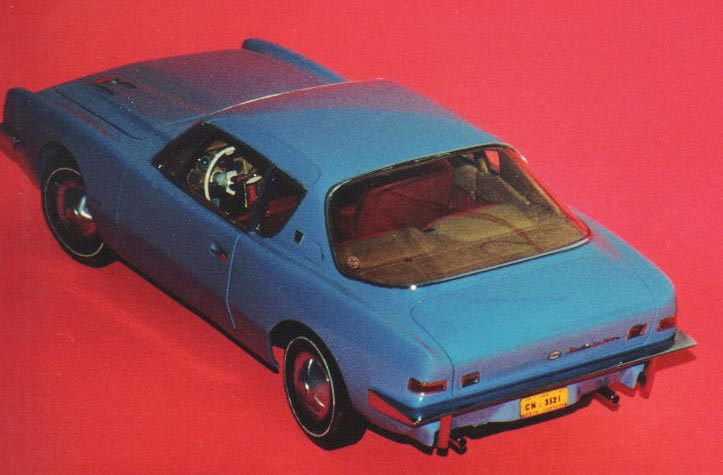
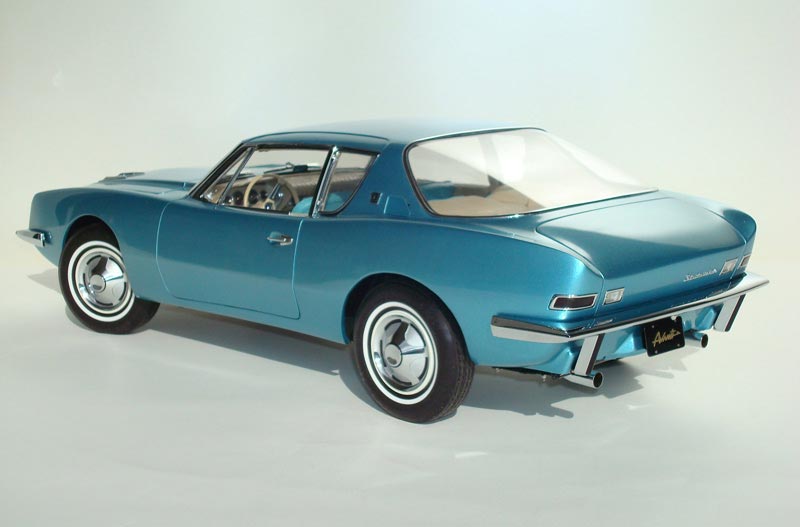
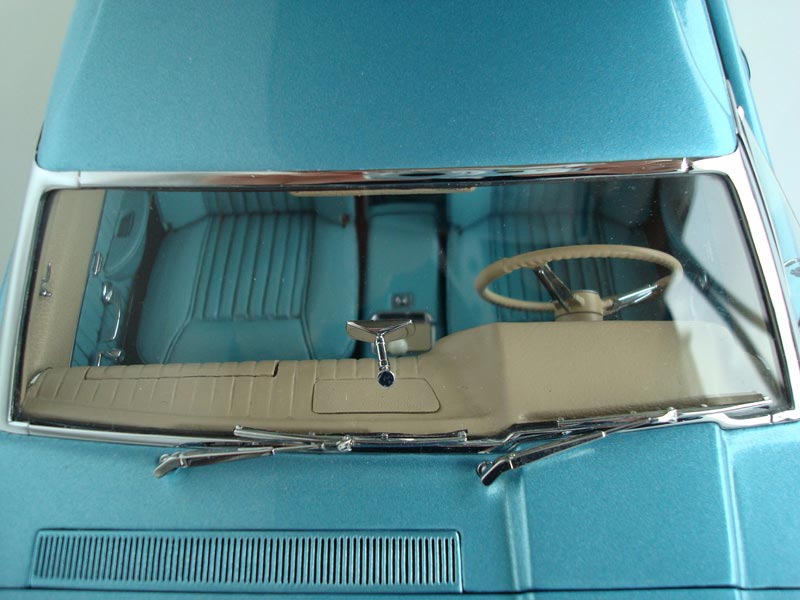
Several views of the first iteration of the body show that the shade of blue paint is not quite correct. Also, the leather interior is a little too dark. This would eventually be corrected in the final version.
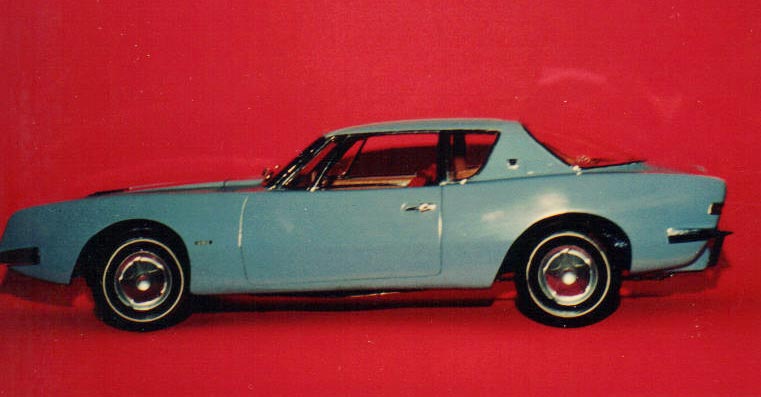
Original Avanti Model
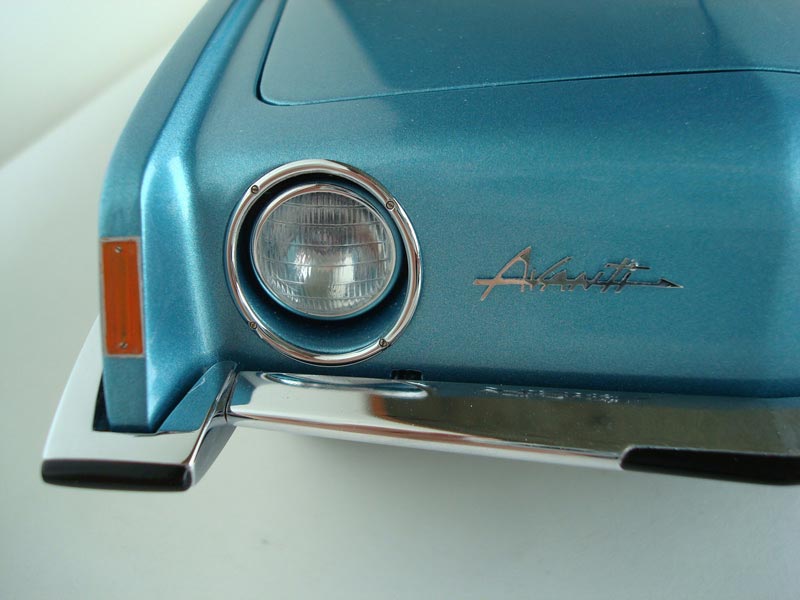
The small badge on the fender behind the front wheel indicates this model was the supercharged version, which was available as a factory option.
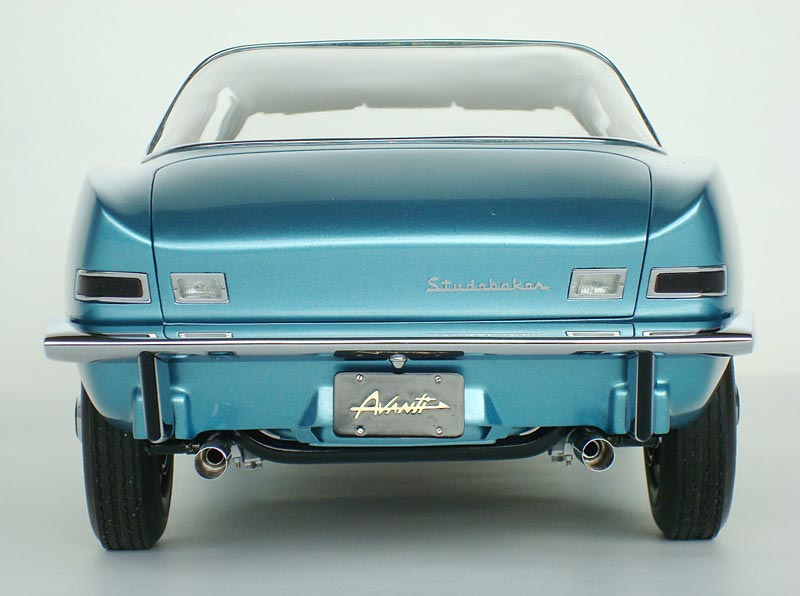
Original Avanti Model
The small badge on the fender behind the front wheel indicates this model was the supercharged version, which was available as a factory option.
Avanti Body Upgrade
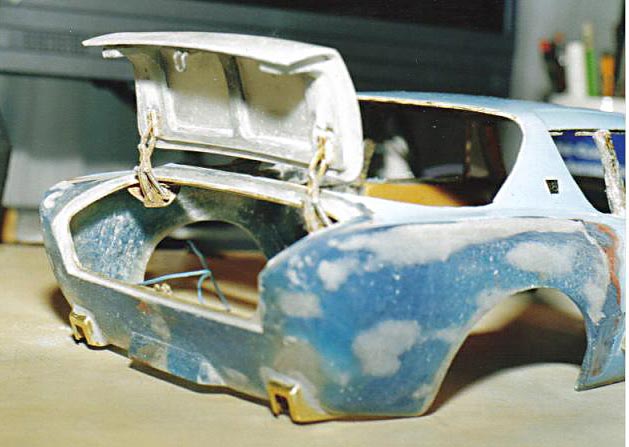
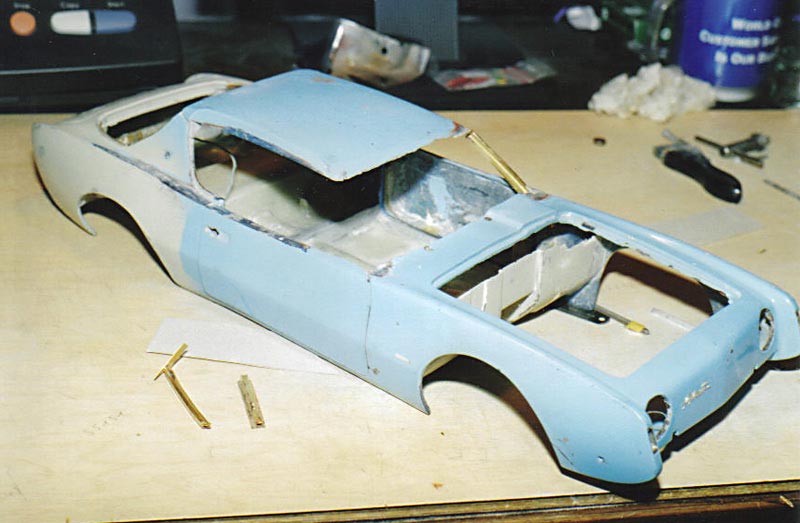
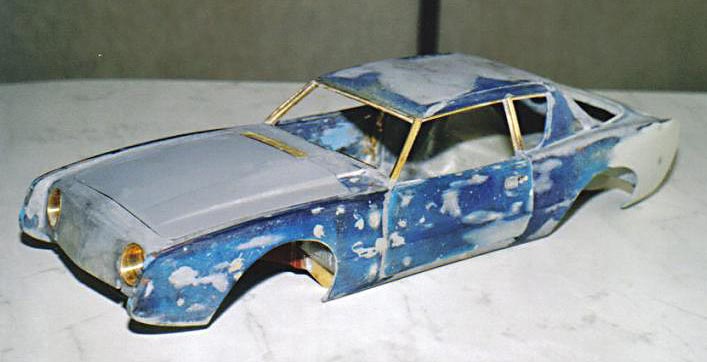
The Avanti body during the upgrade process prior to repainting.
Avanti Body Upgrade
This project was now a major makeover.
Avanti Body Upgrade
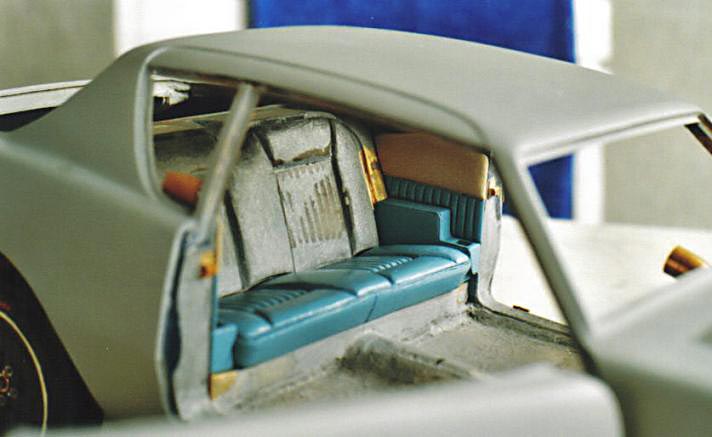
Avanti Interior Upgrade
Roger then dyed the interior with the proper color of turquoise, using actual Studebaker vinyl spray colors. The leather was shaved thin and applied to the carved seat forms with glue.
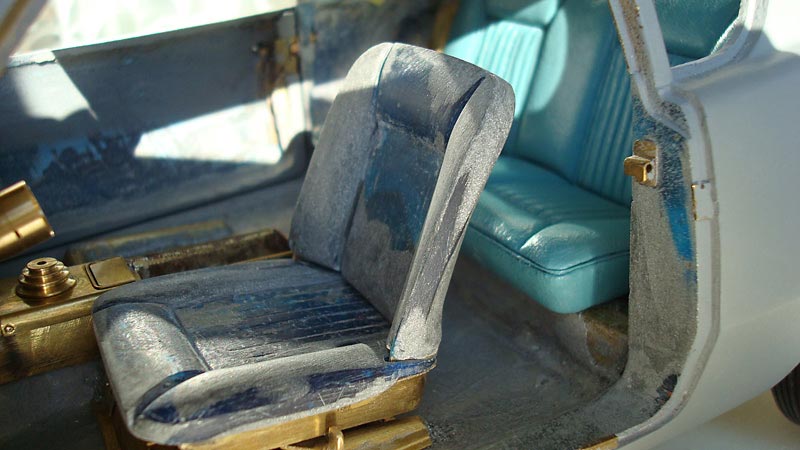
Avanti Interior Upgrade
The front seats were also ready for covering.
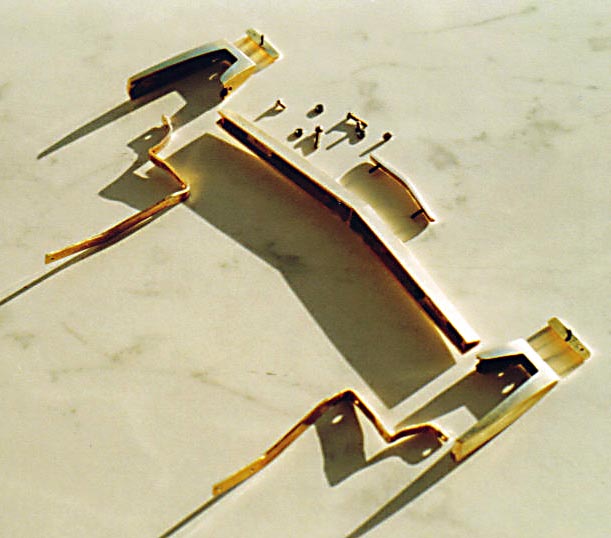
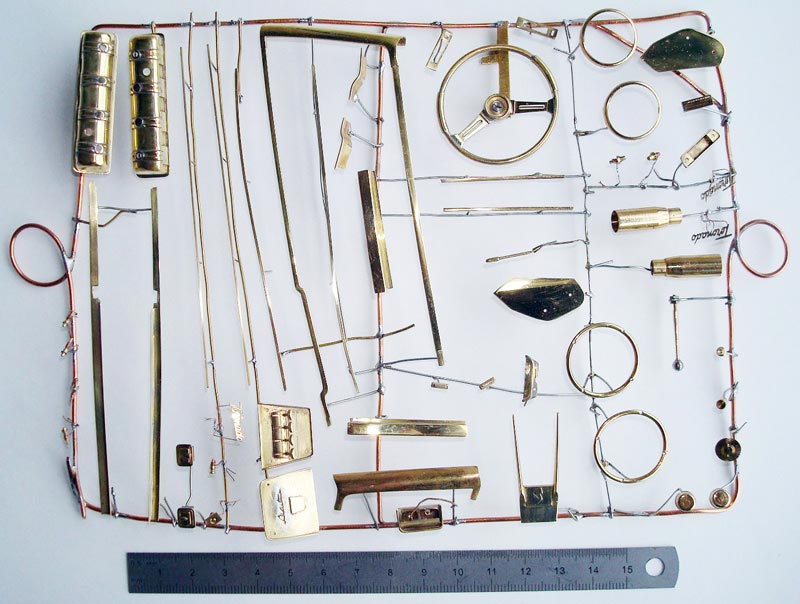
Avanti Bumpers
New brass bumpers and some other interior pieces for the Avanti model upgrade.
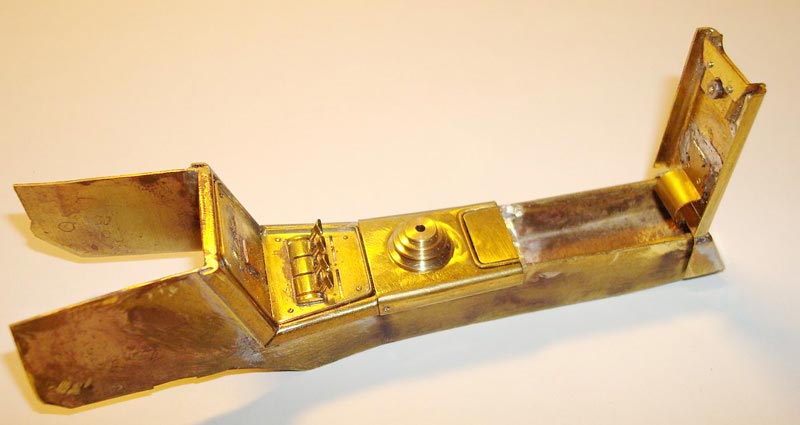
Avanti Center Console
The brass “shift boot” for the 4-speed shifter, and the opened center console lid.
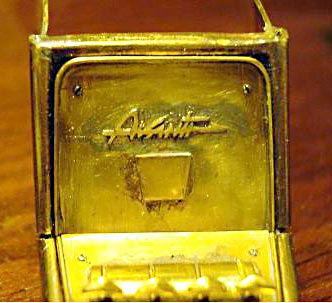
Avanti Center Console
The center console features the Avanti logo along with four temperature and ventilation control levers.
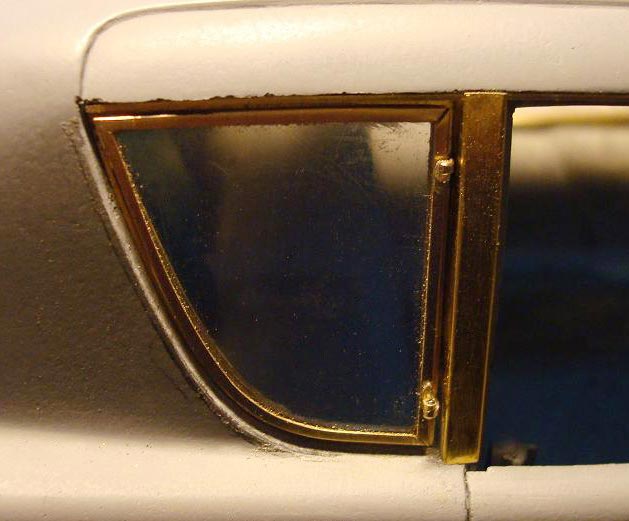
Avanti Rear Windows
The rear windows of the Avanti did not roll down, but they could be popped out from the rear to help draw air through the cockpit. This was another innovation that would be adopted by many others. Here the brass frame was test-fit to the body prior to chroming.
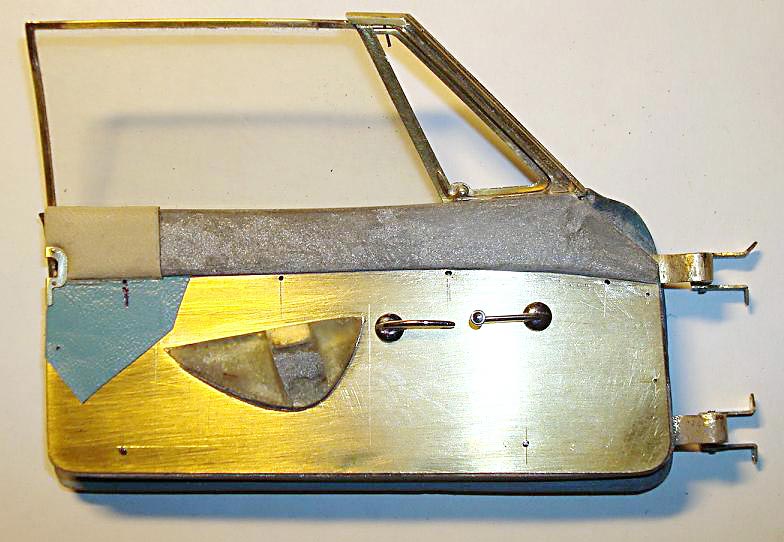
Avanti Door Upgrade
After replacing brass components inside the door, the interior panel was then installed to cover the mechanism.
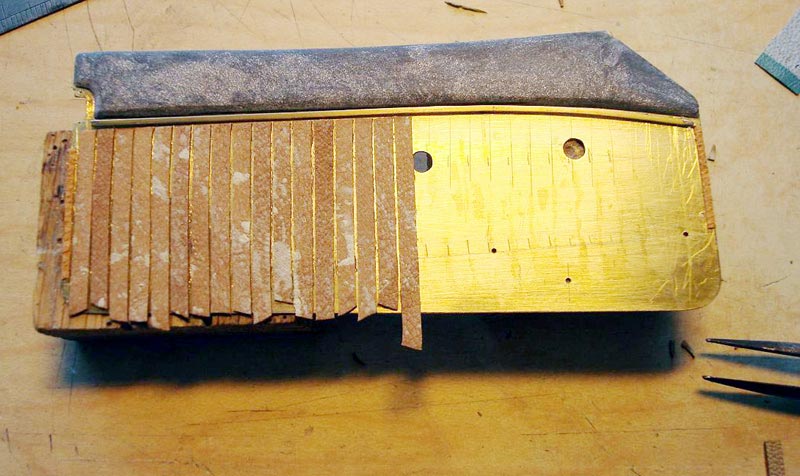
Avanti Door Upgrade
Beige and turquoise leather portions were added with strips of padding underneath to give them a “tuck and roll” pattern.
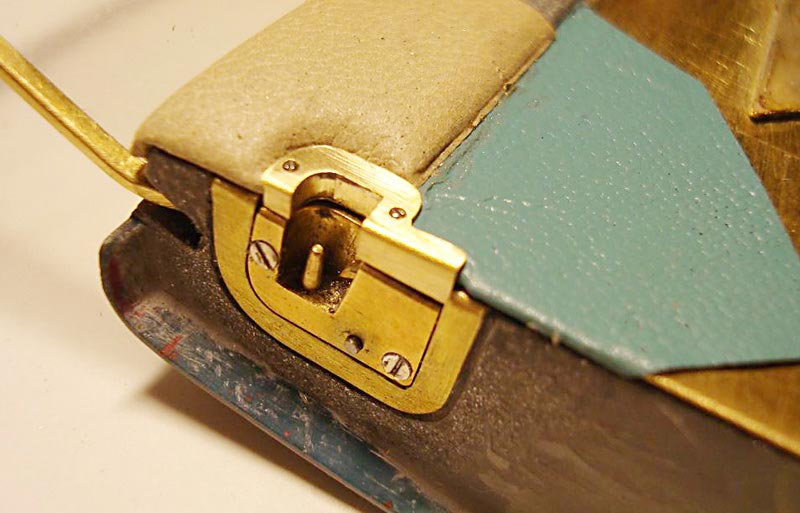
Avanti Model Detail
A close-up shows the unique Studebaker conical pin door locking mechanism. This was designed to provide extra security, and probably also to guide the extremely long and heavy doors into position.
Brass Avanti Components
An array of brass parts ready for chroming.

Brass Avanti Components
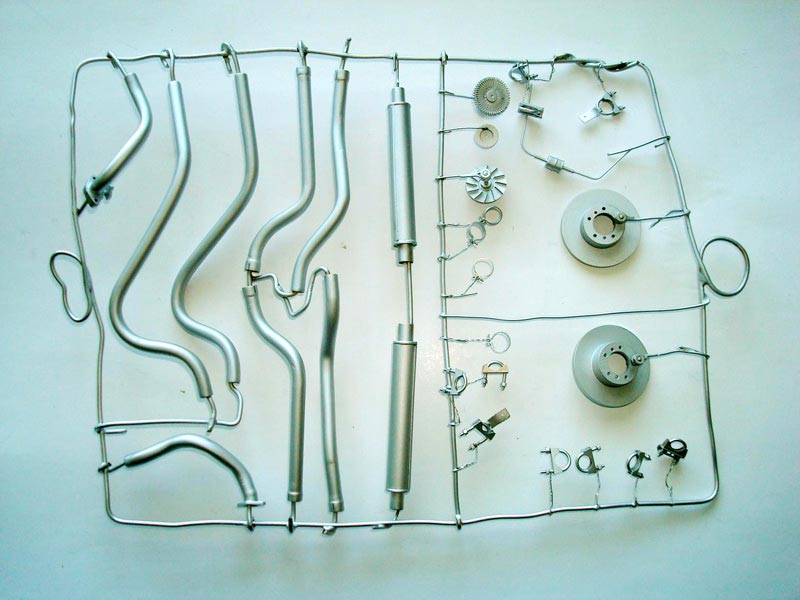
Brass Avanti Components
These parts were satin chromed to represent a galvanized, or non-shiny steel finish. This was applied to the exhaust system and disc brake rotors, among other pieces.
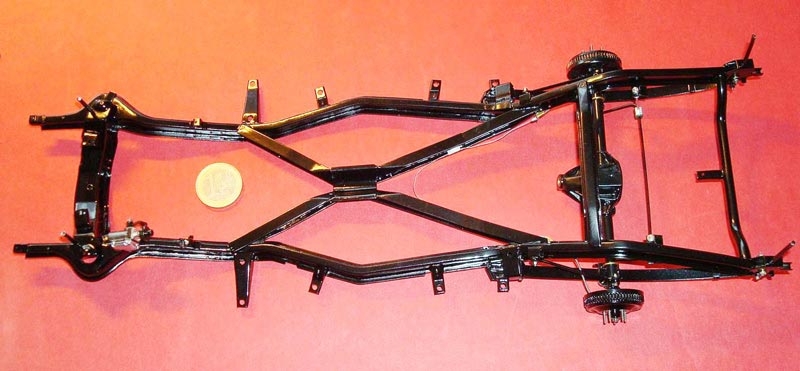
Avanti Frame
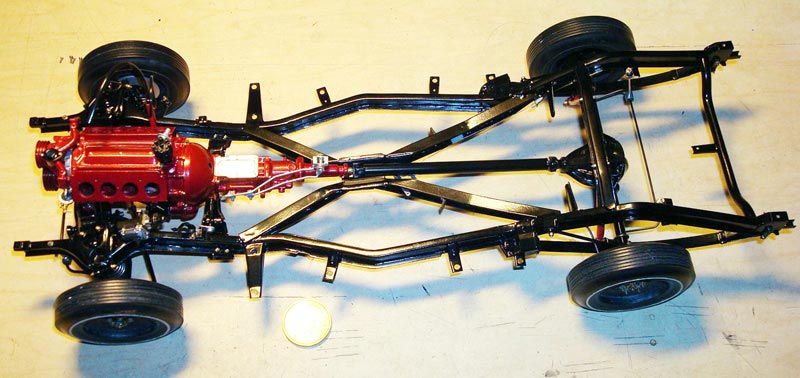
The painted frame is shown here and in the following photos during various states of assembly.
Avanti Frame
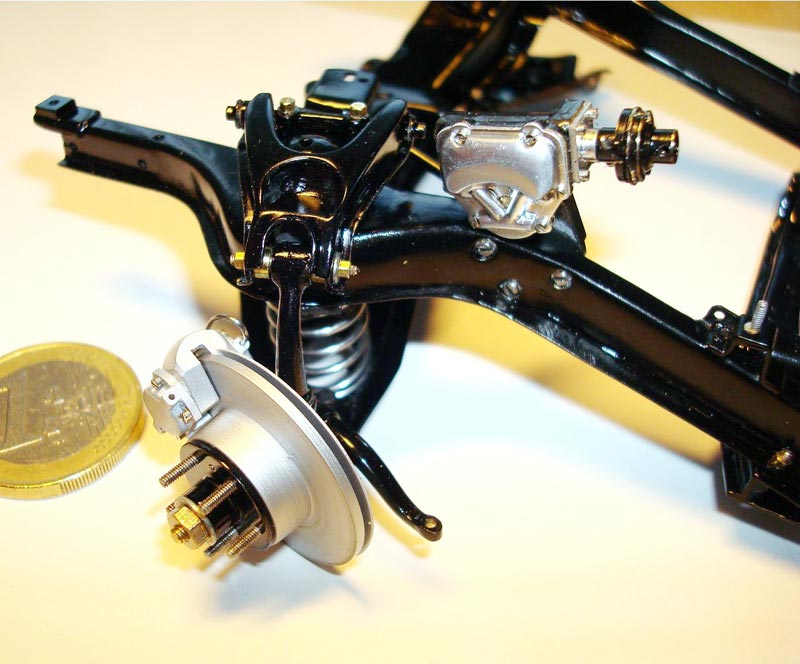
This photo shows the front disc brake—a first on any American car.
Avanti Frame
Wheels and other components were installed.
Avanti Progress
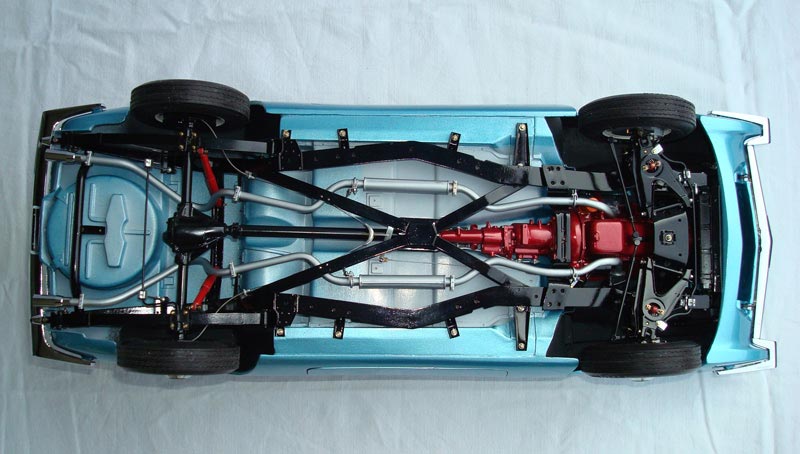
Eventually, the frame and body were assembled.
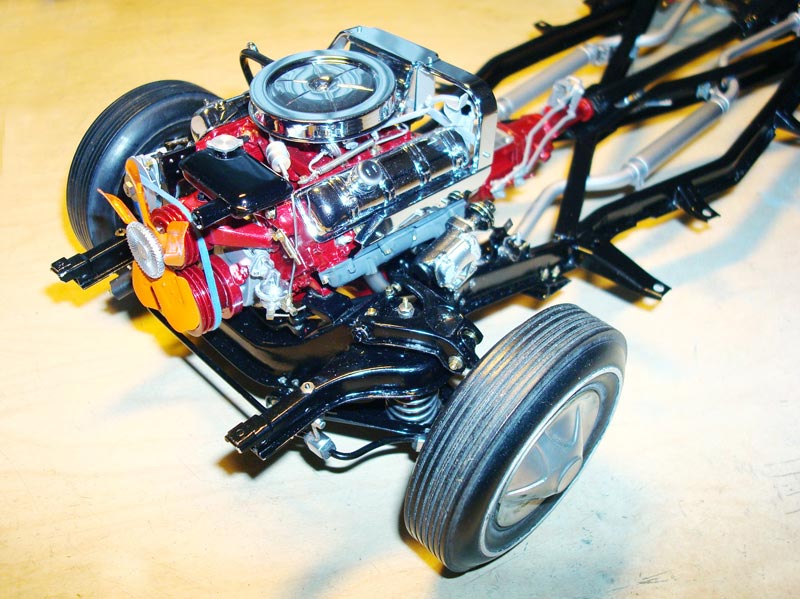
Avanti Frame Upgrade
Here the engine and its accessories were installed. As on the original, the distributor and spark plug leads are shielded by stainless steel panels to prevent static on the AM radio. This pre-dated the modern trend of covering engine components by about 40 years.
Avanti Tire Construction
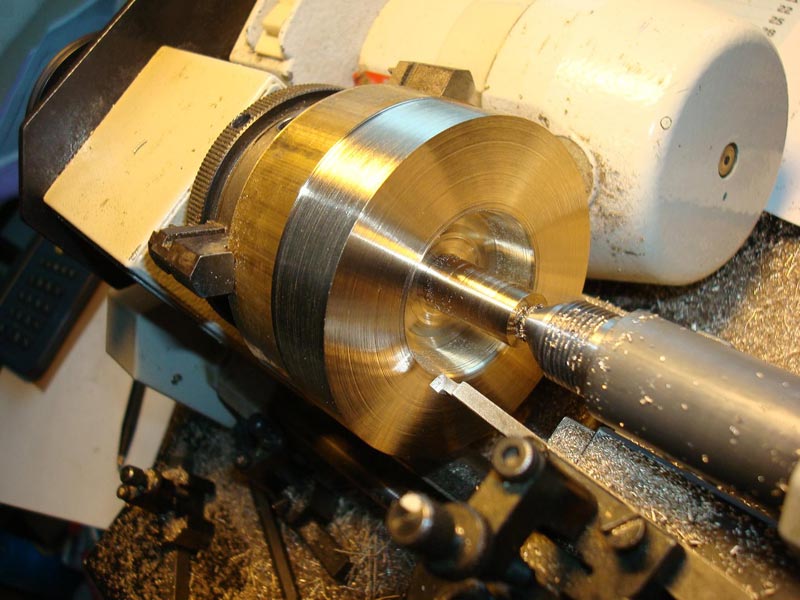
The following photos document Roger’s process for making new Avanti tires. To turn the master for his tire mold, brass bar stock was held between a 3-jaw chuck and live center on his lathe. This method was described in Gerald Wingrove’s comprehensive book, The Complete Car Modeller.
Avanti Tire Construction
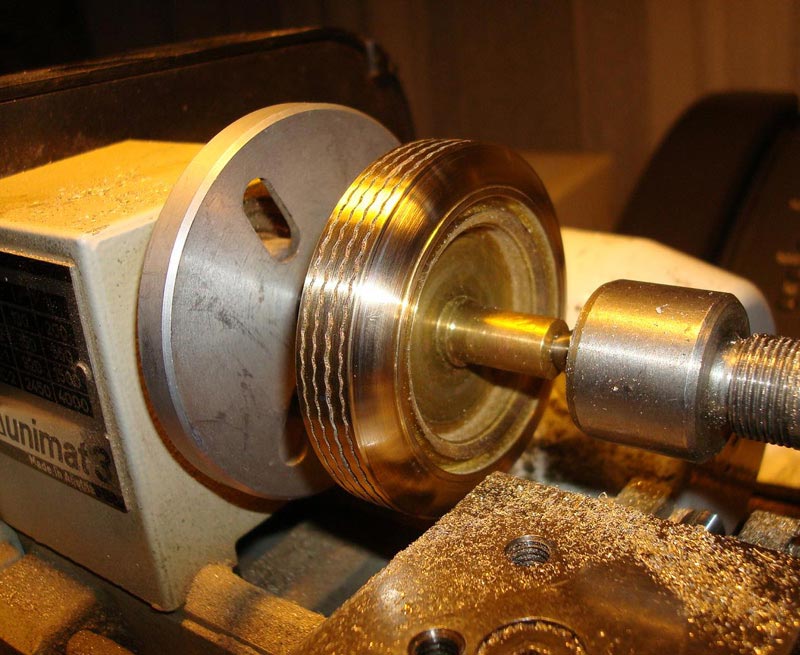
The tire tread was cut into a strip of flat brass, which was then “soft welded” to the outside of the tire shape.
Avanti Tire Construction
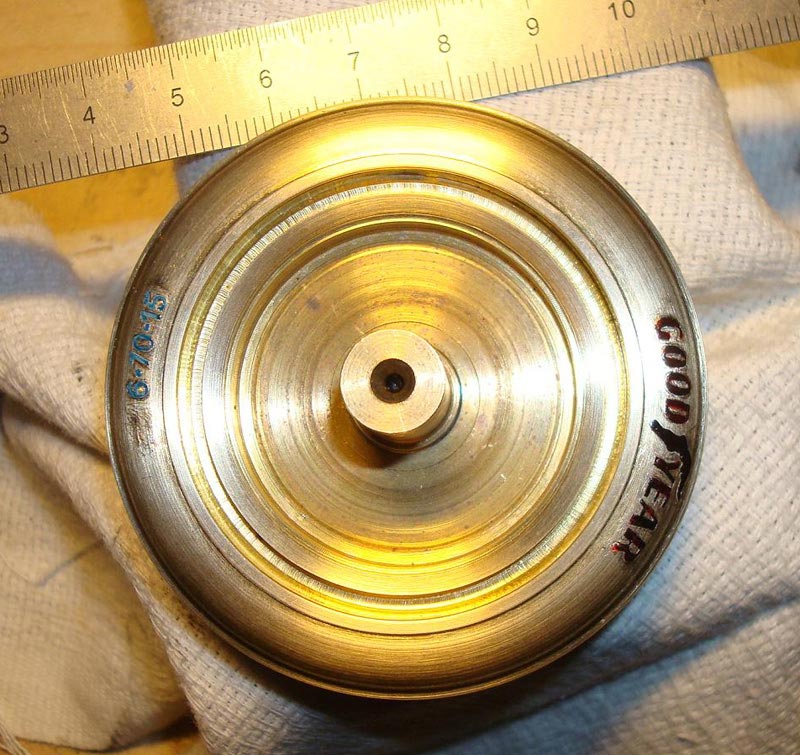
The finished master shape has the Goodyear logo applied.
Avanti Tire Construction
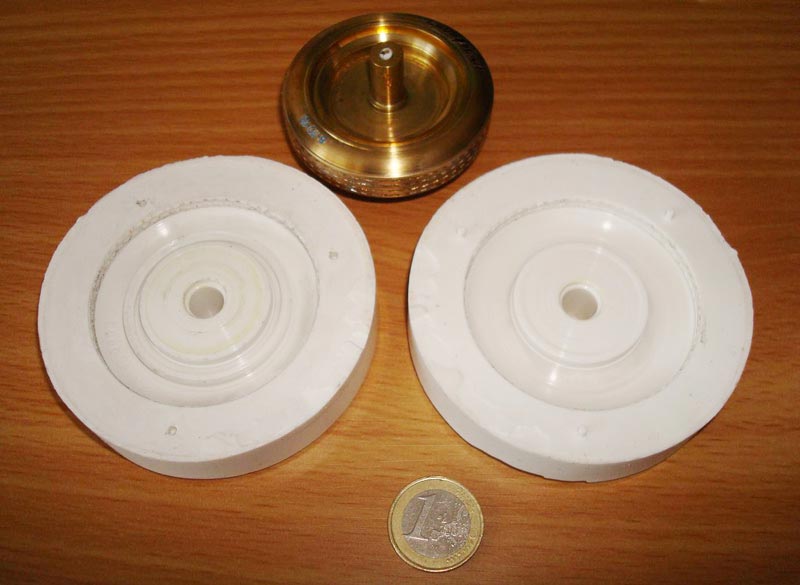
Two halves of a mold were made from the master tire.
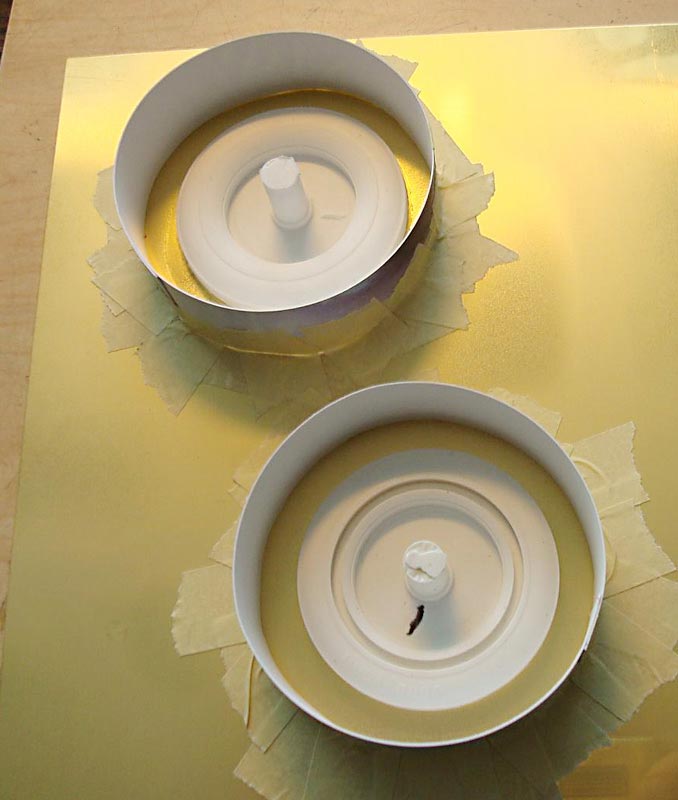
Avanti Tire Construction
Temporary paper dams help contain the liquid molding material.
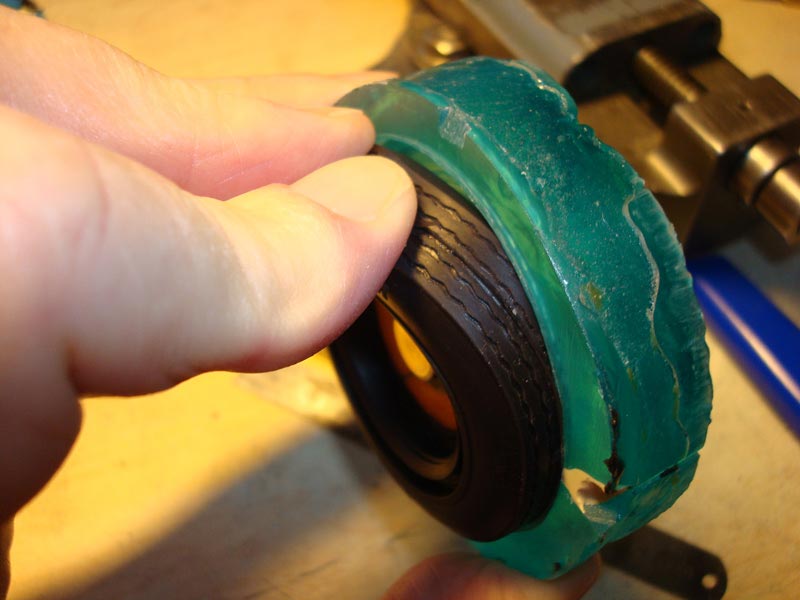
Avanti Tire Construction
A tire is removed from the polyester mold.
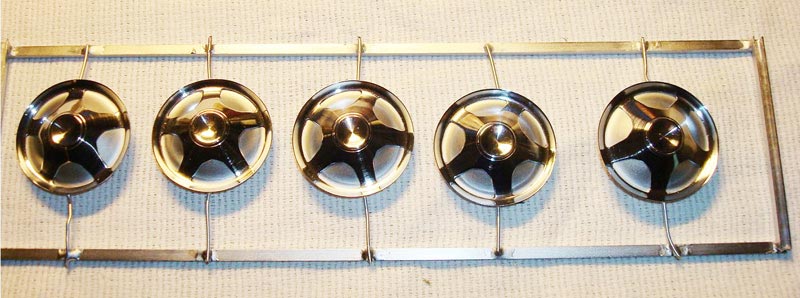
Avanti Wheel Covers
Roger made these wheel covers with an inner and outer piece to give the impression of raised spokes.
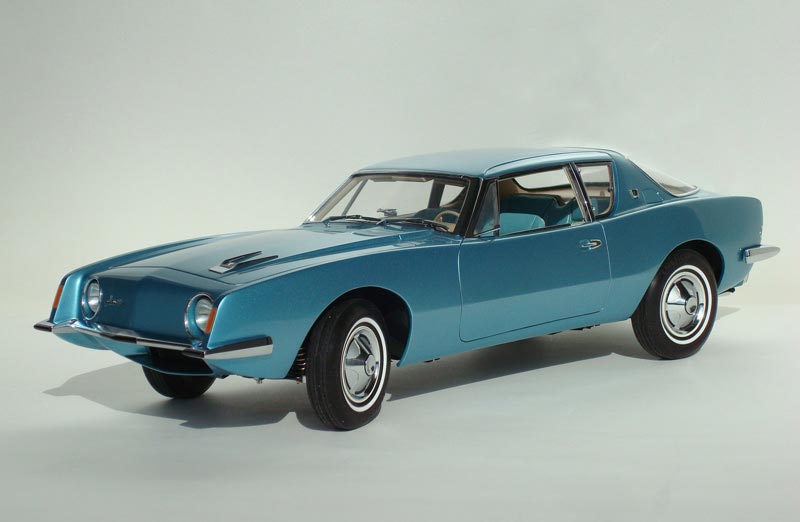
1/12 Scale Model Studebaker Avanti
Roger’s finished 1/12 scale Studebaker Avanti is truly a thing of beauty.
1/12 Scale Model Studebaker Avanti
Keep in mind this car was introduced in 1963. It is a shame only several thousand of these daring and innovative cars were made.
1/12 Scale Model Studebaker Avanti
The hood, doors, and trunk are all functional.

1/12 Scale Model Studebaker Avanti
Roger went to great lengths to incorporate every tiny detail on his model.
1/12 Scale Model Studebaker Avanti
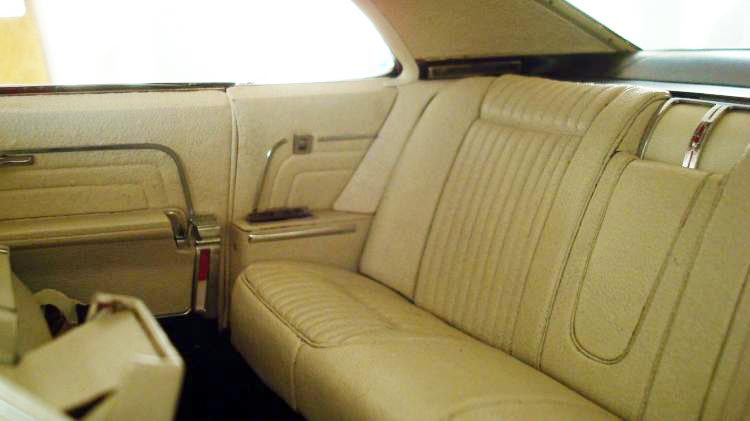
Even the interior of the finished Avanti model is accurate.
1/12 Scale Model Studebaker Avanti
A customer could choose supercharging or air conditioning, but not both, which is why the supercharged cars are seen less often.
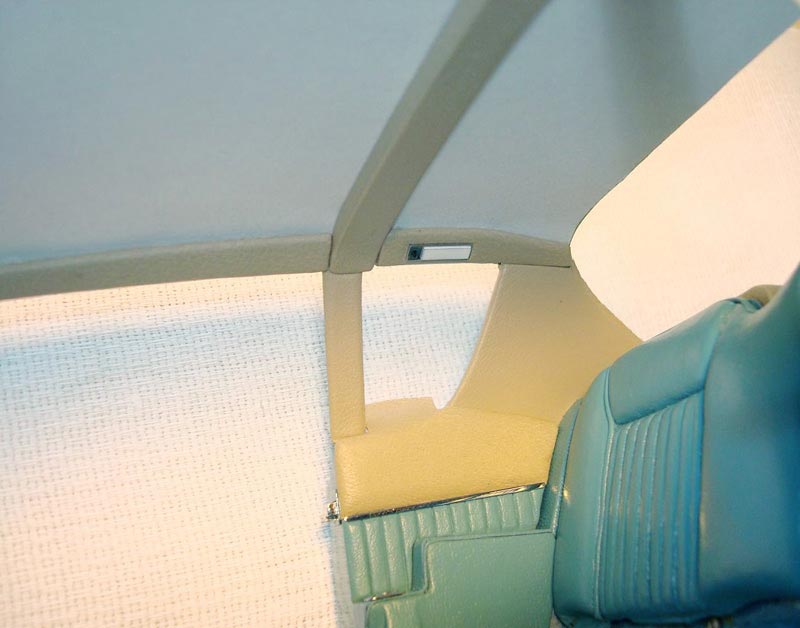
1/12 Scale Model Studebaker Avanti
Inside and above the rear seats is the padded foam cover over the built-in steel roll bar. This was the final touch to a car that was way ahead of its time.
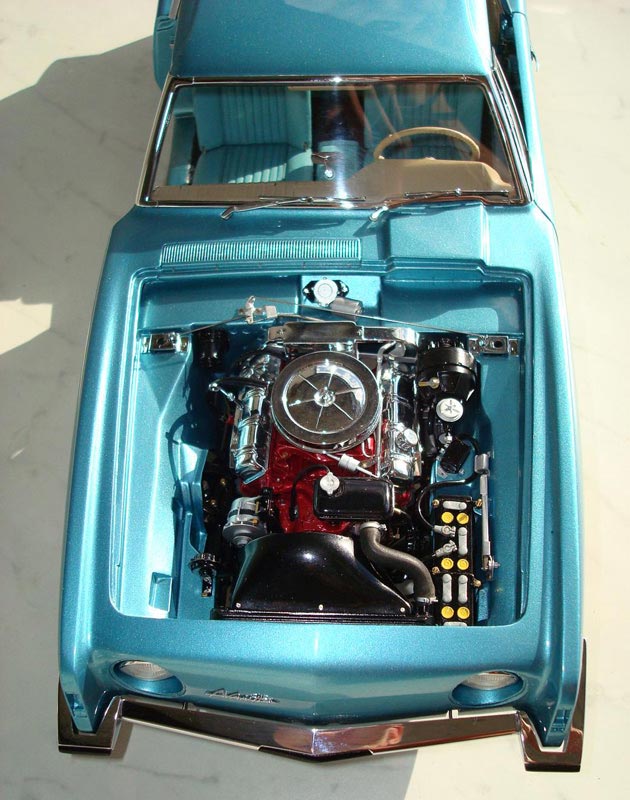
1/12 Scale Model Studebaker Avanti
The hood is removed to show the pristine model engine.
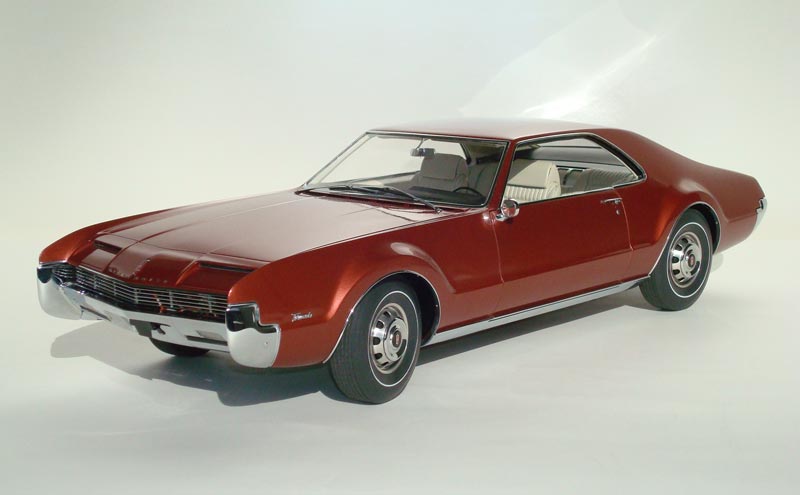
1/12 Scale 1966 Oldsmobile Tornado
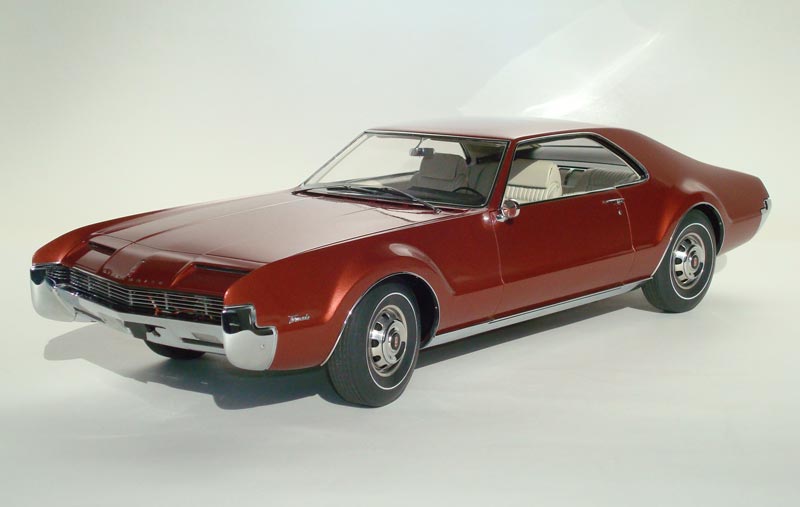
1/12 Scale 1966 Oldsmobile Tornado
Roger’s sleek 1/12 scale 1966 Oldsmobile Tornado is even more detailed than the Avanti in many respects.

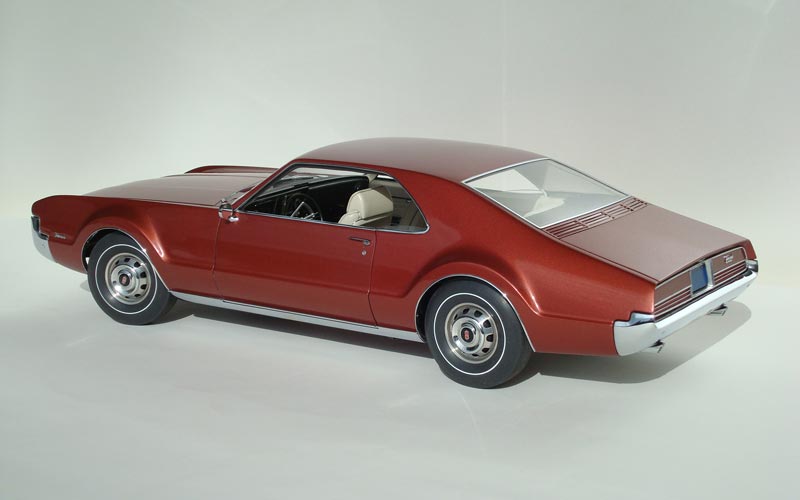
1/12 Scale 1966 Oldsmobile Tornado
The Tornado model even includes working electric window lifts, and a powered front wheel drive. Roger did this mostly just to see if he could!
1/12 Scale 1966 Oldsmobile Tornado
1/12 Scale 1966 Oldsmobile Tornado
1/12 Scale 1966 Oldsmobile Tornado
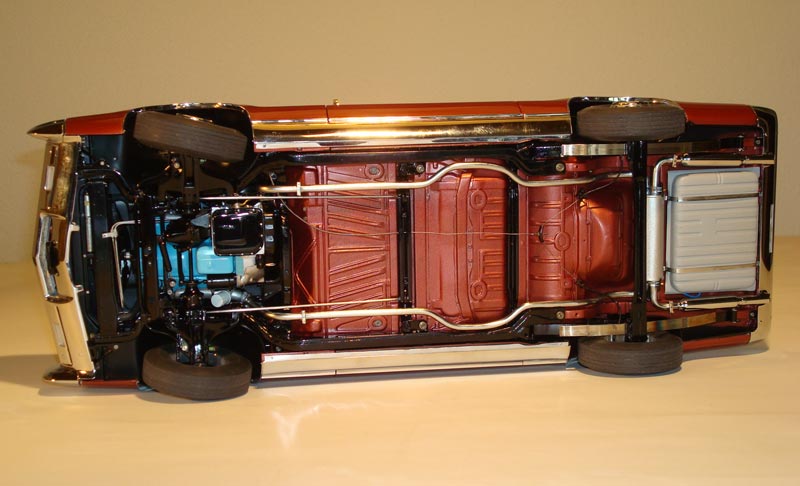
1/12 Scale 1966 Oldsmobile Tornado
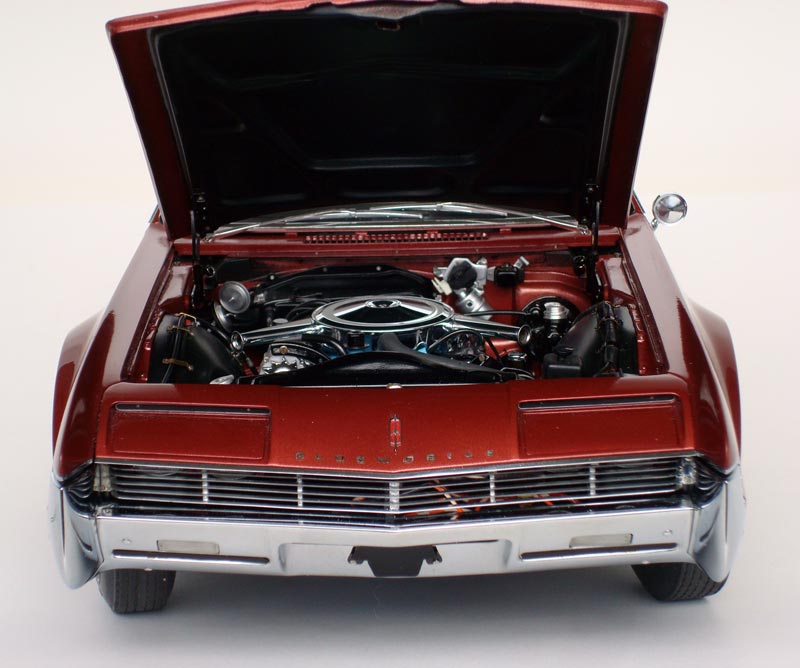
From under the hood to under the car, no detail escaped Roger’s attention.
1/12 Scale 1966 Oldsmobile Tornado
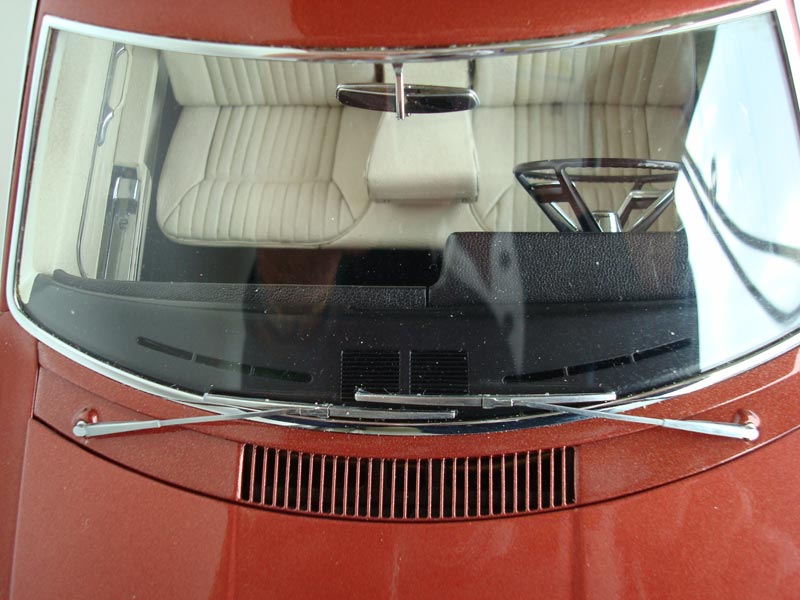
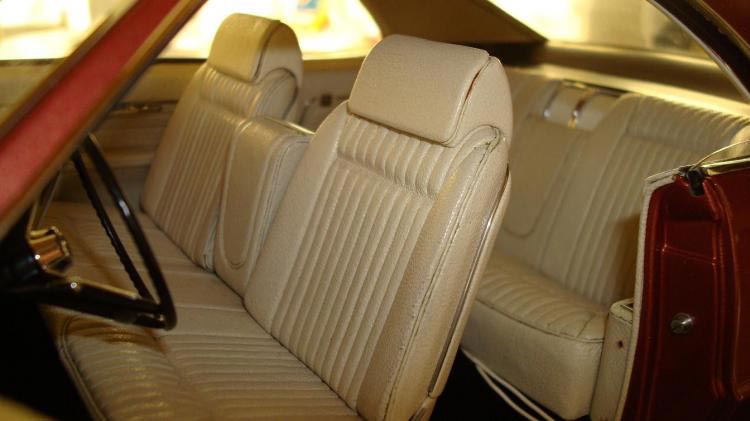
Even the leather interior is authentic.
1/12 Scale 1966 Oldsmobile Tornado
1/12 Scale 1966 Oldsmobile Tornado
Though Roger only has a few models to show for many years of work, the end results demonstrate that patience pays off in the end. Roger refused to settle for anything less than perfection, and it shows.
1/12 Scale Continental Mark II
In November 2010, Roger was in the process of making his next model car—a 1/12 scale Continental Mark II. He sent along some photos of his early progress on the project.
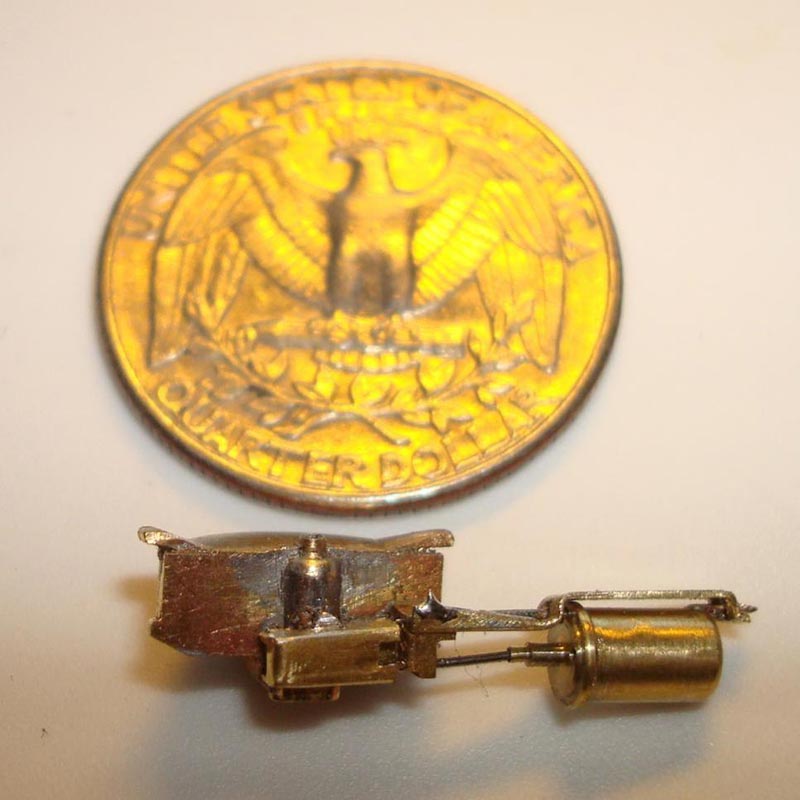
Continental Mark II Construction
Roger started out this project by building some of the smaller parts first. The brass windshield wiper motor was starting to take shape here.
Continental Mark II Construction
The following photos show construction of the valve covers. Layers of brass stock were aligned on a central core and milled to the shape of the cover.
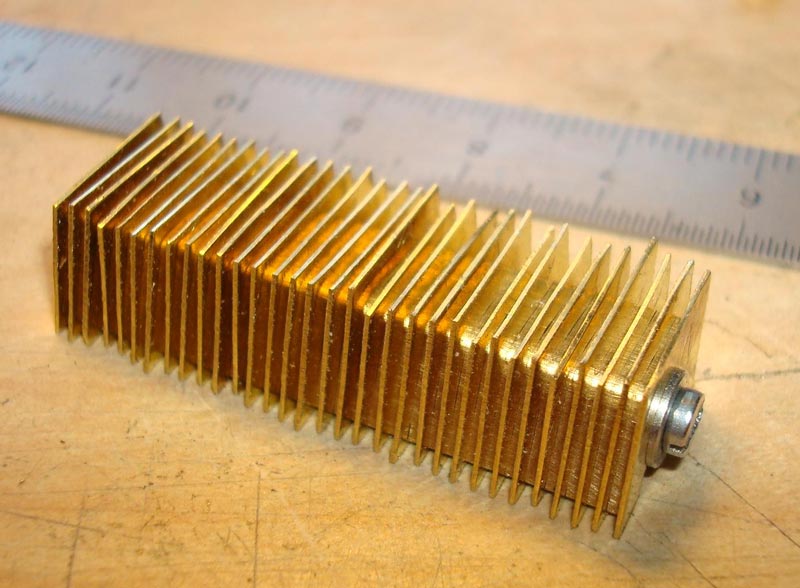
Continental Mark II Construction
Thinner but larger plates were then inserted on the same rod between each thicker piece, and then machined to the contour of the outside of the fins.
Continental Mark II Construction
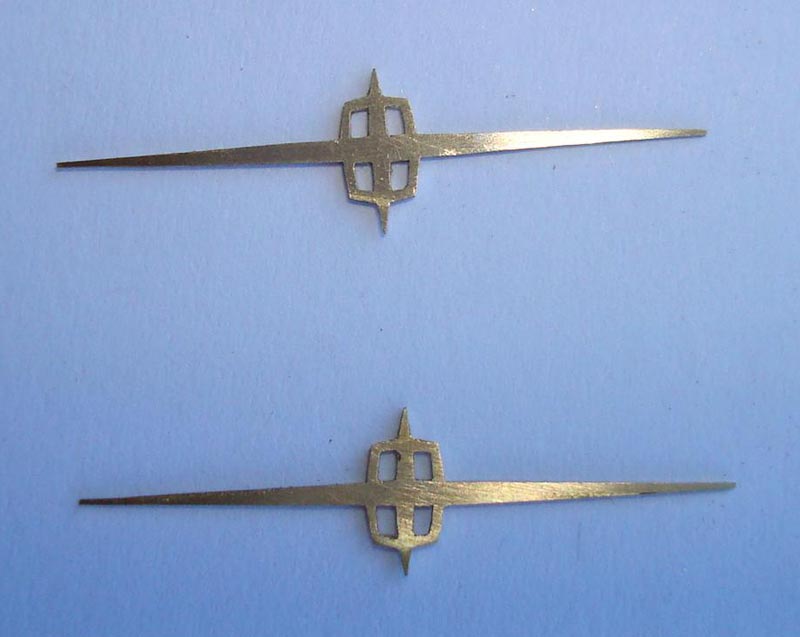
A Continental logo was cut from thin stock and soldered to the assembly.
Continental Mark II Construction
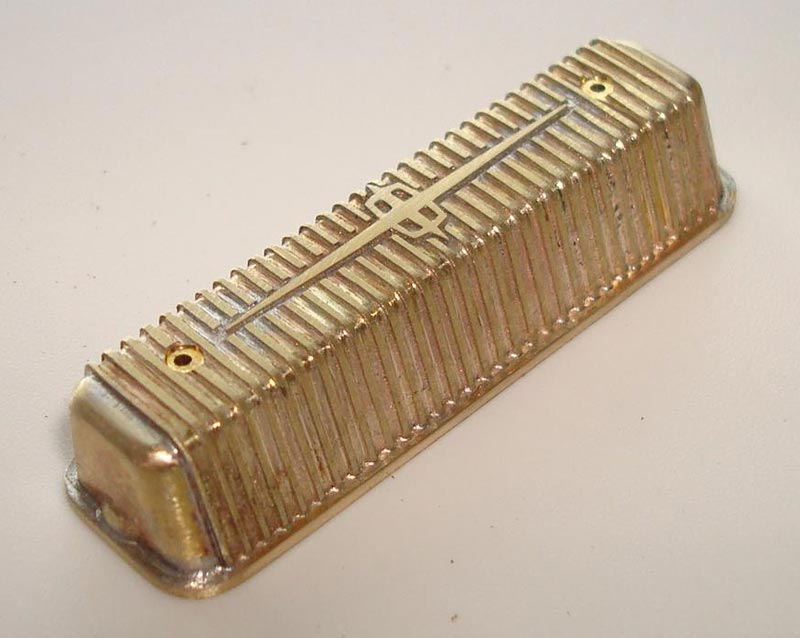
The nearly completed valve cover. In the mid-1950’s, Continental was a division of its own. That’s why you won’t see the Lincoln brand applied to this car.
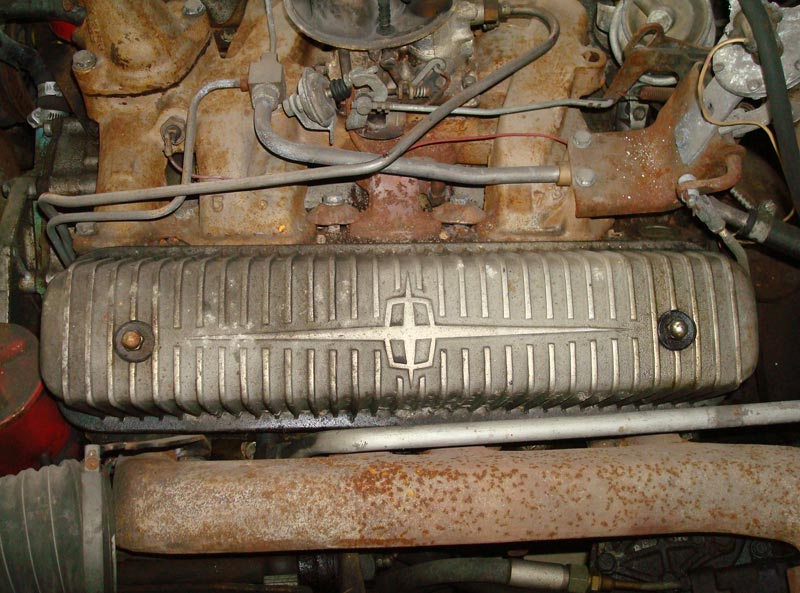
Full-size Continental Engine
The real valve cover is shown in this photo of a full-size engine.

Continental Mark II Construction
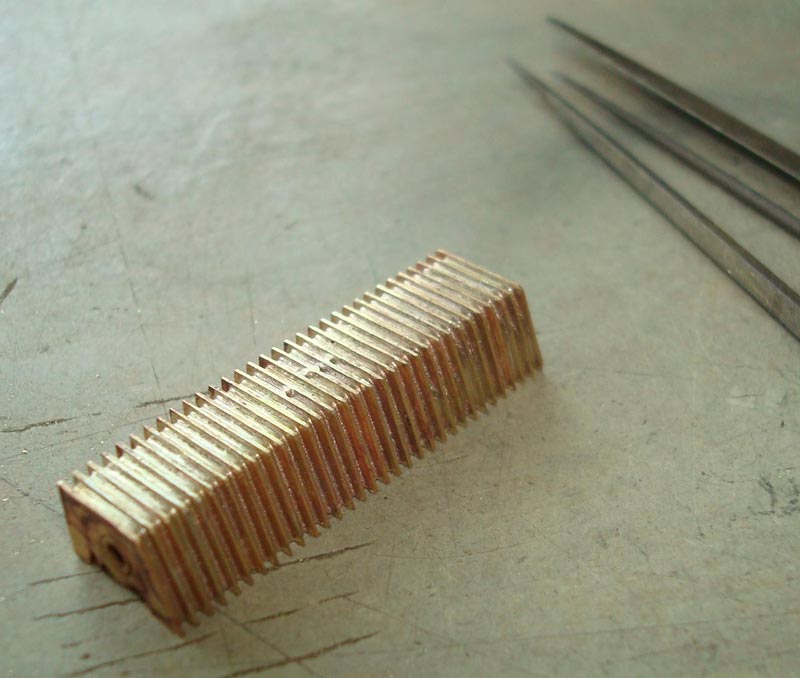
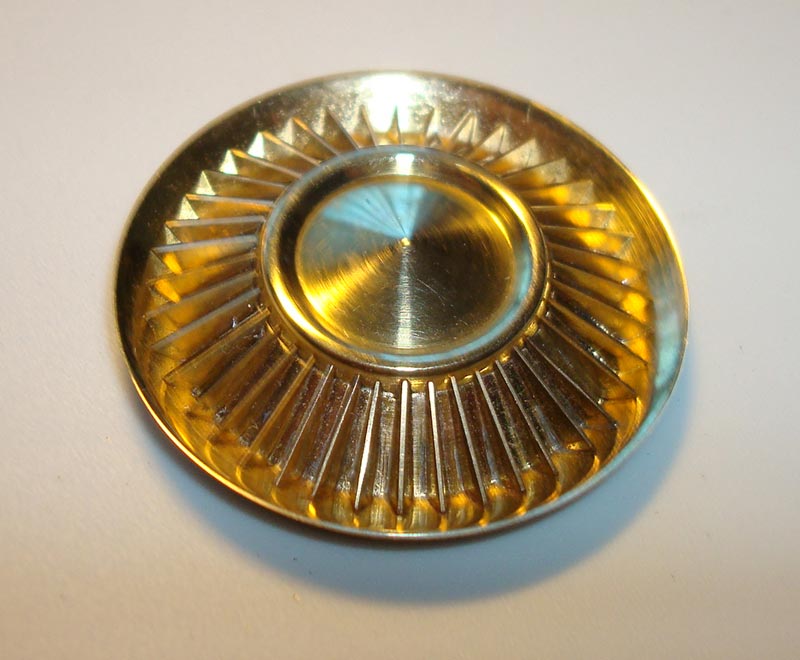
These last photos show Roger’s process for making the hubcaps. Continental hubcaps have a pattern of fins or vanes that is very complicated. To duplicate it, Roger first turned the basic hubcap shape in brass.
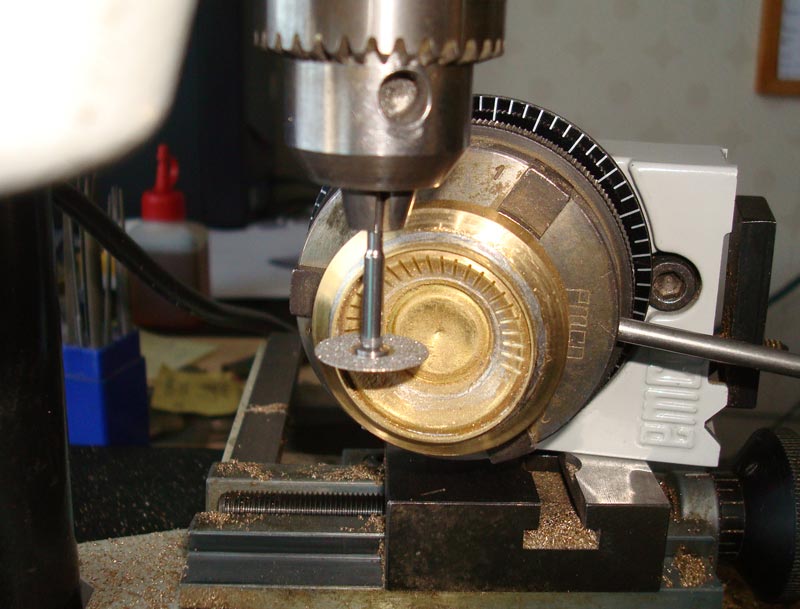
Continental Mark II Construction
A mill with a slitting saw was used to cut 40 slits on the cap surface.
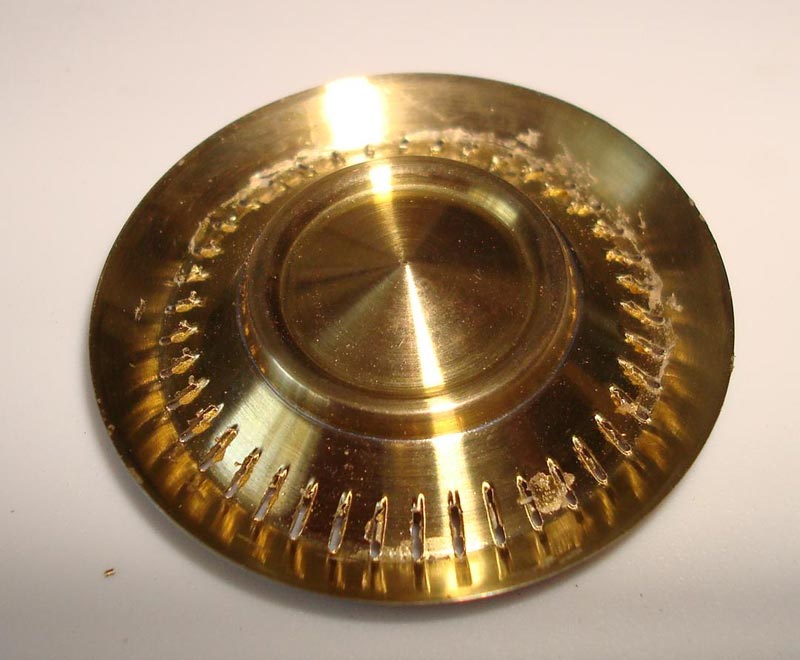
Continental Mark II Construction
Continental Mark II Construction
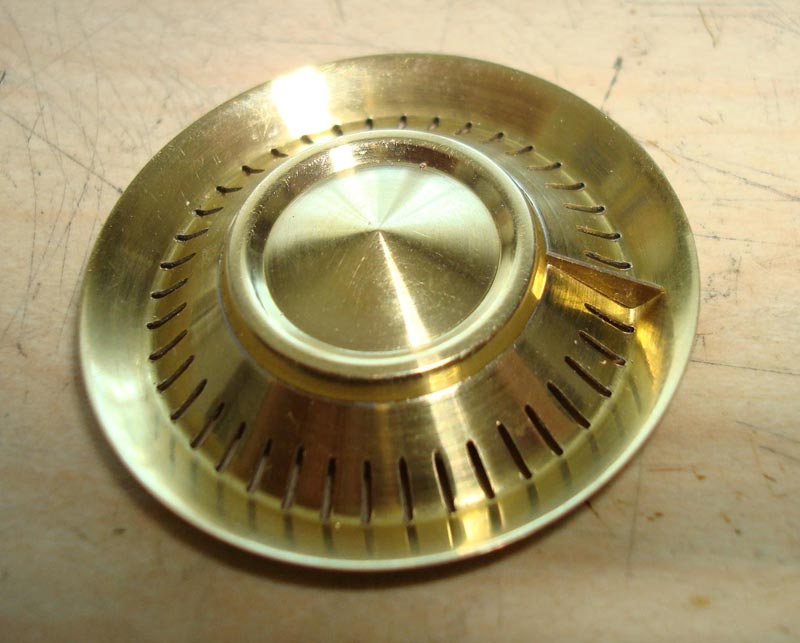
Individual vanes were then cut and soldered to the hubcap.
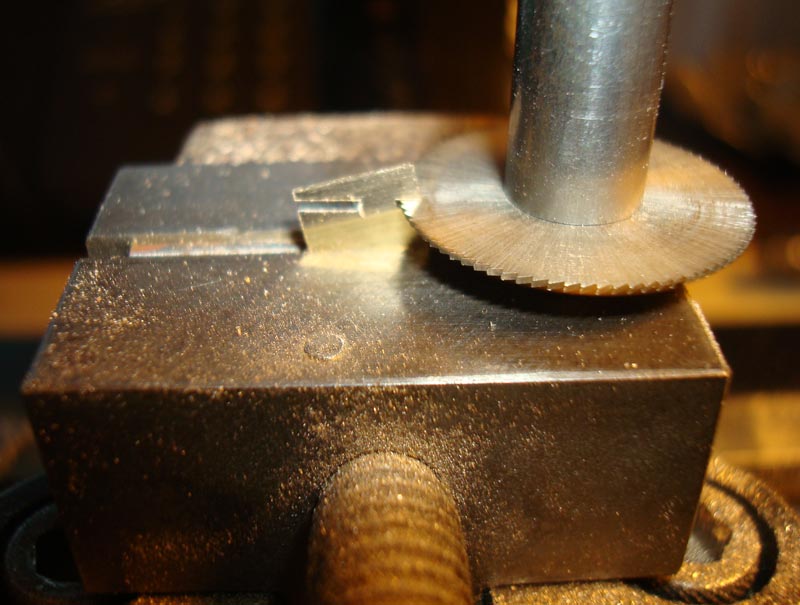
Continental Mark II Construction
Each vane took about one hour to make and solder in place, so you can estimate how long it took to complete each hubcap. Wow!
Continental Mark II Construction
The finished hubcap would be nickel or chrome plated next. Roger constructed six of them, even though only four will be needed for the finished car. He said that it was, “nice to have extras” to choose from.