A Lifelong Love of the Studebaker Avanti Eventually Leads to a Spectacular Model
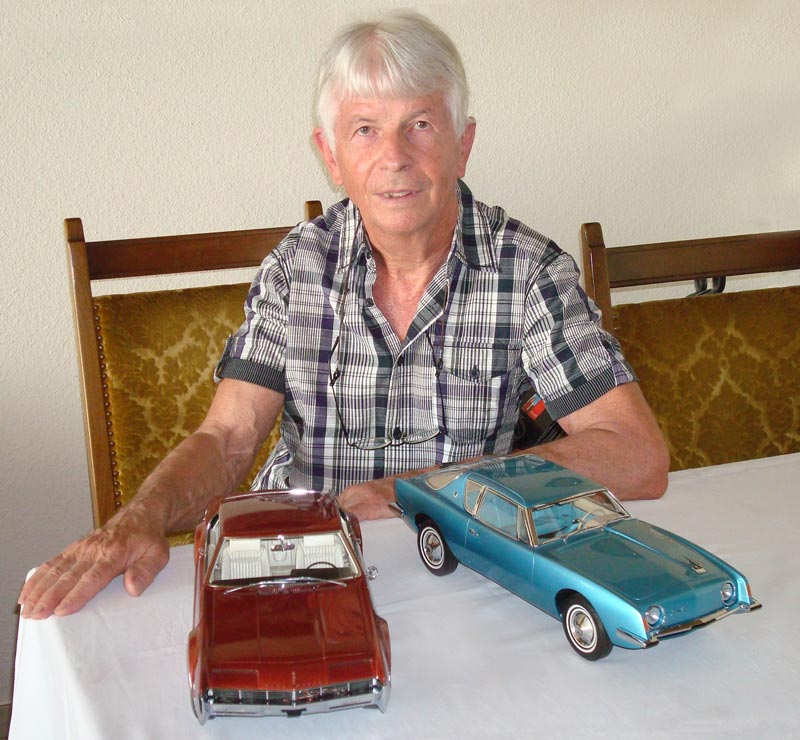
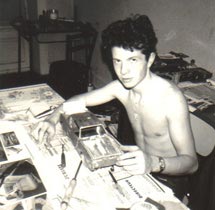
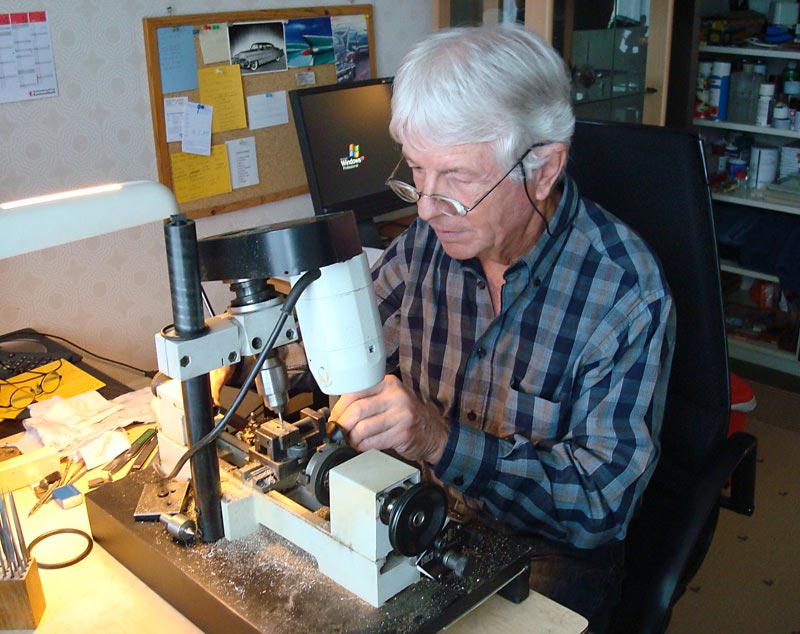
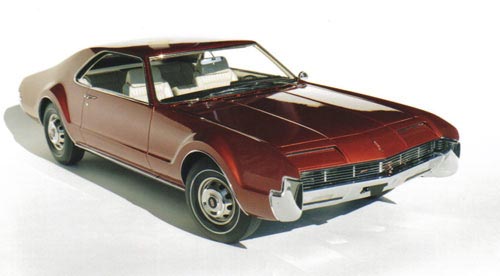
Roger Zimmermann, a retired General Motors engineer from Switzerland, is seen with his 1/12 scale models of an Oldsmobile Tornado and Studebaker Avanti. He began building these models in 1963, and spent the following decades improving his techniques and standards.
Introduction
By Craig Libuse
Having grown up with a Studebaker Avanti that my father purchased new in 1963, and which I still own, I have been a member of the Avanti Owners Association International (AOAI) for many years. Membership includes a subscription to Avanti magazine. For the past several years, I have read with interest each time the magazine included articles documenting the progress of a very detailed 1/12 scale model car being built from the frame up by a craftsman in Switzerland. The winter/spring 2010 issue finally showed the nearly finished model, complete with turquoise exterior and interior (my favorite combination, too), chrome bumpers, and full engine detail.
The following article details the model making progress of automotive engineer Roger Zimmermann. Starting with crude cardboard and tin models as a child, he improved his techniques over the years to come up with these museum-quality models. His obsession with a very unusual piece of American automotive history has resulted in a real masterpiece.
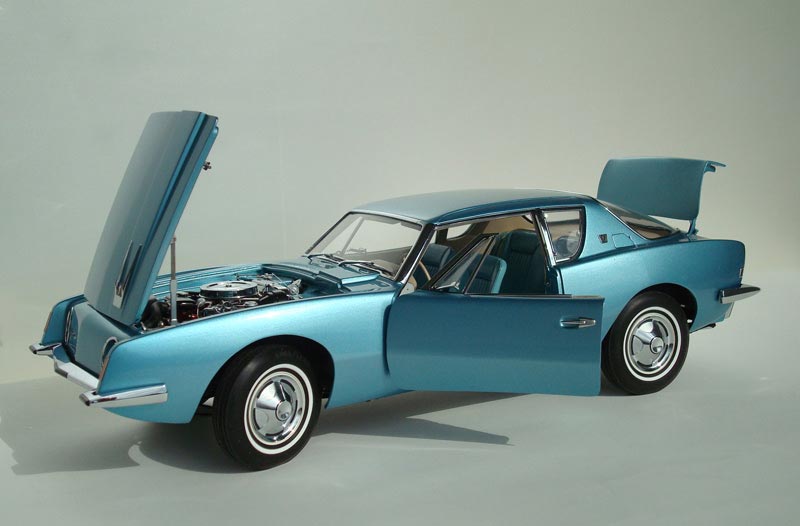
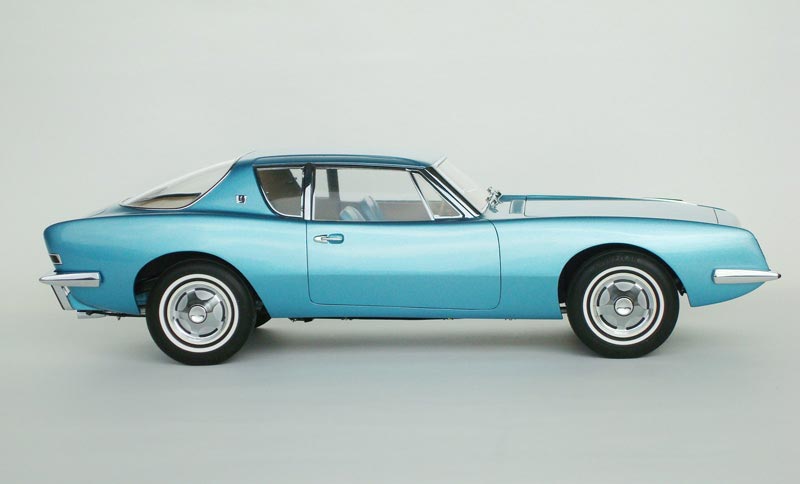
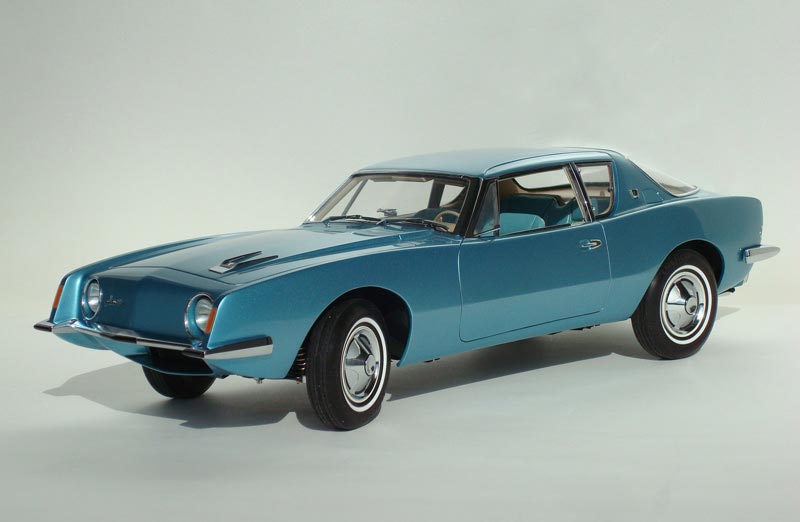
Roger Zimmermann’s finished 1/12 scale 1963 Studebaker Avanti model. This impressive model car occupied much of Roger’s spare time from 1963 to 2010.
About Roger Zimmermann
To start, Roger lives in Switzerland and turned 65 in 2010. He was an automotive engineer with General Motors (retied in 2002), and has been interested in cars since childhood. Roger was especially interested in the 1950’s Studebakers, along with some other US cars. During his youth, Roger’s parents lived in a rural part of the French portion of Switzerland, where cars were rare, and American models even rarer.
Most of the farmers owned Volkswagens. Roger couldn’t understand why so many were sold, noting, “Such an ugly, noisy and impractical vehicle is beyond my understanding, then and now.” Actually, his parents did not have a car at all, which was not unusual in the fifties in Europe.
Early Attempts at Model Making
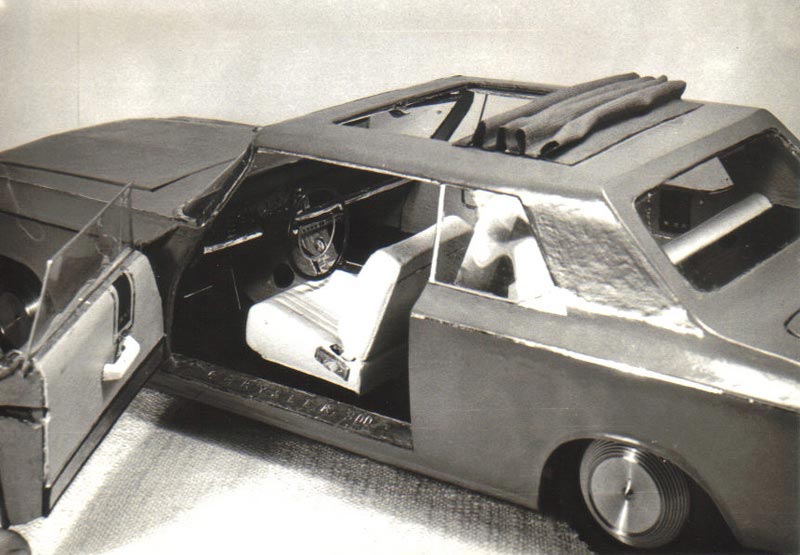
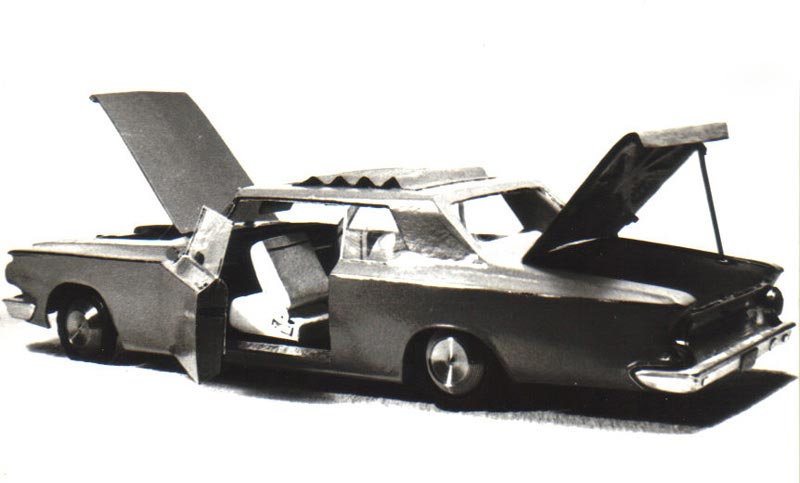
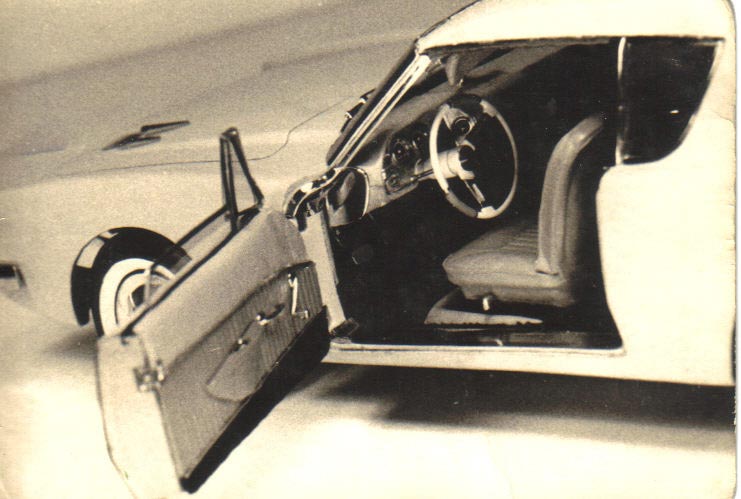
Roger started building model cars at an early age, probably as a response to his perpetual frustration of not having one around. On his first models, the body was cardboard and the frame was made with a construction kit from Meccano. Several types of bodies were made. Roger remembered making a 1959 Studebaker Lark and a sport car of his own design. A truck was also created using the same system. In 1963, Roger was very impressed by the new Chrysler New Yorker. He decided to build a model of that car based on the manufacturer’s color catalog.
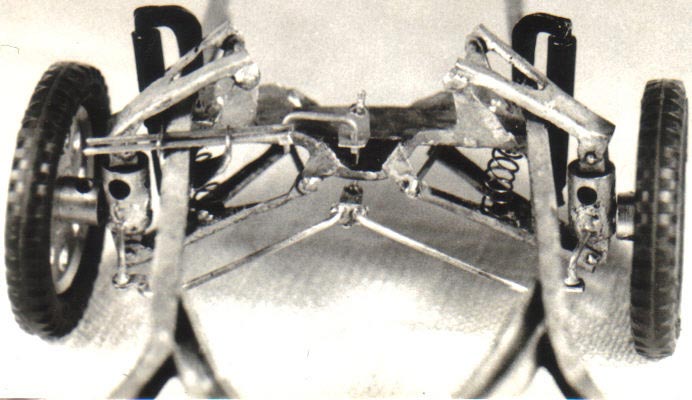
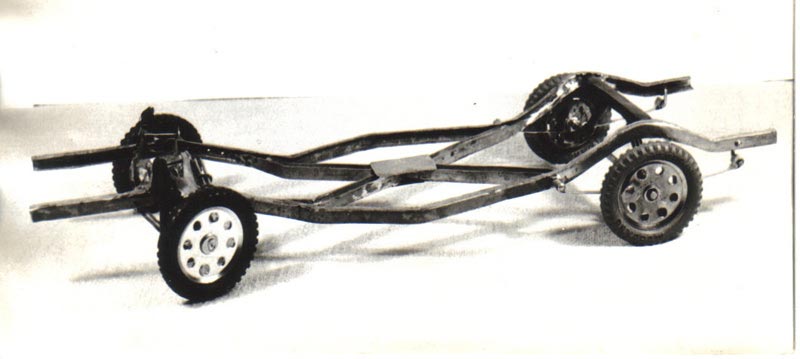
For this model, the frame was his own design. In fact, it was just a piece of sheet metal bent to support the floor with a crude suspension attached. Since cardboard can only be bent in one direction, the body shapes were limited. In order to improve the general appearance, Roger tried to see what would happen with wet cardboard. It was indeed much better, but still far from a perfect replica. Roger couldn’t resist sending along a few pictures of this project, although the model itself is long gone.
Giving the Studebaker Avanti a Try With New Techniques
Later in 1963, once Roger’s Chrysler was completed, he decided to try constructing a model of the Studebaker Avanti. Why an Avanti? For Roger, Studebaker was the first choice (he was still riding a bicycle then), and when he saw the sleek Avanti in pictures he fell in love.
Roger visited the Geneva Auto Show that same year, and the only cars he still remembers were the Avanti in metallic red, and a white Studebaker Hawk. Roger joked that the staff at the Studebaker display was probably very glad when he finally left. For this new model, Roger used basically the same technique to get started.
This involved making a crude frame bent on his father’s vise, crafting a rear suspension similar to the original car, and, for the first time, an independent front suspension. Roger noted that the new front suspension didn’t look like much.
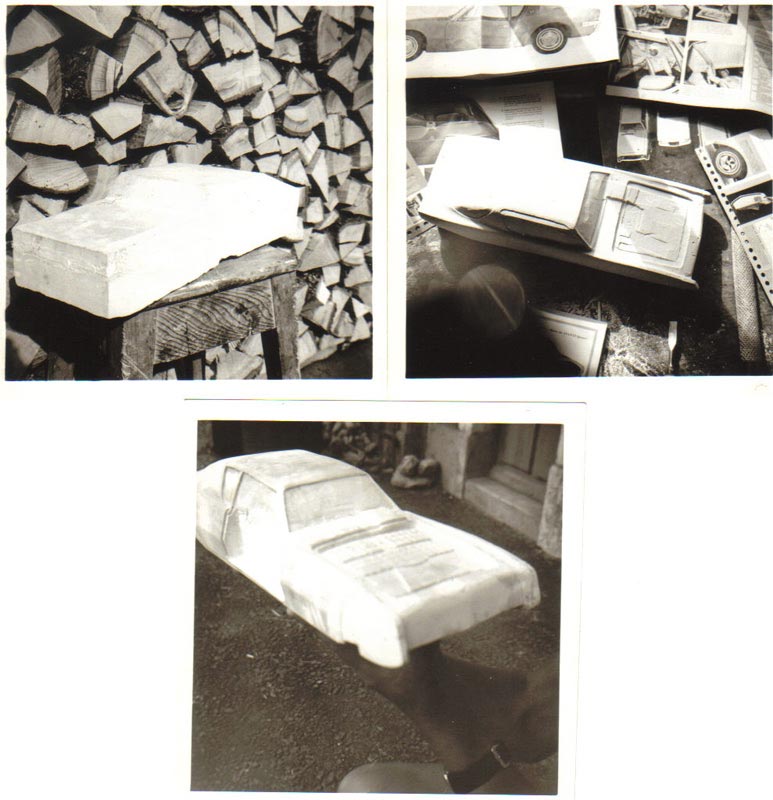
At that time, he was an apprentice in a school, and one of his colleagues suggested making the body of his car from polyester instead of cardboard. This new material necessitated the creation of a mold, and this time Roger chose plaster. Because he only had a few documents to work from, the general shape was only approximate.
The next problem for Roger to solve was figuring out how to replicate the chrome parts. As a naive idea, he asked for tinplate from a store. Of course, the person behind the desk wanted to know what he was using the tinplate for. Roger was told that brass would be more suitable for what he had in mind. Going further, he could braze pieces of brass together and then chrome plate them. In addition to learning about polyester, Roger now had to learn a new technique altogether—brazing.
As he had no access to a real car, Roger took many liberties with the construction. In the beginning, the model still had Meccano wheels and tires. It was around 1965 that he heard General Motors was hosting a contest for model cars. After sending in his application, Roger received four nice rubber wheels in the mail. He then realized that the Meccano wheels just didn’t look right as the model was coming along.
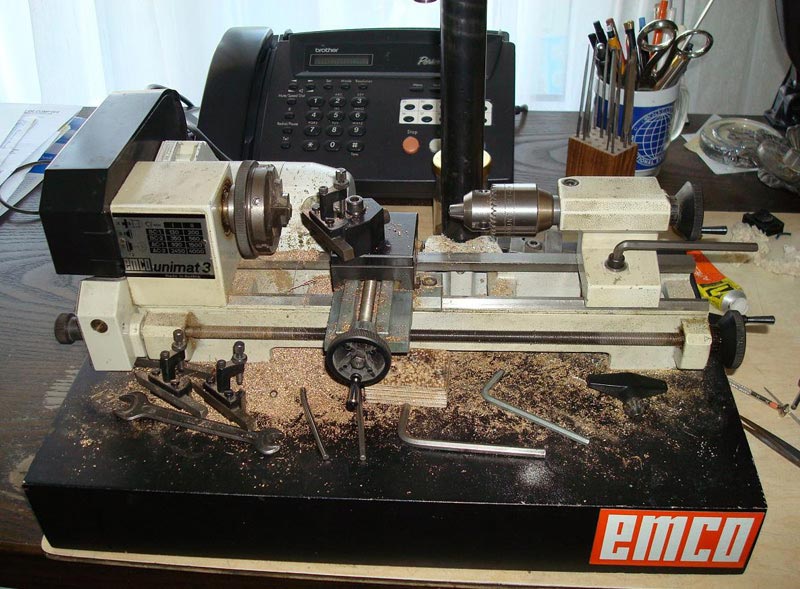
Ultimately, Roger decided to create a new front suspension, and to adapt the rear one to the new wheels. This necessitated yet another investment—an Emco-Unimat SL lathe with some accessories. As the body was integrated onto the frame, Roger found that he needed to take on the rather difficult task of modifying the frame to fit the body.
He eventually succeeded without damaging the body, which was still unpainted. The old frame was cut aft of the front cross-member, and the new assembly with a different steering box was soft welded to the existing frame. After two or three years, Roger finally completed his model.
He painted the car with a spray can for model kits. Roger wanted to paint the car in the proper Avanti turquoise color, but unfortunately his choices were limited. The small Avanti ended up with a sort of baby blue tone.
The Studebaker color catalog had a fantastic picture of a turquoise car with red and fawn interior. (Although not a very good choice in real life, it sure looked great in the picture!) Roger found some red leather suitable for his needs, but unfortunately the leather that he bought to duplicate the fawn tone was more of a light brown.
From Scale Models to Restoring Full-Size Cars
After completing his first Avanti model, Roger began constructing a scale model 1966 Oldsmobile Tornado. He felt that it was the right time to increase the standards of his own model making. As a result, this model took an incredible amount of time to complete. Roger added that in 1982, he had had enough with the model, and turned his attention toward the restoration of a full-size Cadillac.
Since it was too cold to work on the Cadillac during the winter, Roger continued working on his model car during the cold season. The last details were installed in 2000. However, during the construction of the Tornado, Roger bought another tool: an Emco Unimat 3 universal machine with plenty of accessories.
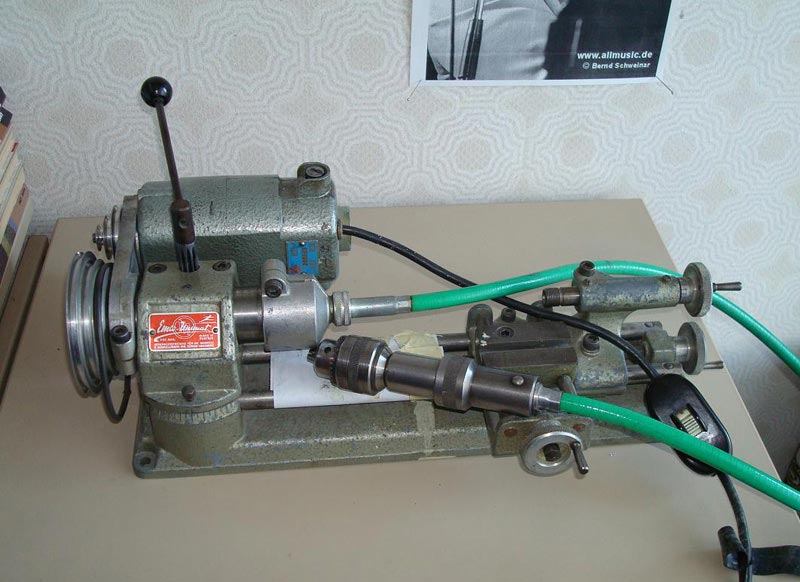
This Emco Unimat 3 lathe with a drill/mill column attachment became one of Roger’s main tools. Though it was an improvement over the original Unimat SL1000 and DB200 models, this tool is no longer in production.
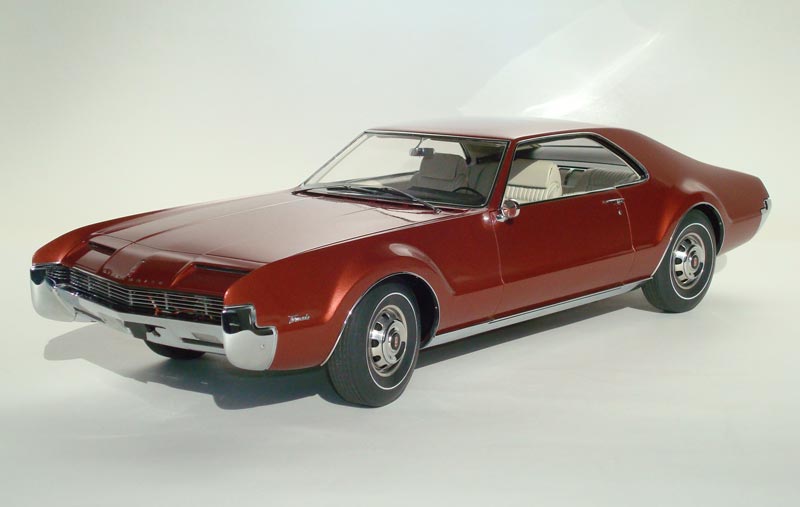
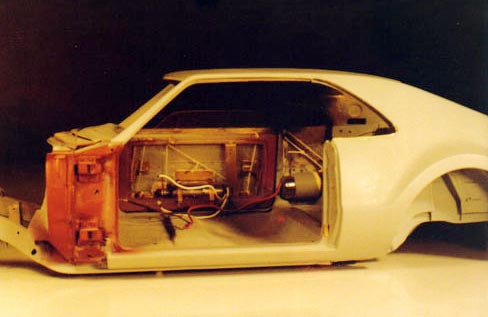
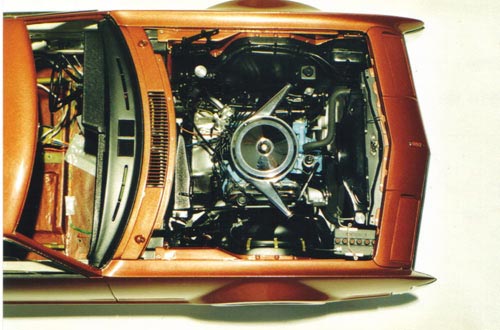
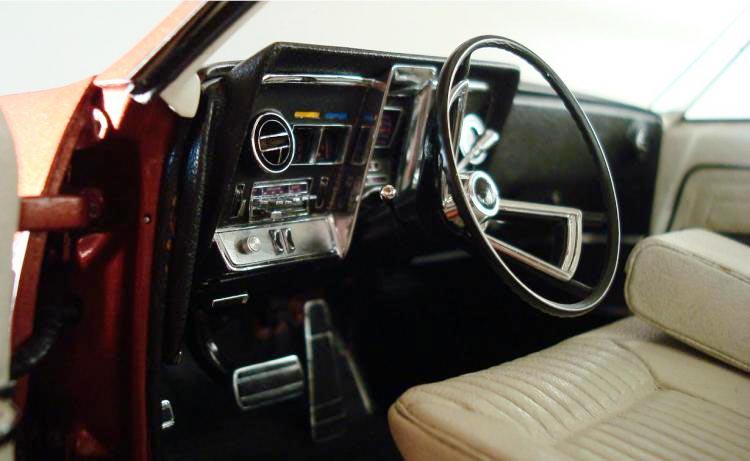
With regard to his Tornado model, Roger had this to say: “The model has four electric windows and an electric motor cast into the V-8 that turns the front wheels via a centrifugal clutch. It also has a 2-speed mechanical gearbox and differential. This was done more as a demonstration of model making skills rather than to make it a motorized model. Some of the electrical contacts and mechanical devices are not reliable or practical enough to operate on a regular basis.”
Roger went on to say, “During the construction of the Toronado, I had the idea to do a model that was as close to the original as possible, without concern for the time spent. For example, the original door latch has 2 stages, and the model does, too. The light switch on the dash of the original both operates the headlights and opens the headlamp doors. It works the same way on the model as long as the doors do not stick because the paint is too thick!”
Retirement Provided More Time for Model Making
In 2002, GM offered Roger early retirement at 57, which is unusually young by Swiss standards. Roger finished restoring not one, but three full-size Cadillacs, and suddenly he had plenty of time on his hands. One day, he took a critical look at his original Avanti model, especially the wheel covers which were painted polyster. At first, he simply toyed with the idea of making new wheel covers.
Then, Roger noticed that the exterior paint was slowly showing its age, and the inside trim had stains from the contact cement (which was almost 40 years old at that point). Roger decided on new wheel covers, new paint, and some refurbishing of the interior. He delicately removed the dashboard, and much to his dismay Roger discovered that the stained leather could not be cleaned.
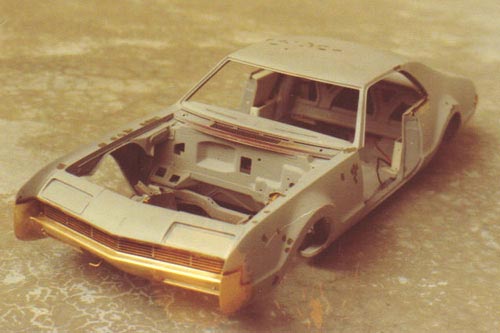
An overhead view of the 1/12 scale model Tornado with the hood removed. The techniques that Roger learned building this model were later applied to his remake of the original Avanti model.
A Lesson on Compromising His Standards
After examining his first Avanti model further, Roger decided that the frame was really quite awful. He thought to himself, Studebaker frames are so simple, why not do one in brass?
Unfortunately, his documentation was not very thorough, but he decided there was enough information for a quick job. Roger then realized that the rear end of the model was too wide. He began to draw a frame based on the picture in the 1963 sales catalog.
At that point, Roger still had his mind set on doing as little as possible, so he compromised and widened that frame to suit the existing body. In retrospect, it was the worst possible decision. Even with the new dimensions, Roger still had to make a new trunk lid, and he had to heavily reshape the rear of the car—all because of what he deemed a foolish compromise. Fortunately, the overall look of the car was not impaired.
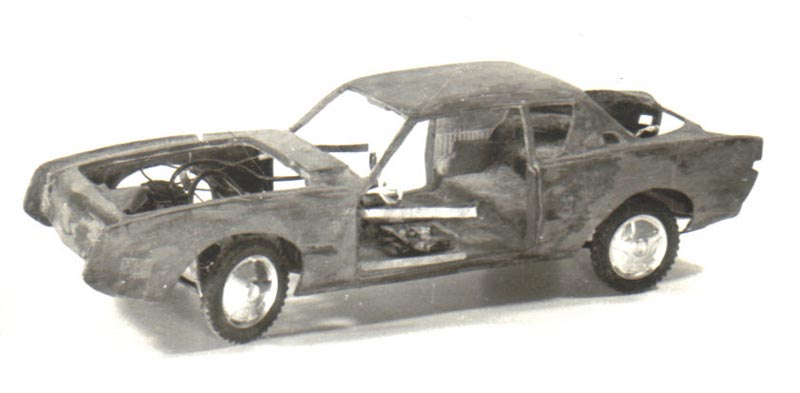
This was Roger’s original Avanti model (albeit a limited view), which had aged to the point that Roger decided it needed, “just a little freshening up.” Little did he know where this project would lead.
A New Frame Leads to a Variety of New Parts
Now, Roger had many questions about the real shape, dimensions, and details of the car’s actual frame. After a quick web search for “Avanti,” Roger came across a forum dedicated to the cars. He asked forum members for some dimensions and pictures to help with his project, and received an answer from David Crone.
David sent Roger a CD with many photographs of his own Avanti frame, as he was in the process of doing a frame-off restoration. Those pictures were very helpful, although Roger later noted that he would prefer to first search for an owner, measure the car himself, and then take his own pictures before working on a single part. To obtain even more details, Roger bought several back issues of Avanti magazine.
Even though only a few issues were helpful, Roger at least had plenty to read! Once the work was underway, Roger found that construction of the frame took more time than anticipated, which was not surprising. When he began planning the construction of the rear axle, it was obvious that he needed to make a drive shaft as well.
Roger thought about how he could support the drive shaft at the front, and decided it needed a gear box, too. However, a gear box alone didn’t quite make sense, so he decided that it needed an engine. The project naturally unfolded in this way, and the model car continued to grow in scope.
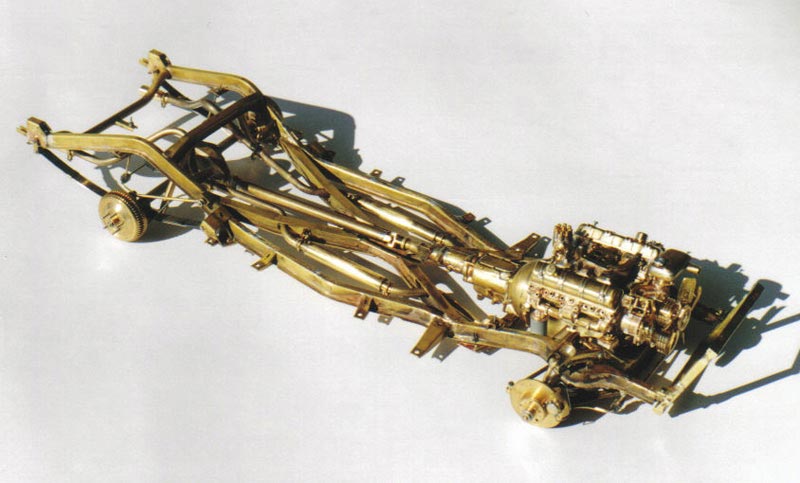
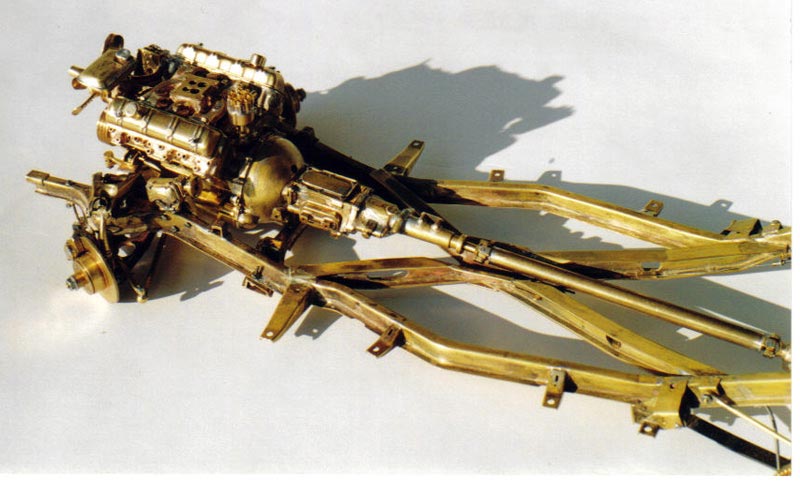
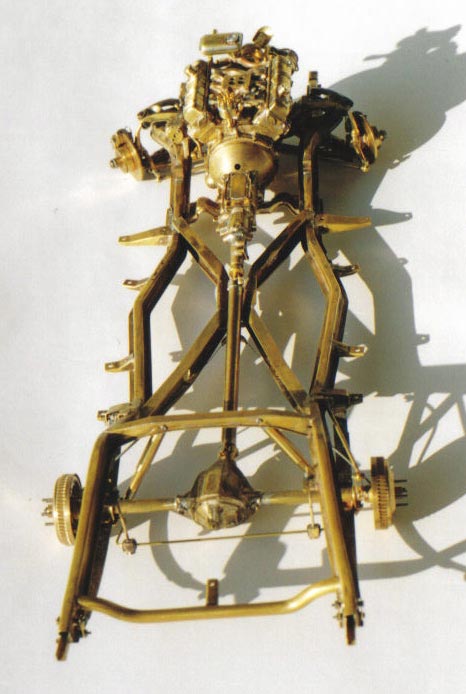
Another look at the Avanti frame with brass engine included. Because the body of the existing model was too wide in the back, Roger compromised and made the frame to fit the model, rather than correcting the body. This was a decision he would later regret.
Finally, a Real Avanti to Work From
About one year after the beginning of the Avanti “refreshment,” as Roger called it, he discovered a real full-size Avanti in the little town where he lived. Around the same time, he was having a discussion about the Avanti with a dealership manager who told Roger that his stepfather owned one. Roger arranged for a visit with the owner, and it turned out to be the same car that he had seen several weeks before.
Roger gathered plenty of measurements of the body, and took as many pictures as he could. Unfortunately, he couldn’t measure or photograph the underbody, as they had no way to get the car on a lift. Even so, this was a tremendous help to Roger, and he finally had good references for the bumpers and engine accessories, too.
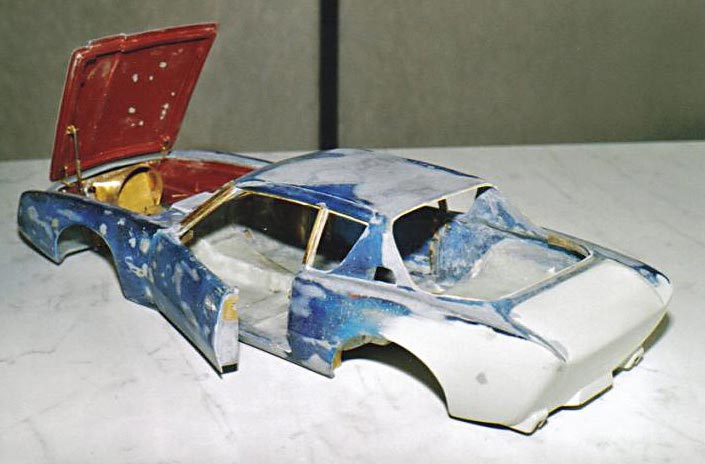
The Avanti body during the upgrade process prior to repainting. So much for a simple freshening up. This was now a major makeover.
Constructing a Brass Frame
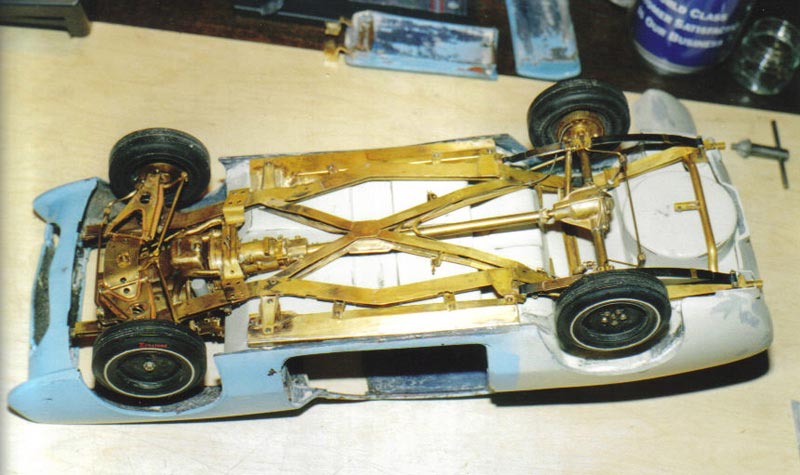
At this time, precision was not Roger’s main concern as he was still thinking in terms of a quick refurbishment of the original model. The frame itself was done with flat brass, mainly 0.4 to 0.5 mm thick. This was cut, bent, and brazed together. Based on the various pictures he had taken, Roger then attached a suspension to the frame. He noted that it took more time to come up with the proper dimensions than to actually build the parts.
When it came time to make the parts, Roger would do a quick sketch using the main dimensions. These sketches were drawn on paper, labelled, and dated. Roger found it interesting to look at these sketches when any given part was finished. All of the sketches were consolidated in a binder.
The frame, rear suspension, rear axle, and front suspension with steering took about one year to complete. For the steering, Roger applied a technique that he had first used on the Tornado for the ball studs.
First, a small ball was brazed onto a shaft. Then, the ball portion of the assembly was put into a brass socket that was slightly deeper than the radius of the ball. Finally, the socket was squeezed on the ball, creating a perfect ball joint. All that was missing was the fitting for the grease gun.
The brass frame was test-fit under the Avanti body, and modified to fit the somewhat oversize rear end.
Finding Tiny Fasteners
All of the elements that are screwed onto the frame of the full-size car are also held by screws on the model (with a few exceptions). The screw diameters that Roger used for the model go from 0.6 mm (mainly for lenses and small parts) to 1.4 mm for the largest ones. Most of the screws up to 0.8 mm were from the watch industry.
During construction of his model, Roger found a supplier in Germany that sold 0.6 mm to 1.2 mm screws and nuts with a hex head. Fortunately, many of the screws that had a round head could be replaced with the hex versions for a more authentic look.
Engine and Transmission
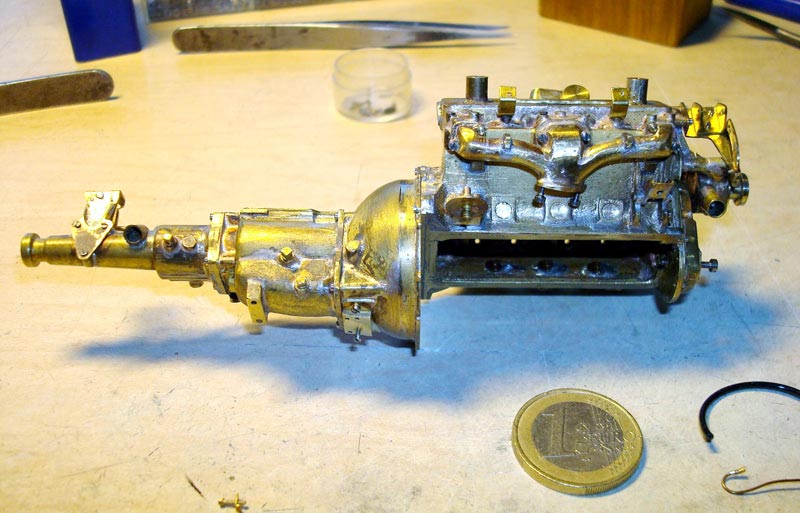
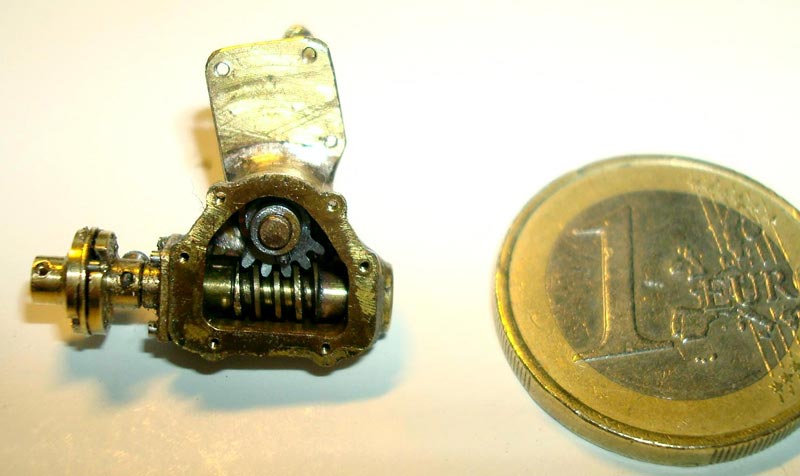
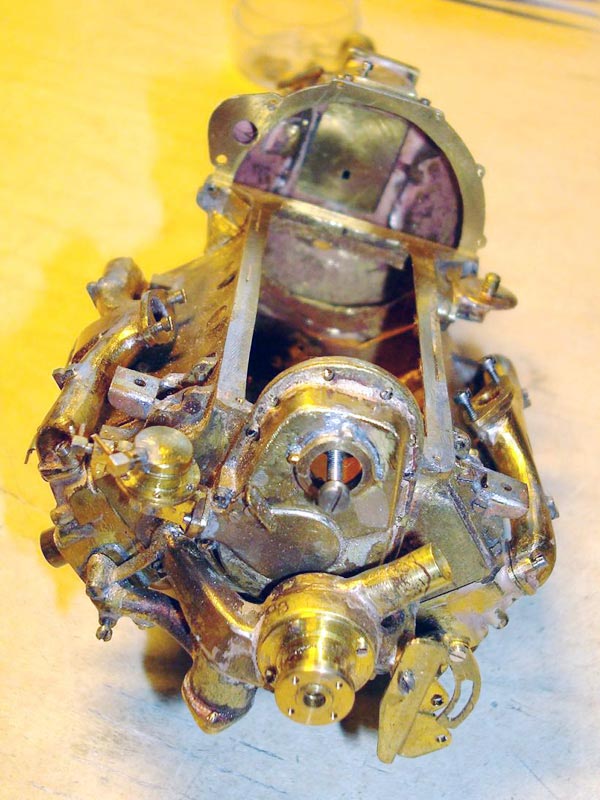
The engine and transmission were also constructed mainly from flat brass, which was cut, formed, milled, and brazed. Roger was fortunate to get the chance to measure an older Studebaker engine from the mid-fifties. With the exception of a few details, the Avanti engine was based on the same block.
Modifying the Body
During this period of construction, the body was mostly untouched with the exception of the floor pan. Once the frame was ready, Roger made a mold using some thin cardboard, and then molded the part in polyester.
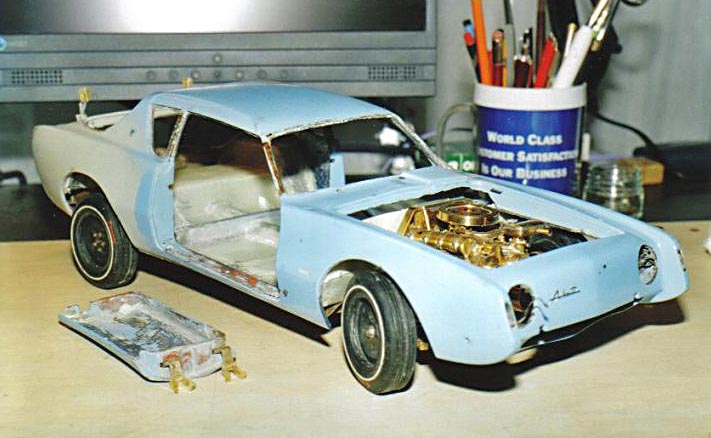
Once the frame was fitted with the drivetrain, Roger couldn’t resist putting the body on it. When that was completed, it was immediately clear that he had more work ahead. For example, the original hood was too thick and too flat. In fact, Roger couldn’t even close it! (Remember, the original model had no engine.)
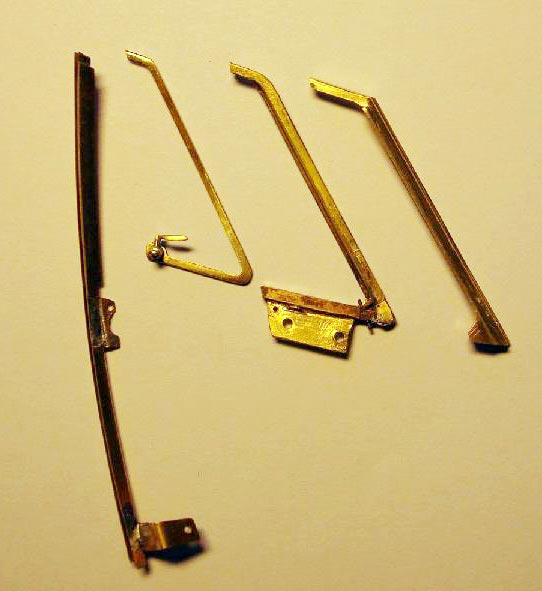
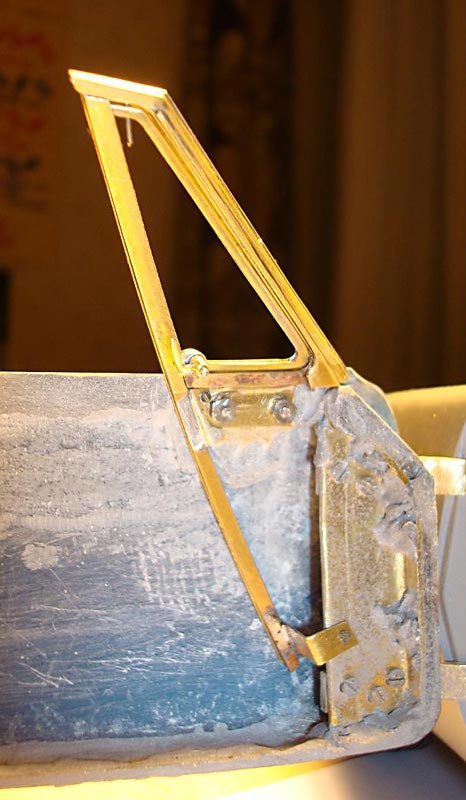
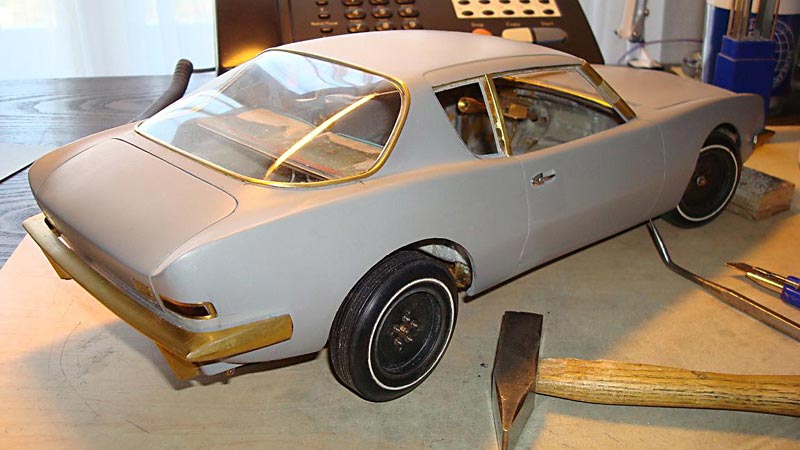
After modifying the rear of the body, Roger needed to make a new hood and front panel, too. Additionally, Roger also noticed that the windshield was too “fast” (angled back), so he would need to make new A and B pillars. These were made from brass, as polyester is too brittle for such elements. Roger also saw that the doors weren’t the same length—there was about 3 mm difference. He thought to himself, “What was I thinking when I made the model in 1963-64?”
The windshield frame, window vent wing, and track mechanism were all made from brass. The curved side glass of the Avanti was a new innovation in automotive design that would quickly become common in most cars. It likely added to the difficulty of making the model window, and getting it to seal.
With Notoriety Came Added Pressure to Improve
In mid-2006, Roger began to post photos of his project in a French automotive forum on US cars. Suddenly, the photos started to gain viewers, and comments were flowing in. This development only had a positive effect on the quality of his work, as Roger could hardly cut corners now.
Roger now had to surpass his own achievements by improving the fine details even more. Once the A and B pillars were finished, it was time to work further toward the front of the body.
The front panel was cut away, and a new polyester part was made. Next came the hood with hinges and a lock. The hood release works from inside the car just like the original. When the body shell was ready, it was time to think about the seats.
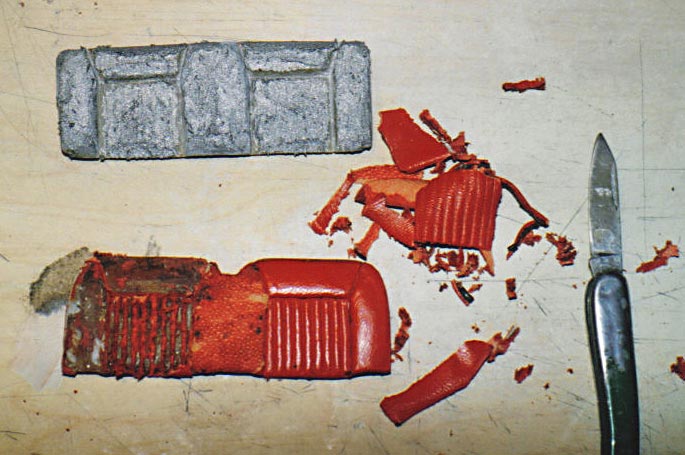
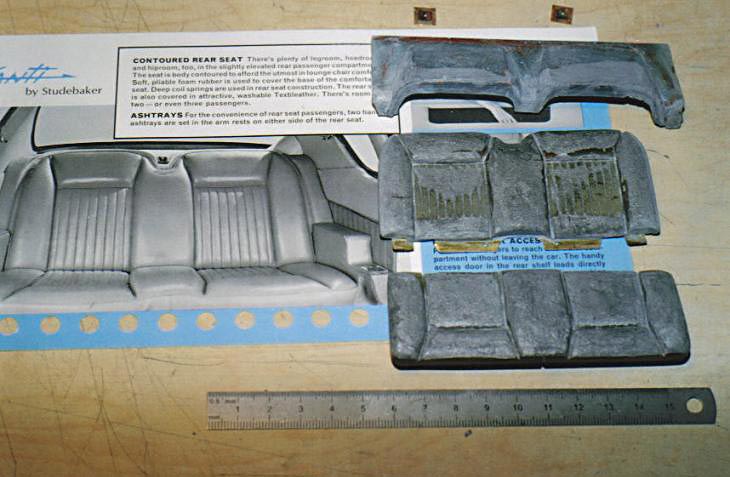
The seats from the original model were far from perfect, and they were also too flat. Roger decided that he could rescue the basic forms by peeling off the old leather and modifying them with Bondo.
Finding the Right Materials for the Interior
As it turned out, the quest for leather was not an easy one. Roger knew from the start that it would be impossible to find the right color of turquoise. He still had white leather from the Tornado project, and had purchased some blue leather in a store. Unfortunately, the blue leather was much too thick. However, almost by accident Roger noticed that he could peel the back off the leather, and keep only the smooth outer surface. That would leave a thickness of about 0.2 mm, which was perfect for Roger’s fix.
Now, Roger had baby blue and white leather, but neither were the right tone for an Avanti. Fortunately, when reading various Avanti magazine issues, Roger saw that Studebaker International was selling spray cans of the correct tone. So Roger ordered a can of each—fawn and turquoise.
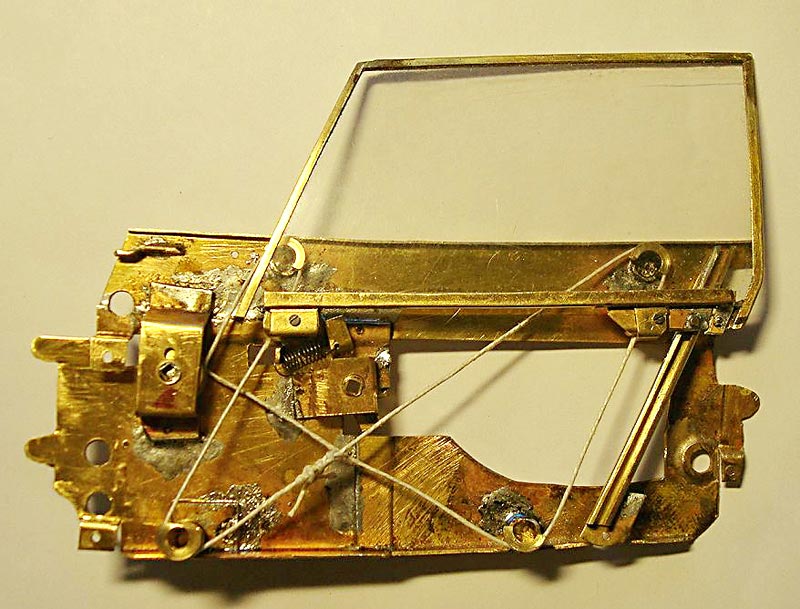
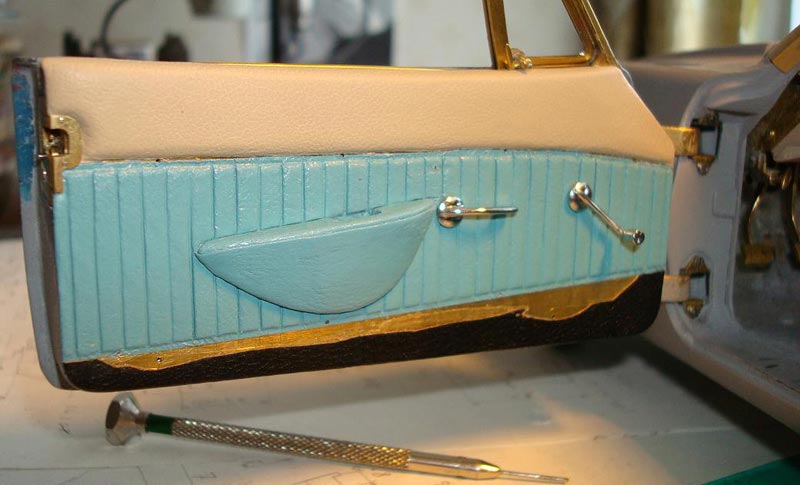
After the seats were completed, Roger turned his attention to the side windows, door trim, and window rolling mechanism. (Yes, the window cranks actually work!) With the exception of the inside and outside door handles, all of the interior parts had to be remade.
Roger started assembling the parts to be chromed on a tree, as it was impractical to chrome each part individually. Not to mention, about half of the parts would probably never have come back from the chromer! In the end, Roger had three trees with gloss chrome, and one with matte chrome for the exhaust tubes and other parts that he didnt want to paint silver.
The interior of the Avanti door is shown with the panel removed to reveal the window lift mechanism. Turning the window crank actually raises and lowers the glass.
Final Painting and Assembly
Near the end of 2008, Roger began to paint all of the elements that were ready. This included the frame, suspension, engine, and so on. Then came the final assembly with all of the shiny painted parts and some of the chrome parts.
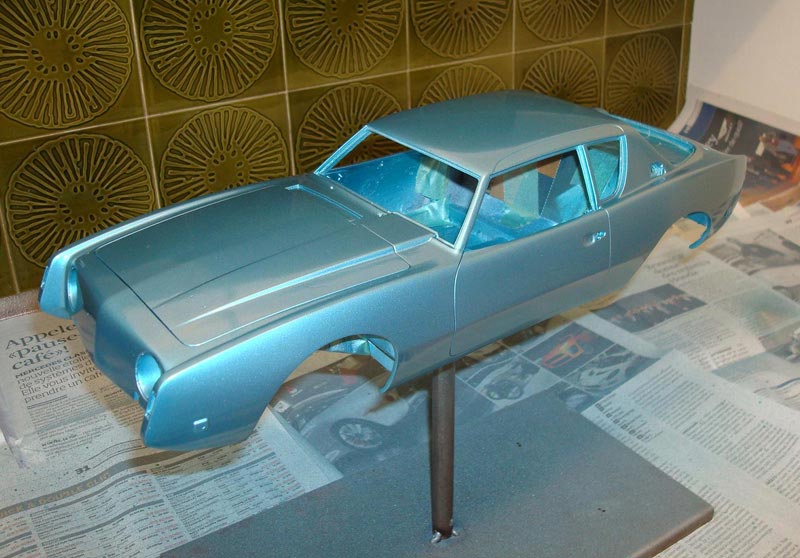
In May 2009 came the great moment when Roger could finally paint the body. The year before, he had found a Volvo paint color that was very true to the original Avanti turquoise. After spraying, Roger let the paint dry for some time, and then sanded and lightly polished it. Of course, the result is never 100% satisfying, especially when using the kitchen as a spray booth.
Nevertheless, Roger found the results acceptable, and noted that the small imperfections are only visible with your nose right up next to the body. The final assembly went without too much trouble.
Contrary to his original plan, Roger couldn’t install the clear covers over the headlights at first. The 0.6 mm screws were just a tad too short. Without the paint, he could barely insert the covers, and the additional thickness of the coat prevented it entirely.
New Wheels and Wheel Covers
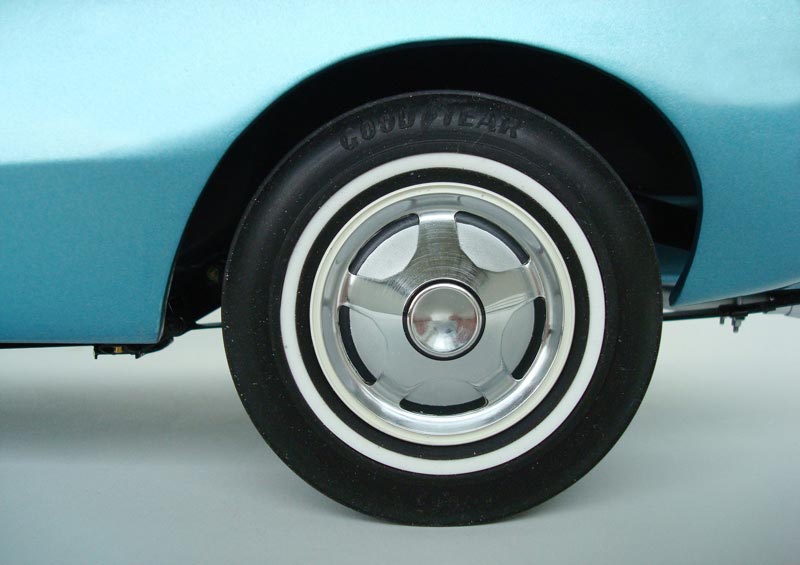
Once the car was ready, Roger found that he was now totally displeased with the tires and wheels. He decided to make brand new ones. Fortunately, the wheels were not so complicated to make, it just took a lot of time because his lathe is a little smaller. Once the five wheels were ready, Roger could begin making the unique Avanti 5-spoke wheel covers. For a long time he had no idea how he would go about building them.
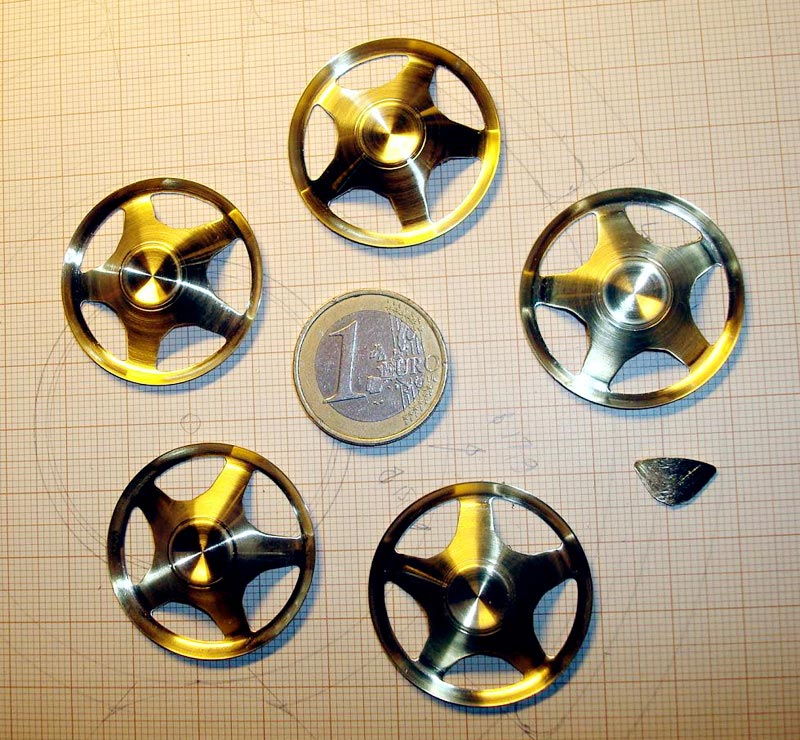
The greatest difficulty was making the five recessed surfaces. Roger decided to press a brass sheet between two forms that he turned on the lathe. He then filed out the areas of the five recessed surfaces, and soft soldered a second cover from behind. The outside diameter of this was used to clamp the wheel covers onto the rim.
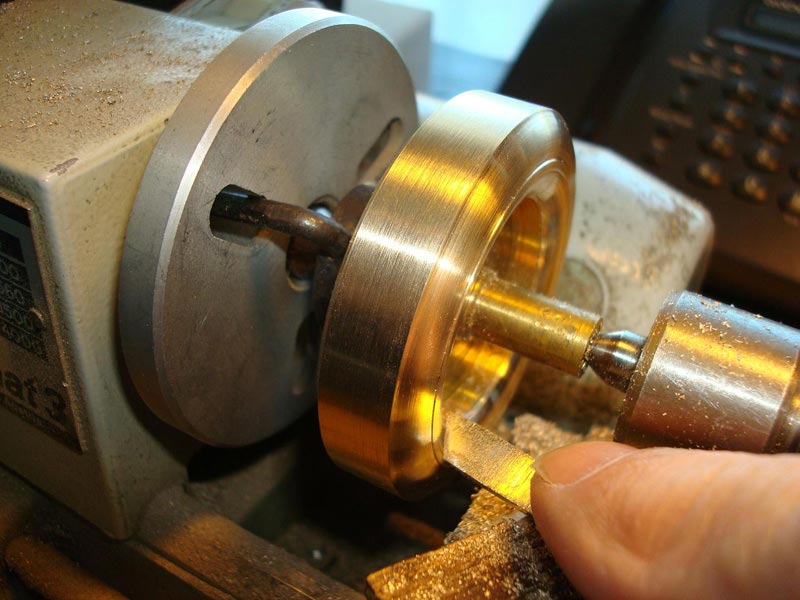
After turning the basic shape of the master for his tire mold on the lathe, the brass was then driven by a faceplate and drive dog. The shape of the tire was turned, and then the curved sides were carefully hand shaped using a graver on a rest—as a watchmaker would do.
Whitewall Tires—the Final Step
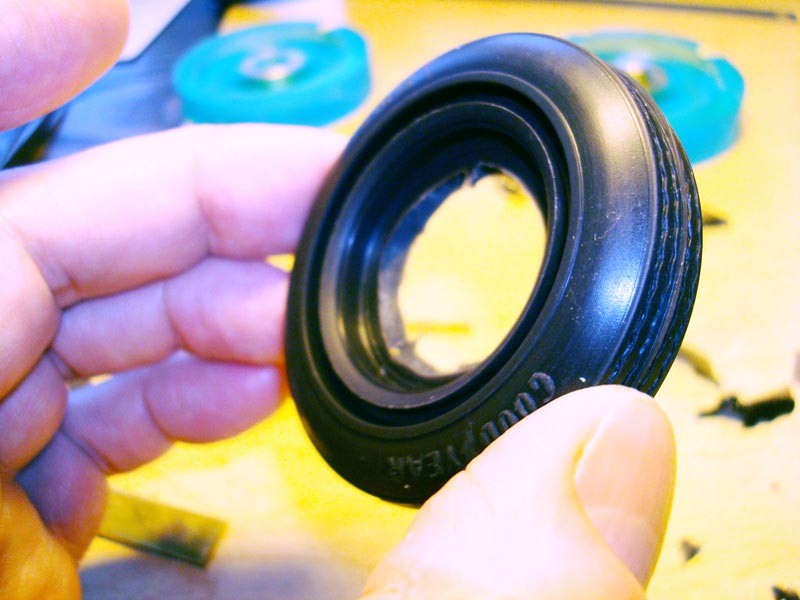
Next, it was time for Roger to make the tires. As with the Tornado, he followed the method described in the book, The Complete Car Modeller by Gerald A. Wingrove (with a few changes). Roger had purchased the book in 1978 at the Harrah’s museum shop in Reno, NV. The products he had when he built the Tornado were no longer available, so Roger had to search for new ones.
After much trial and error, Roger managed to make five quality tires with whitewall. The whitewall was a separate piece inserted into a groove in the black tire. The assembled wheels, tires, and wheel covers were a great improvement to the model compared with the old tires. Roger said that he doesn’t regret the time spent on them and the model as a whole.
Making the wheel covers. Like the original stainless steel Avanti wheel covers, these consist of a polished 5-spoke pattern, and a matte area to represent the holes between the spokes.
What’s Next for Mr. Zimmermann?
When asked what he had in store for the future, Roger said, “Building this model was a great adventure, and usually when the travel is at the end, the most often asked question is typically, ‘What’s next?’ The response is clear, ‘ANOTHER ONE!’ This time, it will be another unusual car: a ’56/57 Lincoln Continental Mark II. In about ten more years it should be ready.”
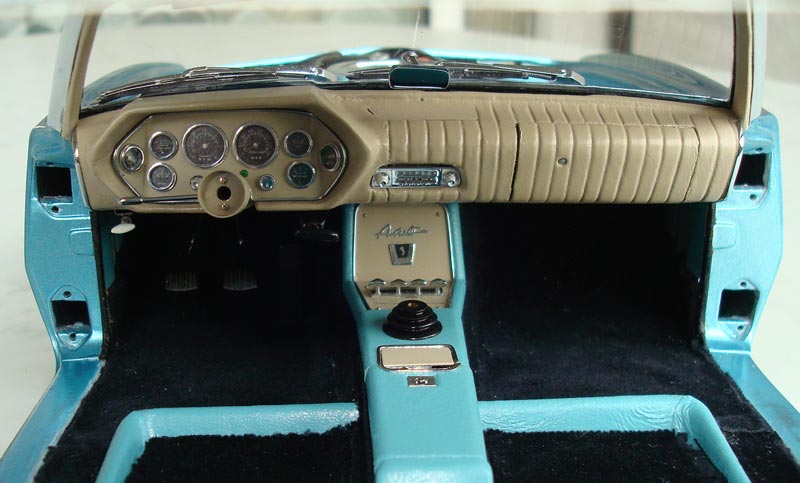
The instrument panel shows the compliment of black Stewart-Warner gauges that were lit in red at night. It features a clock, speedometer, tachometer, and gauges for the oil pressure, water temperature, voltage, and amperage. A vacuum pressure gauge, or “boost gauge,” was also included on Roger’s supercharged version.
Articles on Roger’s Avanti Model
Read an article on Roger’s model published in Avanti magazine, Issue 149, winter/spring 2010.
Additionally, Avanti magazine also wrote a concluding article on the series in issue 150, spring/summer 2010.
View more photos of Roger Zimmermann’s beautiful scale model cars.

