Below you can view more photos of Paul Hamler’s miniature tools and guns. Click on images to enlarge.
Miniature Woodworking Tools
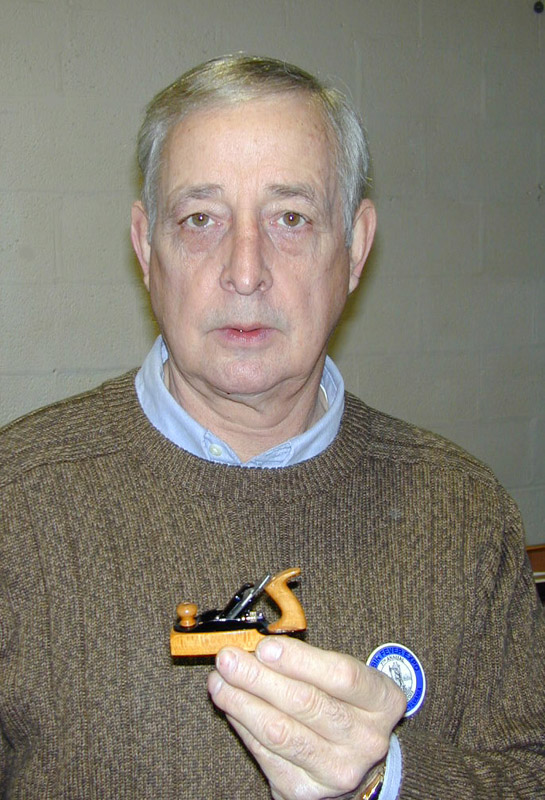
Paul Hamler With a Miniature Woodworking Tool
Paul displaying one of his miniature tools at the 2003 Cabin Fever show in York, PA.
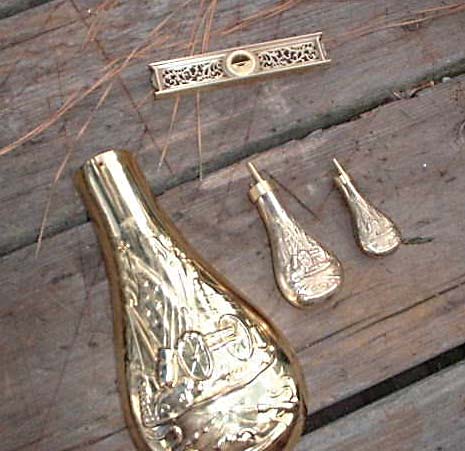
Powder Flasks
Powder flasks in various sizes sit next to Paul’s tiny Davis level.
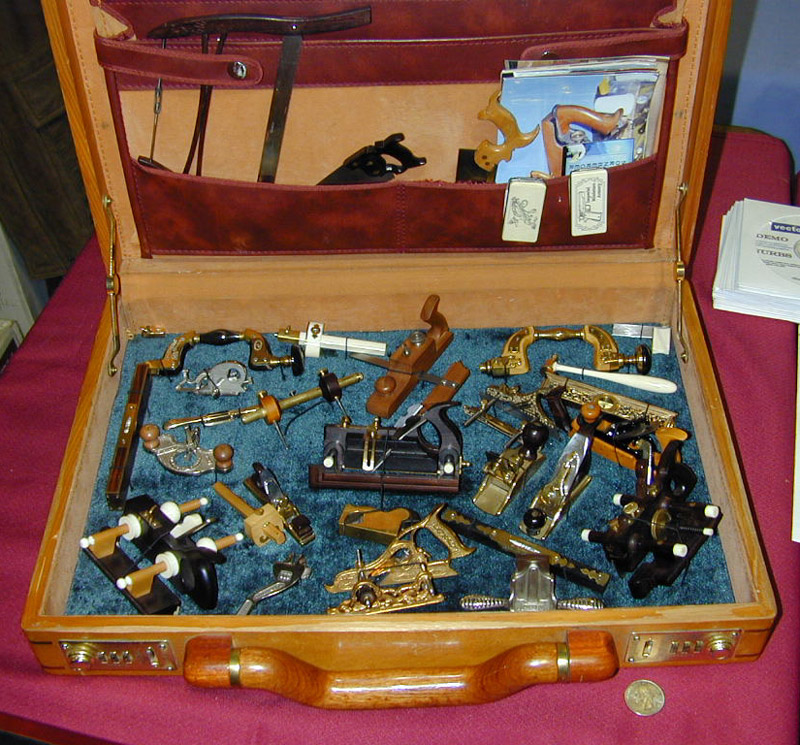
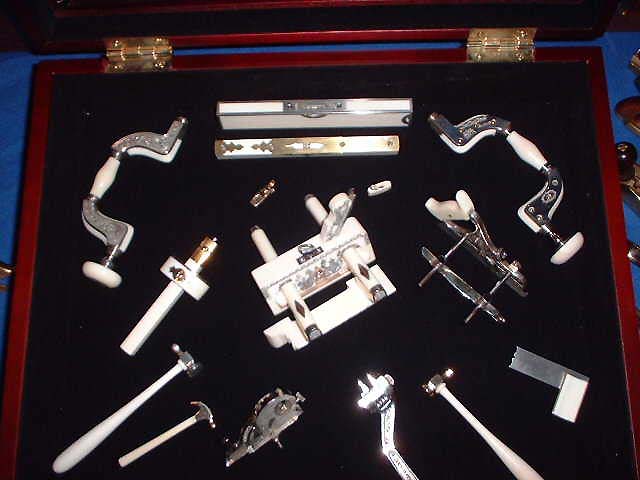
Paul’s Briefcase of Miniatures
Another picture of Paul’s briefcase from the Cabin Fever show (2003). Note the saws tucked into the flap on the lid of the case.
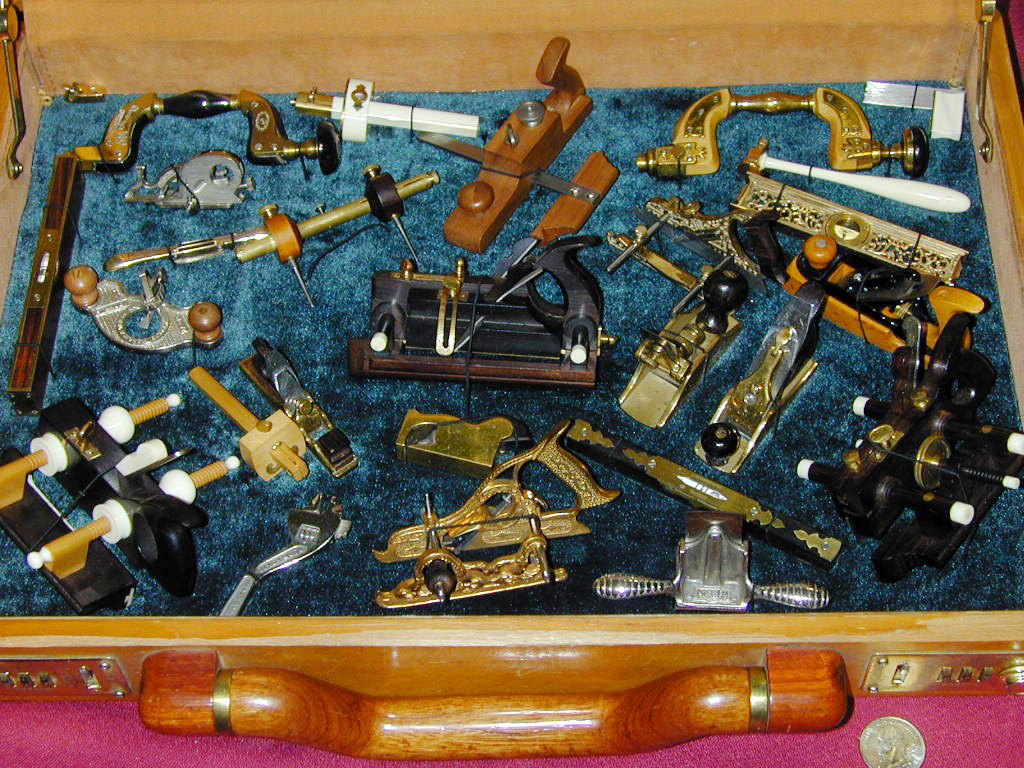
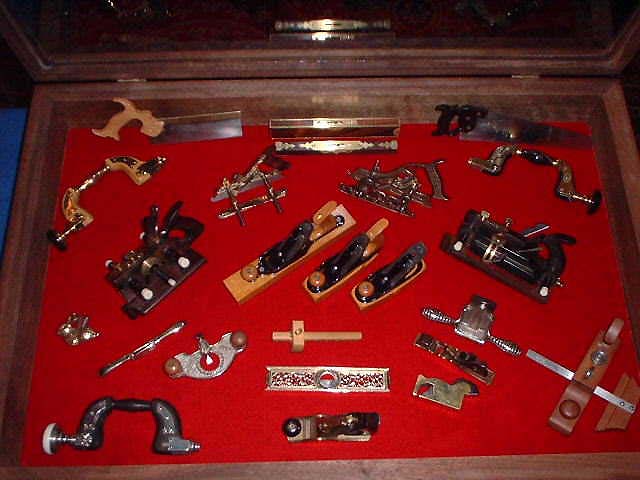
Paul’s Briefcase of Miniatures
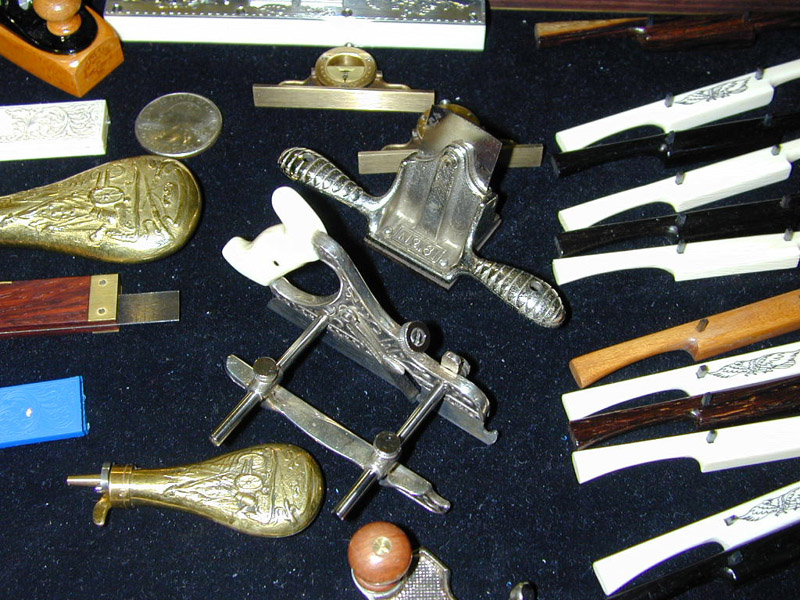
Various Miniatures
A separate glass-covered display case houses some of Paul’s spokeshaves, powder horns, and an ornate slotting plane.
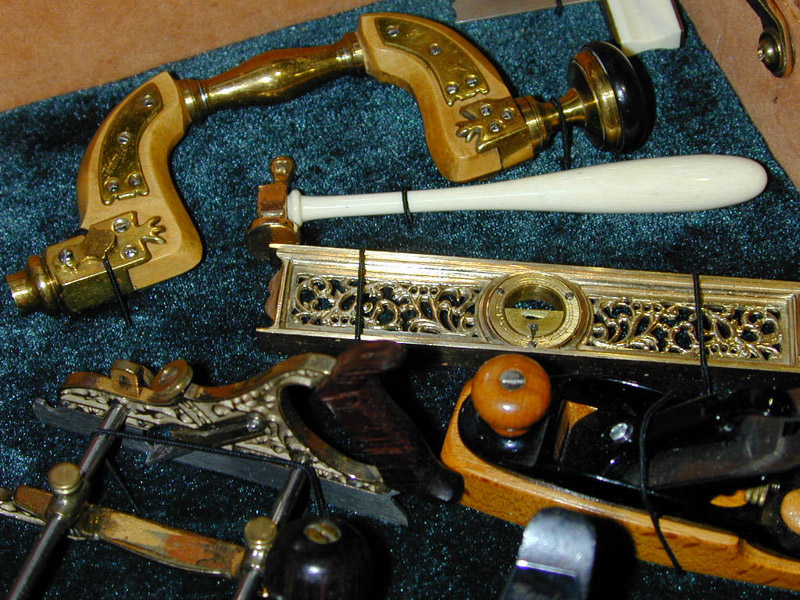
Paul’s Tools
A few of Paul’s tools sit in his case.
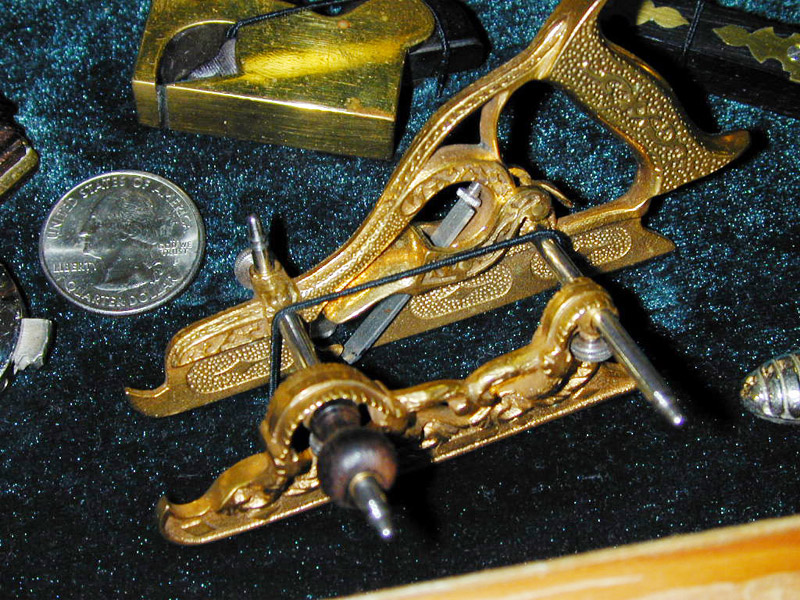
Charles G. Miller Patent Plane
This finely detailed plane was photographed in a display box at the Cabin Fever show, with a quarter for scale reference.
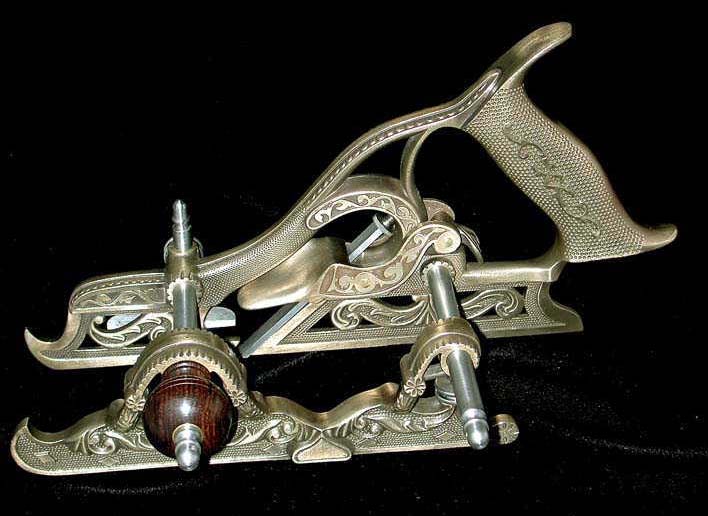
Full-Size Miller Patent Plane
This is a photo of the original full-size Miller Patent plane for comparison. Considering its size, Paul’s model captures an amazing amount of the original’s fine detail.
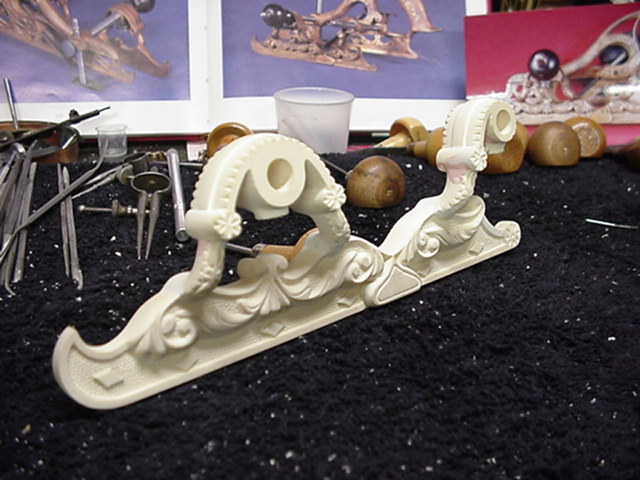
Miller Patent Plane Casting
A pattern master for casting the brass fence for the Miller plane.
Miniature Plane
A plane made from brass and dark hardwood sits among tools in Paul’s case.
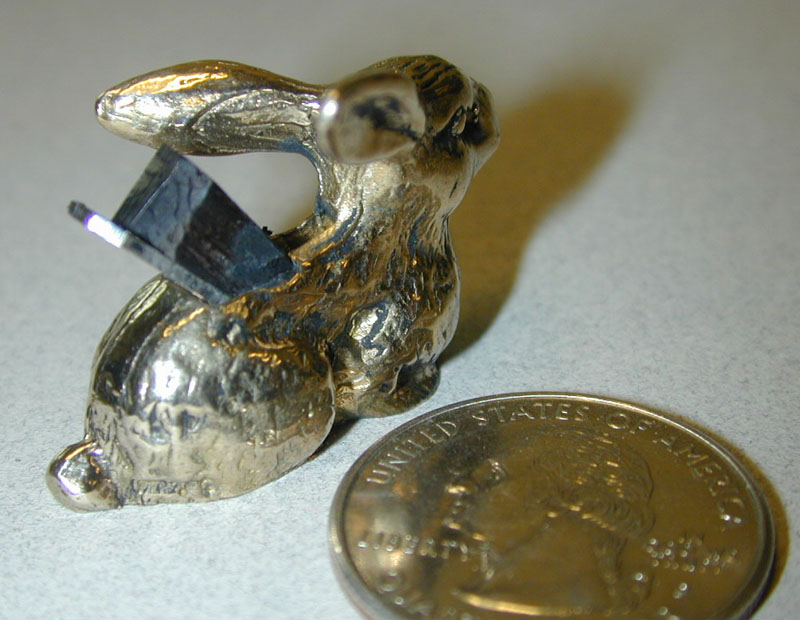
The Original Rabbit Plane
With tongue firmly in cheek, Paul presented the Joe Martin Foundation with one of his fun pieces, which he calls, “the Original Rabbit Plane.” The model is actually a tiny functional plane, and while it may not be very ergonomic, it is certainly charming. A quarter gives reference to the small size.
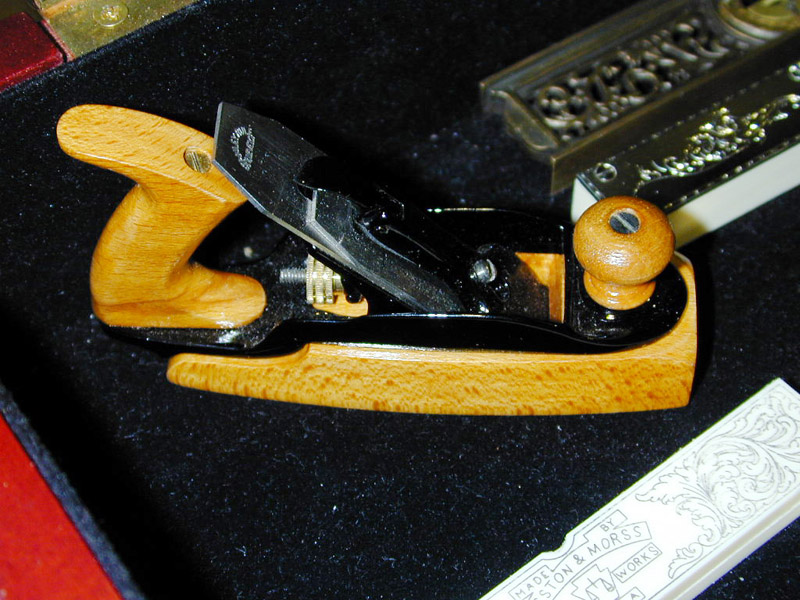
Wooden Block Plane
Various Miniature Tools
Some of Paul’s past projects.
Various Miniature Tools
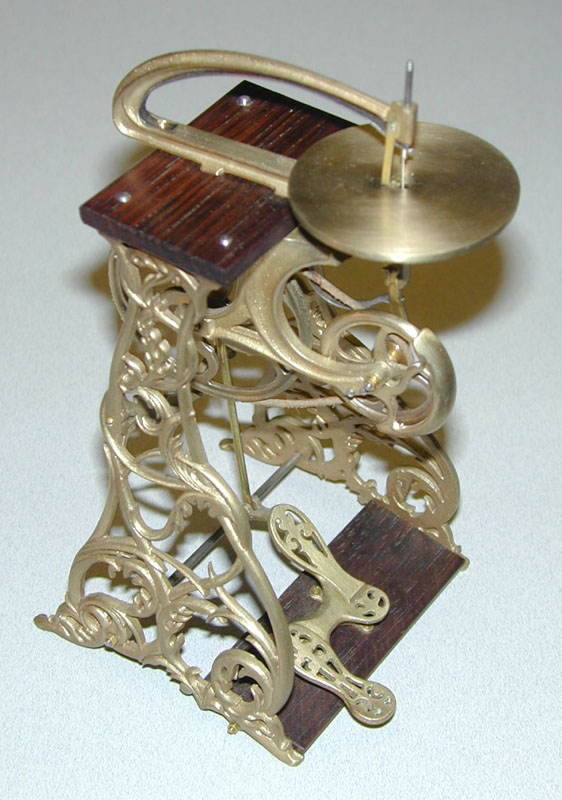
Fleetwood Treadle Saw
Another treadle scroll saw by Fleetwood of Wilmington, DE, from around 1884. This model was also made at a scale of 7.5:1.
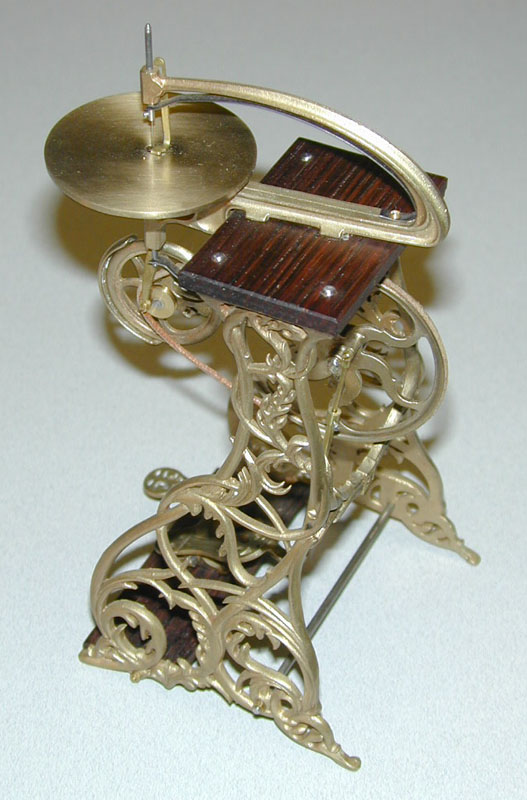
Fleetwood Treadle Saw
Note the fine casting detail, this time left in natural brass and wood.
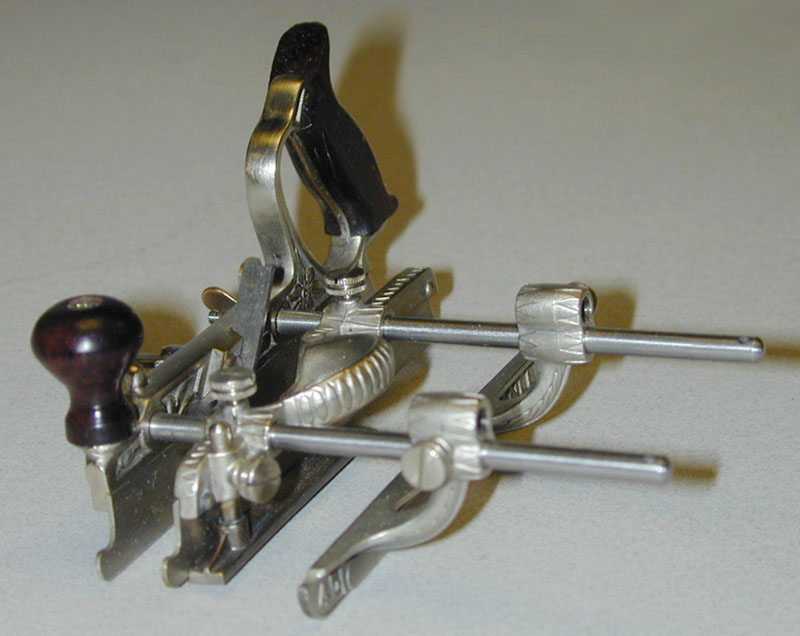
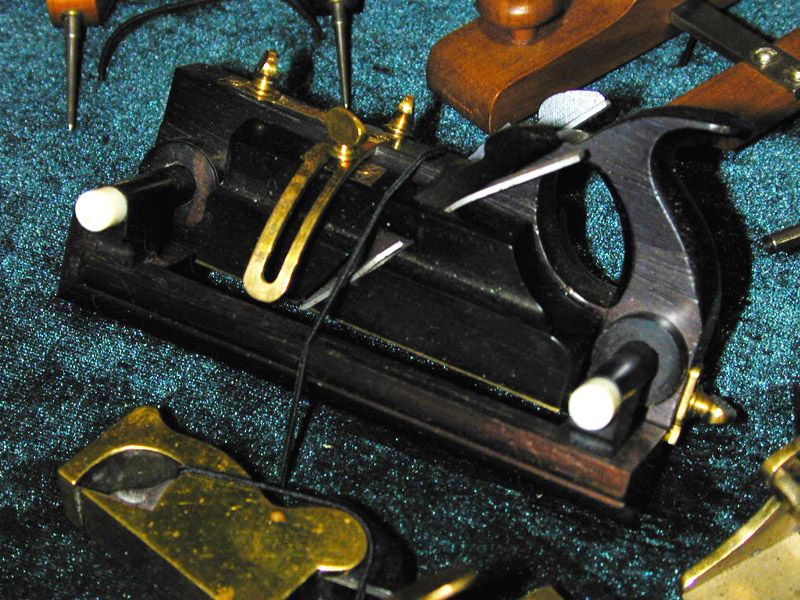
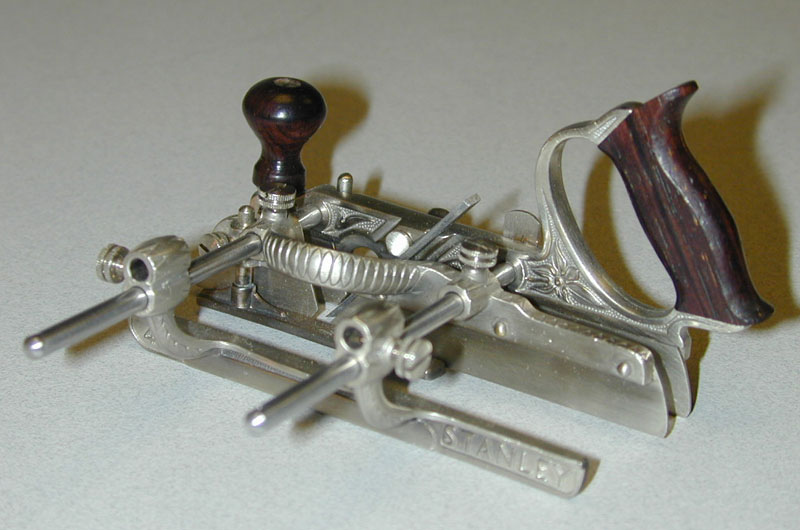
Stanley Type 4 Multi-Plane
This angled view of the multi-plane shows it as it would have been seen in catalogs of its era. In those days, a good craftsman expected their tools to last a lifetime. The care put into these tools, and their ornate decoration, reflects the importance a craftsman places on the quality of their tools and work.
Stanley Type 4 Multi-Plane
This model was made in 1/3 scale, and captures all the fine details of the original.
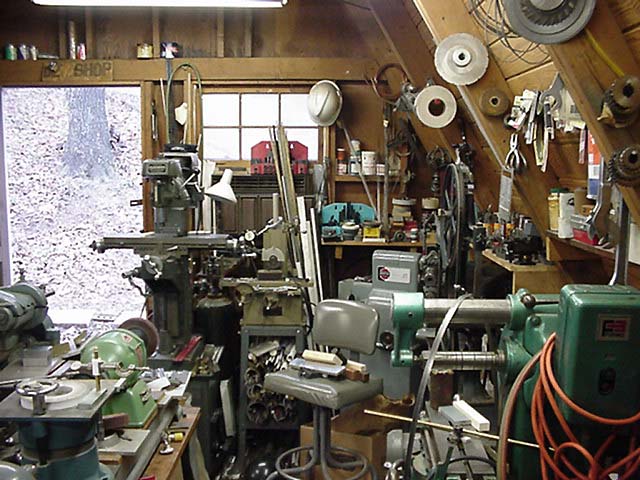
Paul’s Old Workshop
Another look inside Paul’s old workshop.
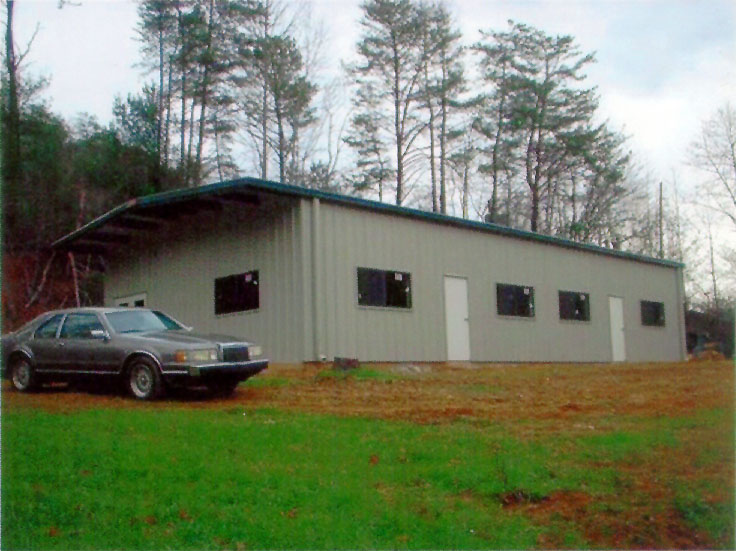
Paul’s New Workshop
Pictured here is Paul’s new 1800 square-foot workshop.
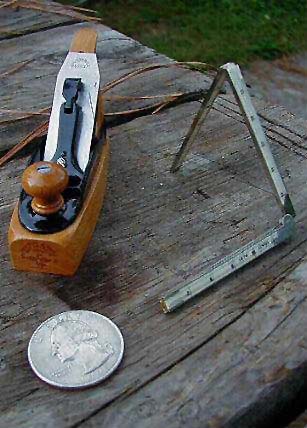
Miniature Plane
A folding ruler is placed next to one of Paul’s planes.
Miniature Kentucky Long Rifles
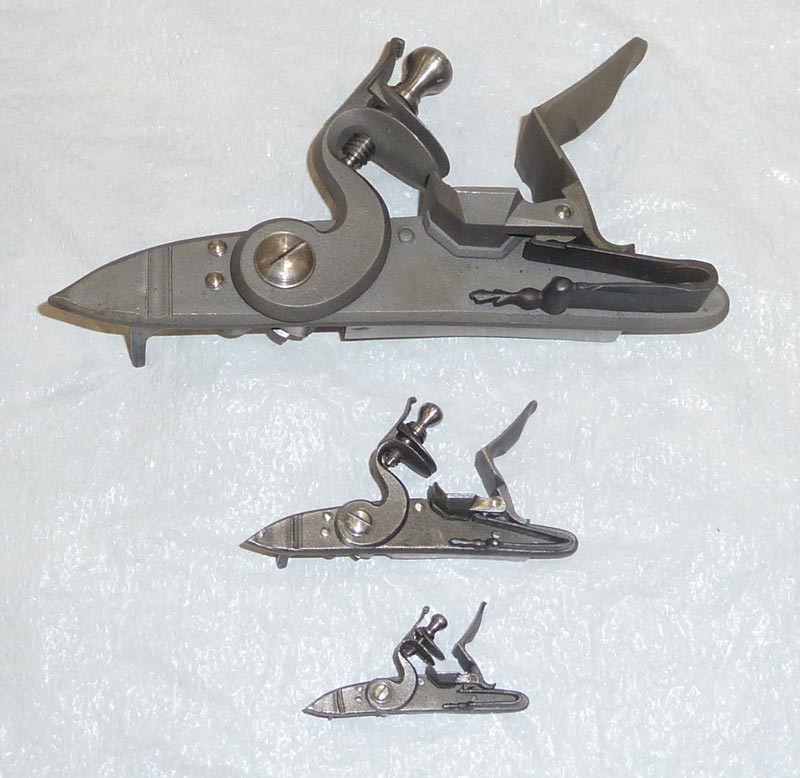
Long Rifle Firing Mechanism
In this photo, the firing mechanism for the rifle is seen at full-size, 1/2 size, and 1/3 size. This image dramatically illustrates how much smaller 1/3 scale really is—even when compared to 1/2 scale. While this increases the challenge of making small parts, 1/3 scale yields a final product that is small enough to be considered “miniature,” while also exhibiting all the details and function of the original.
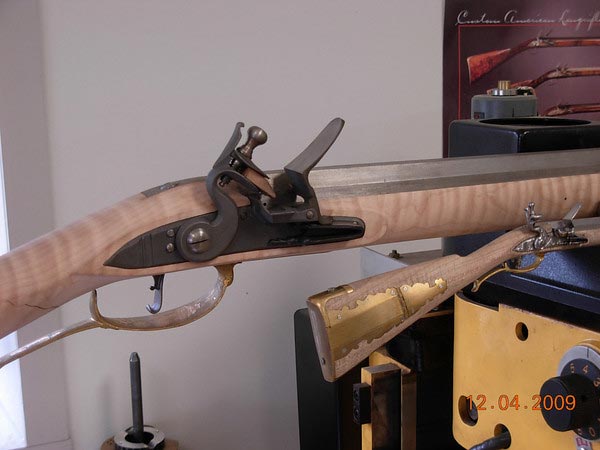
Long Rifle Progress
Checking the fit of the flintlock on a partially completed stock.
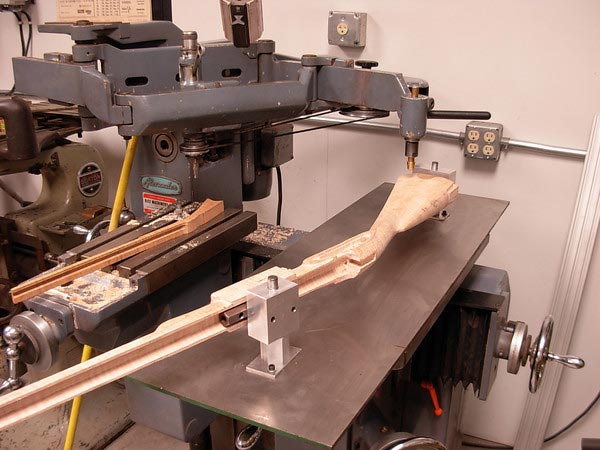
Machining the Stock
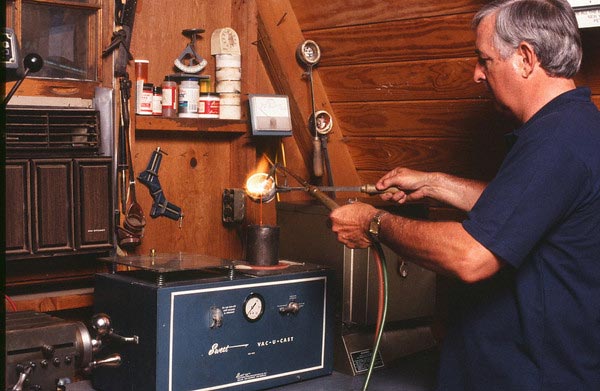
Paul Casting Parts
Paul pours raw metal to cast some parts.
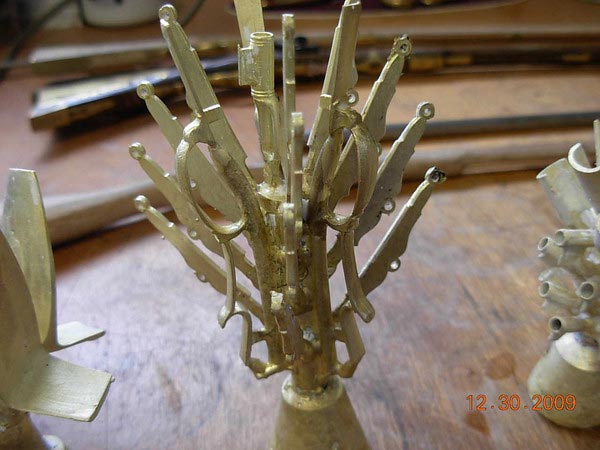
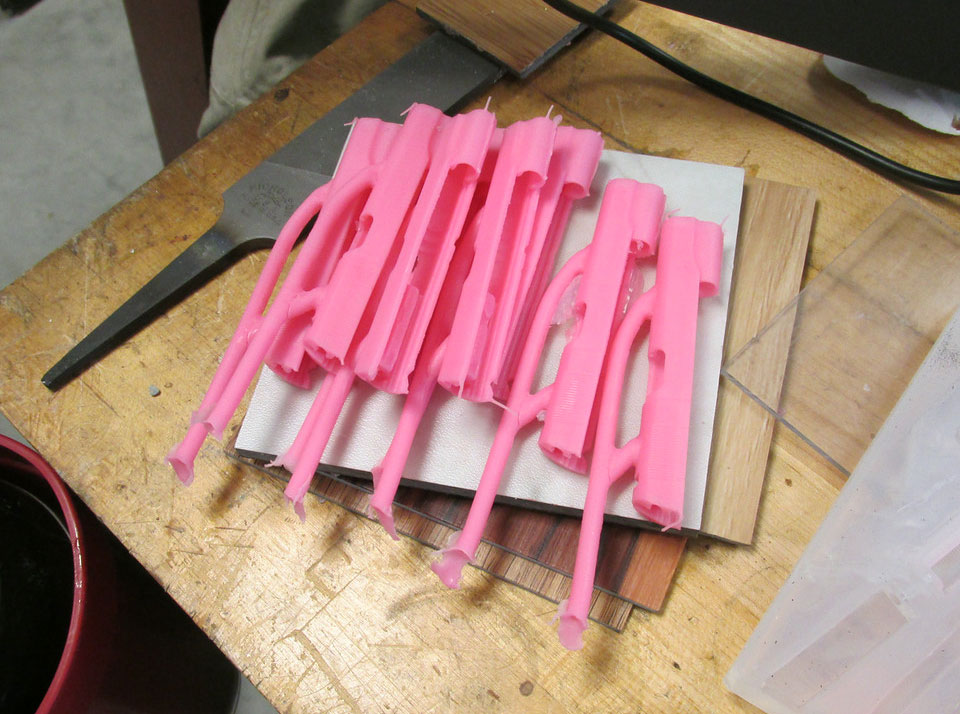
Brass Parts
A “tree” of brass parts ready for trimming.
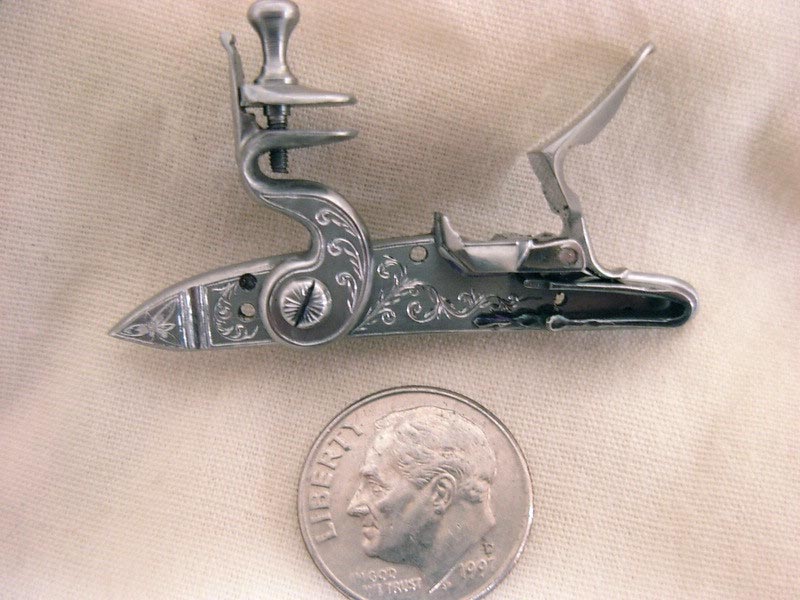
Flintlock Firing Mechanism
The flintlock mechanism with engraving. Note the dime for size reference.
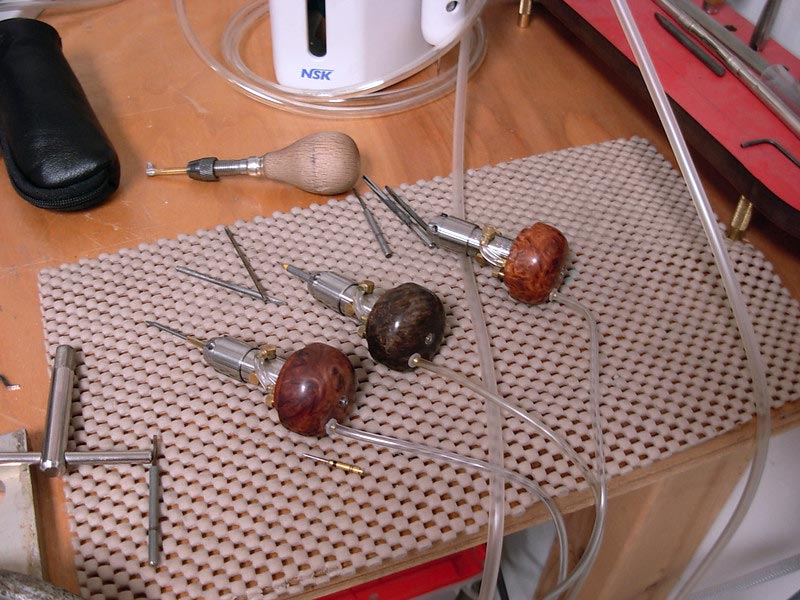
Pneumatic Engraving Tools
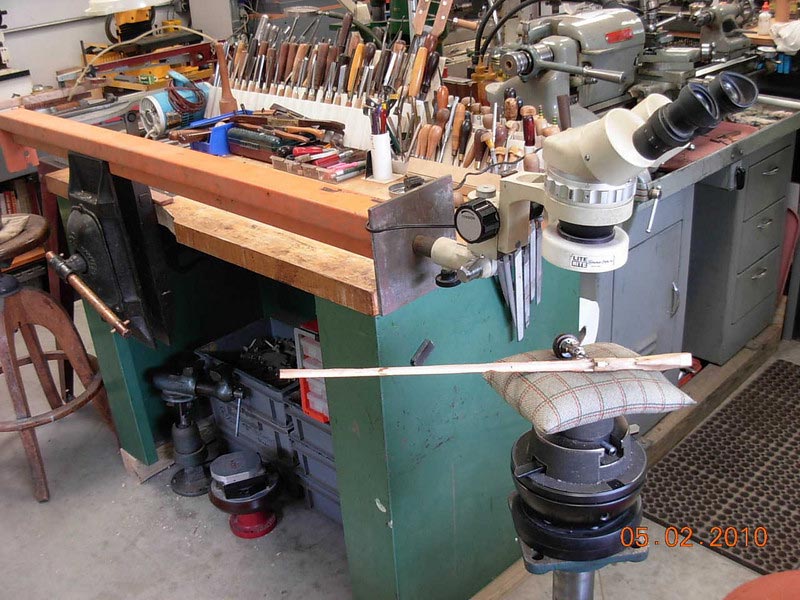
Hand Tools
Paul uses a large selection of hand tools for carving and engraving.
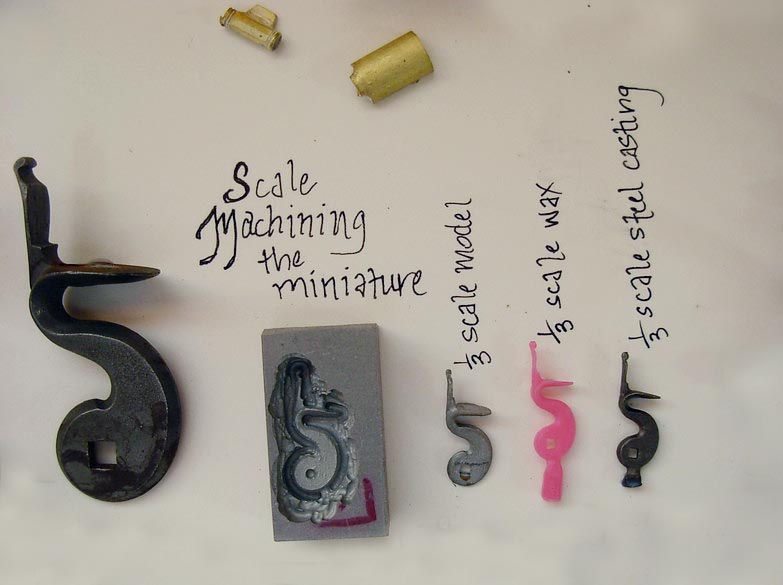
Casting Process
The molding and casting process shows the full-size part, the scaled down mold, a model of the part, a wax of the model, and the final cast piece.
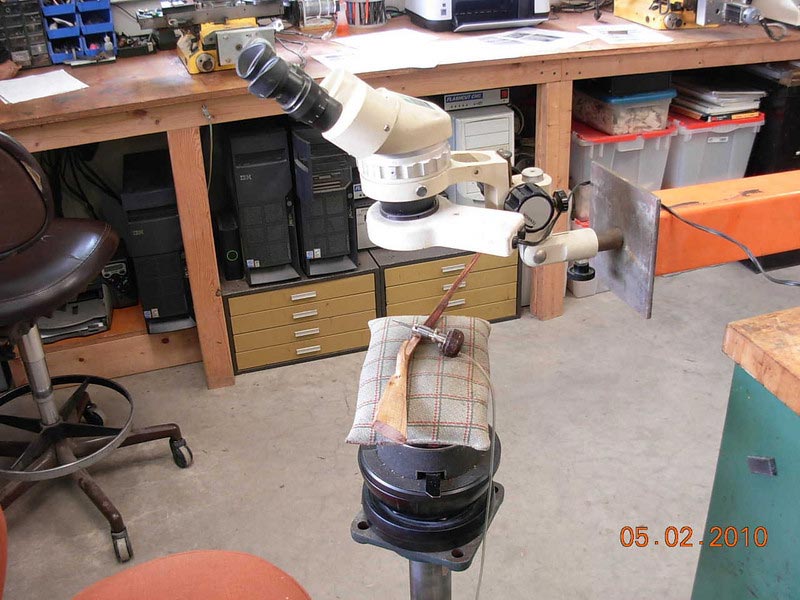
Engraving Setup
The setup for engraving includes a stereo microscope. This makes it possible to see the fine detail when using a pneumatic engraving tool.
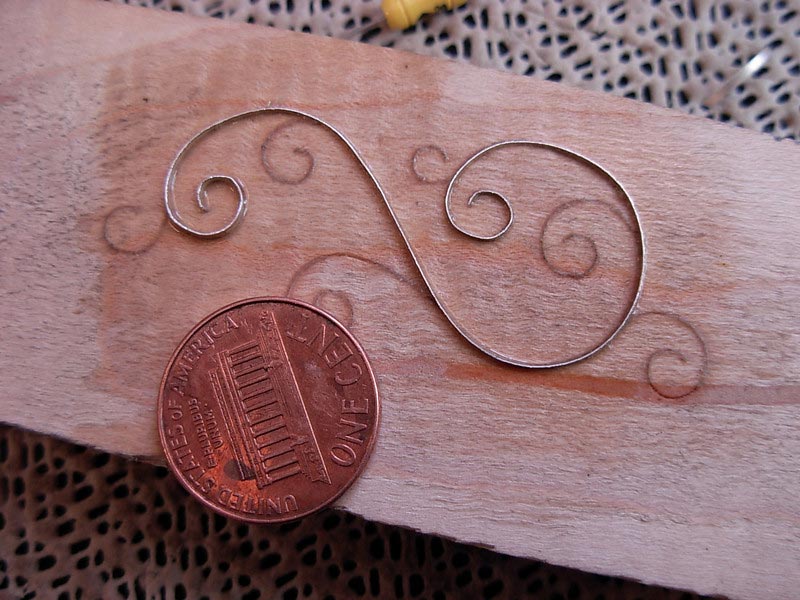
Silver Inlay
A silver piece formed over a pattern, before it was inlaid.

Silver Inlay
The silver inlay is pressed into a slot carved into the final workpiece.
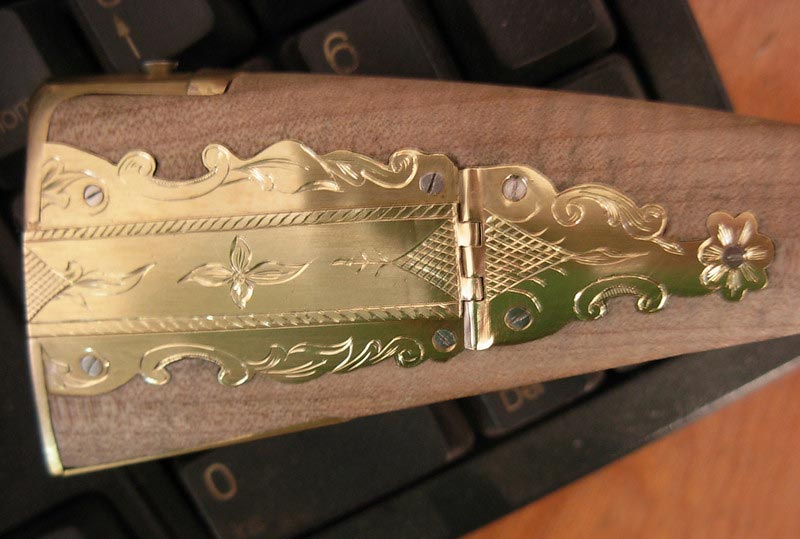
Patchbox Cover
The engraved patchbox cover in place on the stock.
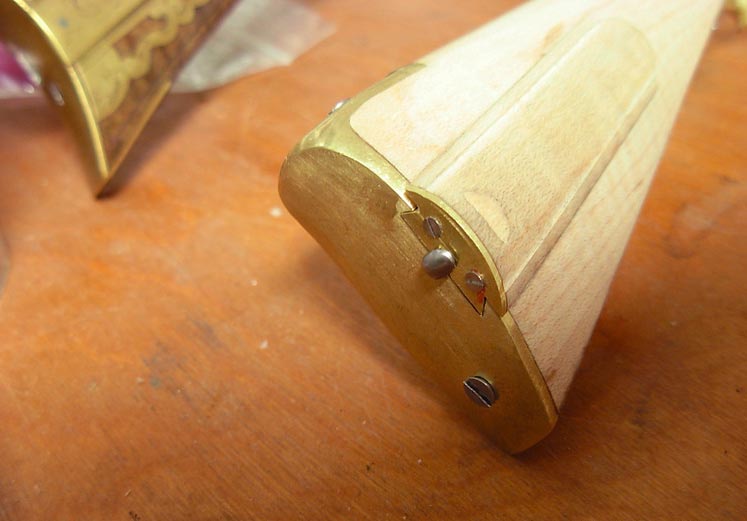
Brass Butt Plate
A brass butt plate installed on an unfinished stock.
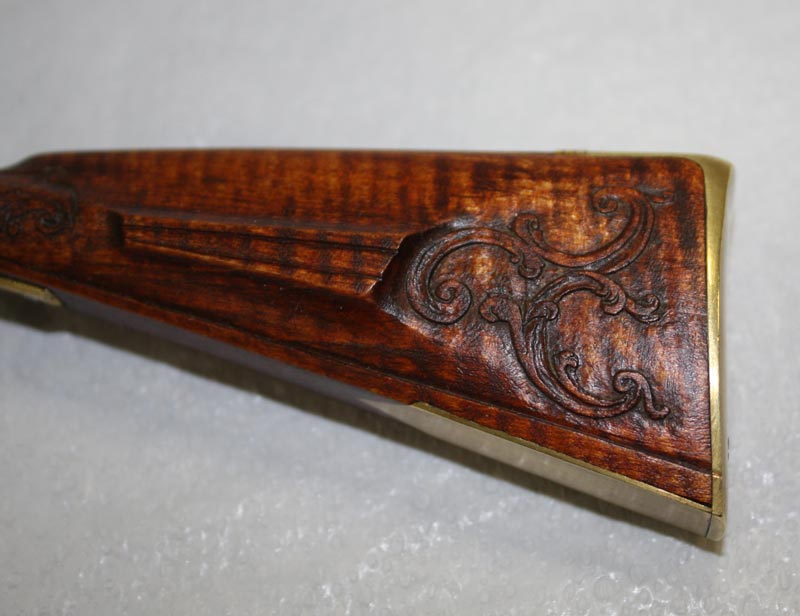
Long Rifle Stock
A closer look at some of Paul’s stock carving.
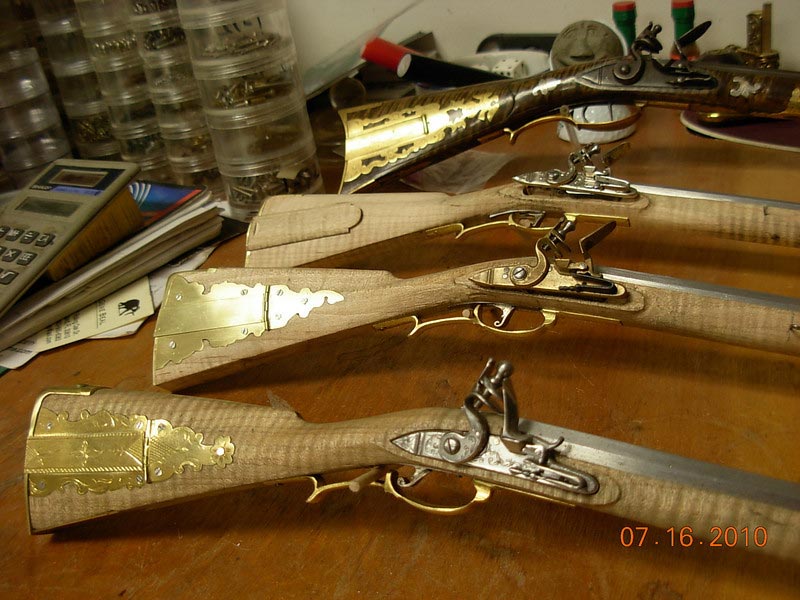
Finishing the Long Rifles
Several models are shown in various states of finish. All that’s left is to stain and finish the stock.
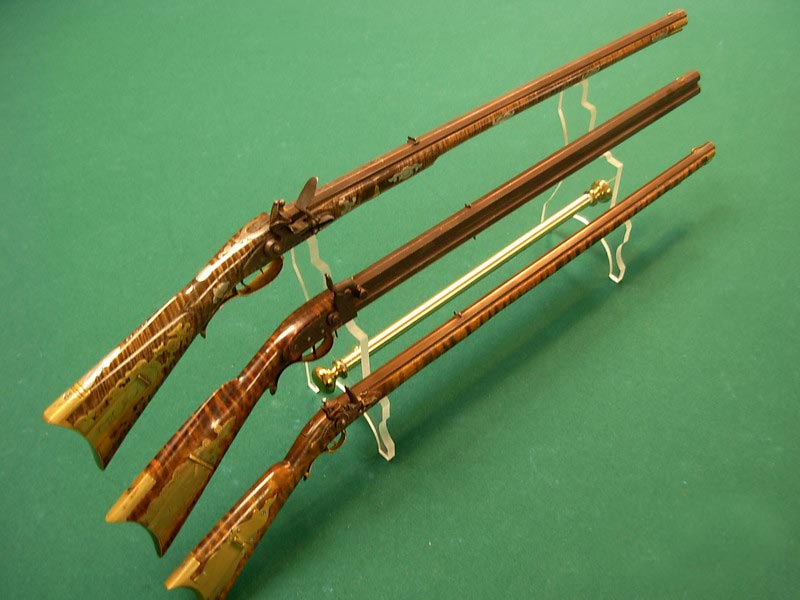
Kentucky Long Rifles
Three finished miniature Kentucky long rifles on display.
Miniature Colt M1911 Pistols
Lost-Wax Process
Once a master pattern for each part is made, the molds for wax casting are created. The pink wax seen here has the sprues attached. (A sprue is the pathway for metal to flow into the mold.) The wax is then encased in a plaster mix. After the plaster dries, the wax is heated up and flows out—leaving a detailed cavity. The cavity is then filled with molten metal.
Lost-Wax Process
Once everything cools down, the plaster cast is broken, leaving the metal part. This is called the lost-wax process. While it may be slow, it produces very detailed, high quality parts. This photo shows some of the wax parts compared to their full-size counterparts.
Wax Parts
Cast Metal Parts
The cast parts are still attached to their sprues.
Assembled Colt M1911 Pistol
A fully assembled scale pistol with grip.
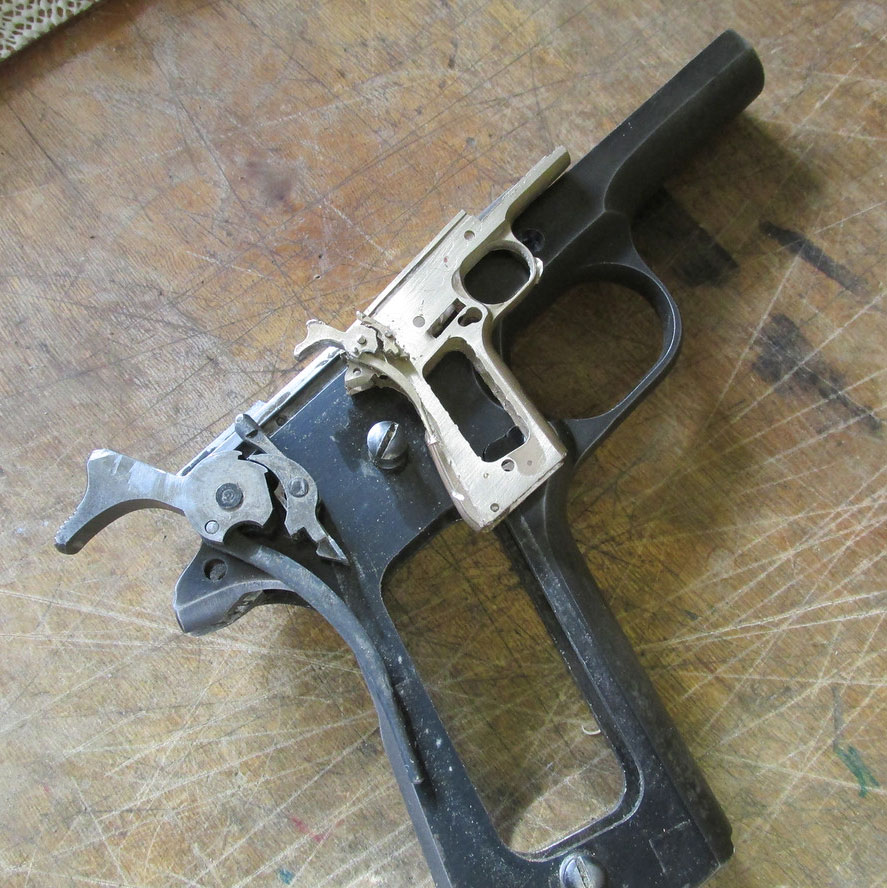
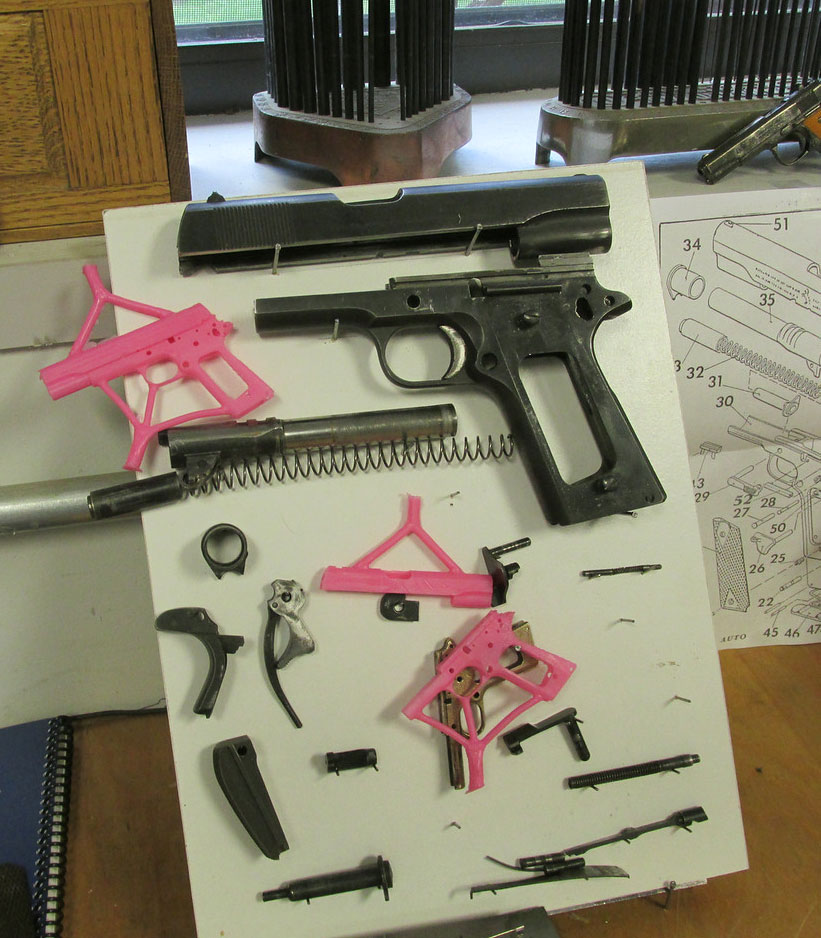
Colt 1911 Frames
The full-size original frame (black) sits below Paul’s 1/3 scale cast frame.
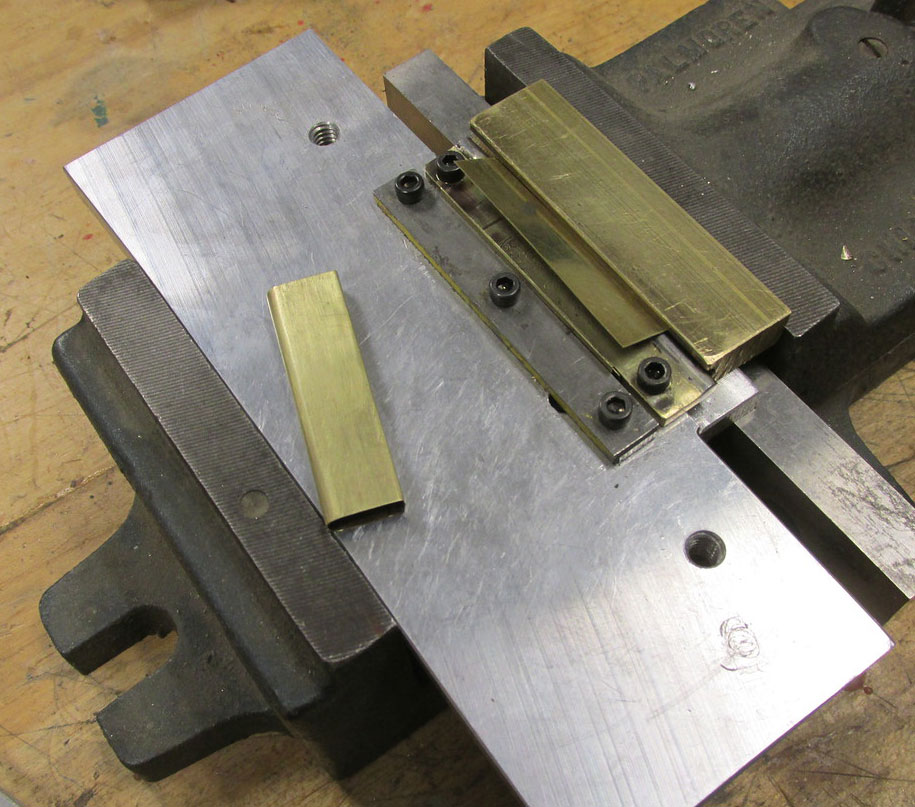
Colt Magazine
The first step in making the magazine is to bend sheet brass.
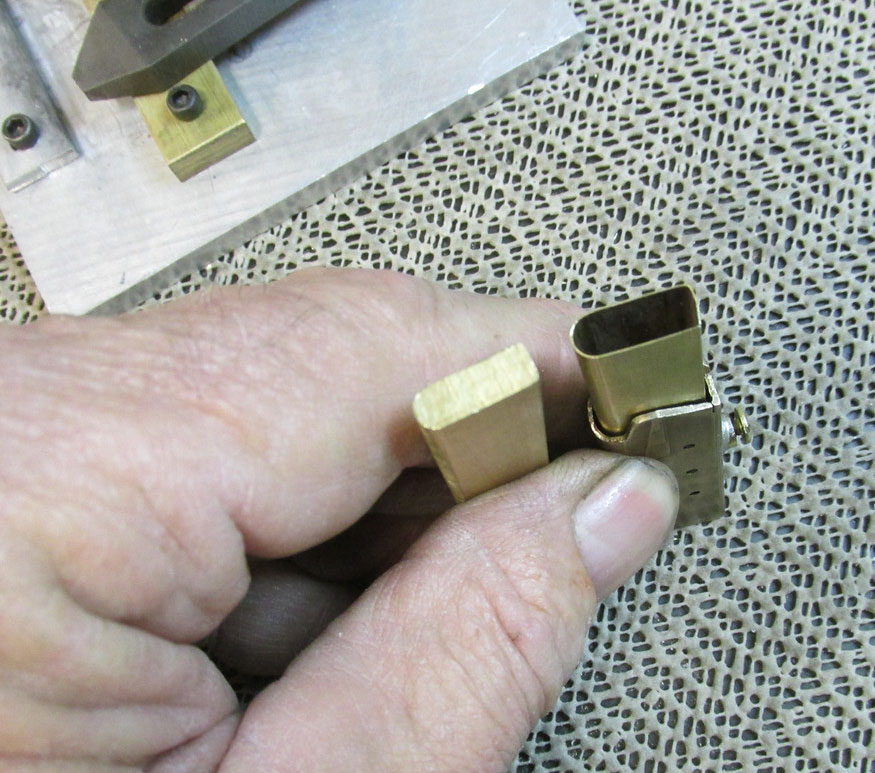
Colt Magazine
This photo shows the sheet metal magazine form.
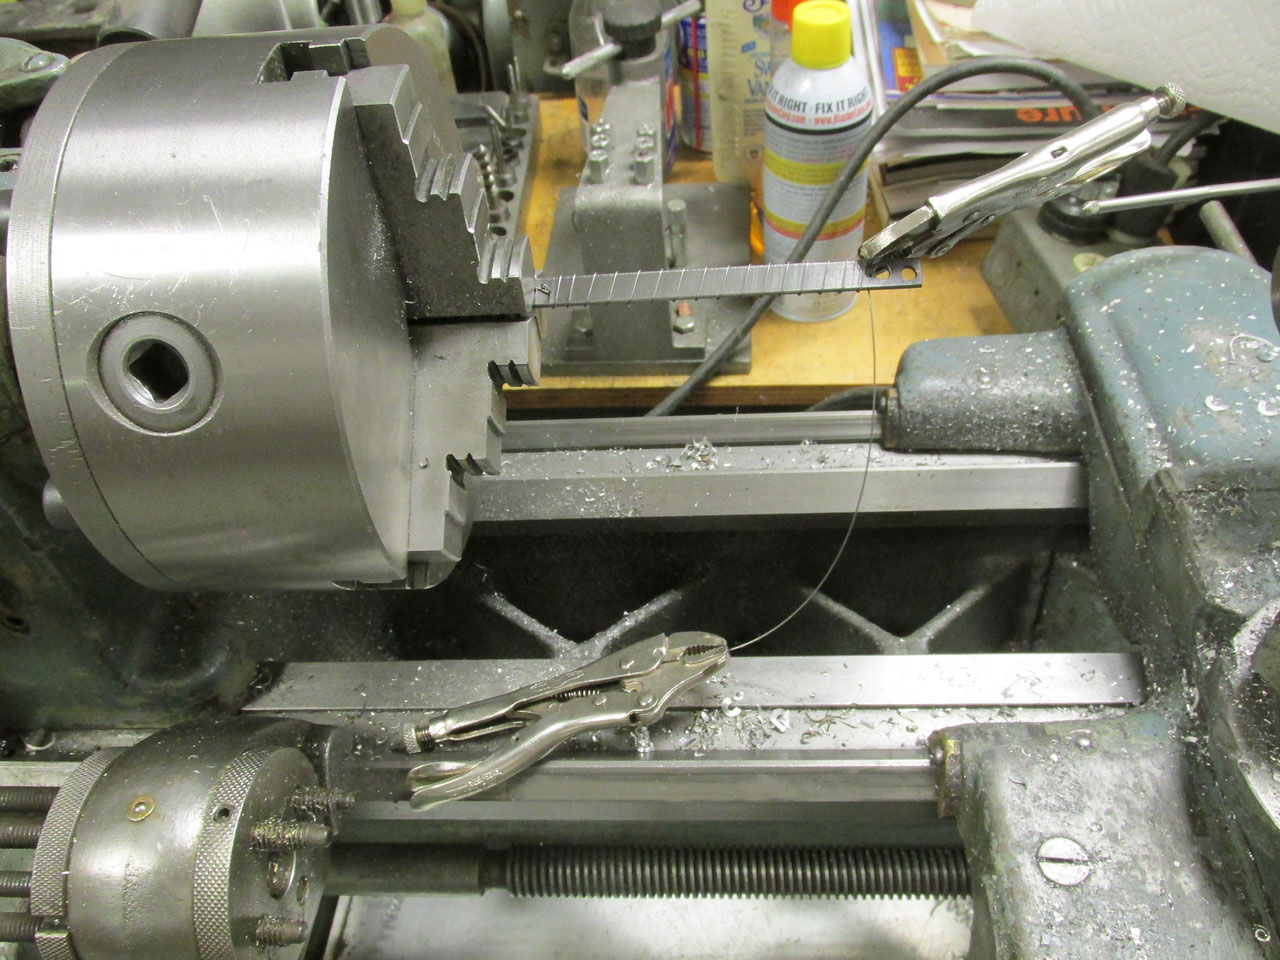
Magazine Spring
A lathe is used to wrap wire around a piece of rectangular metal to make the magazine spring.

Colt 1911 Pistol With Springs
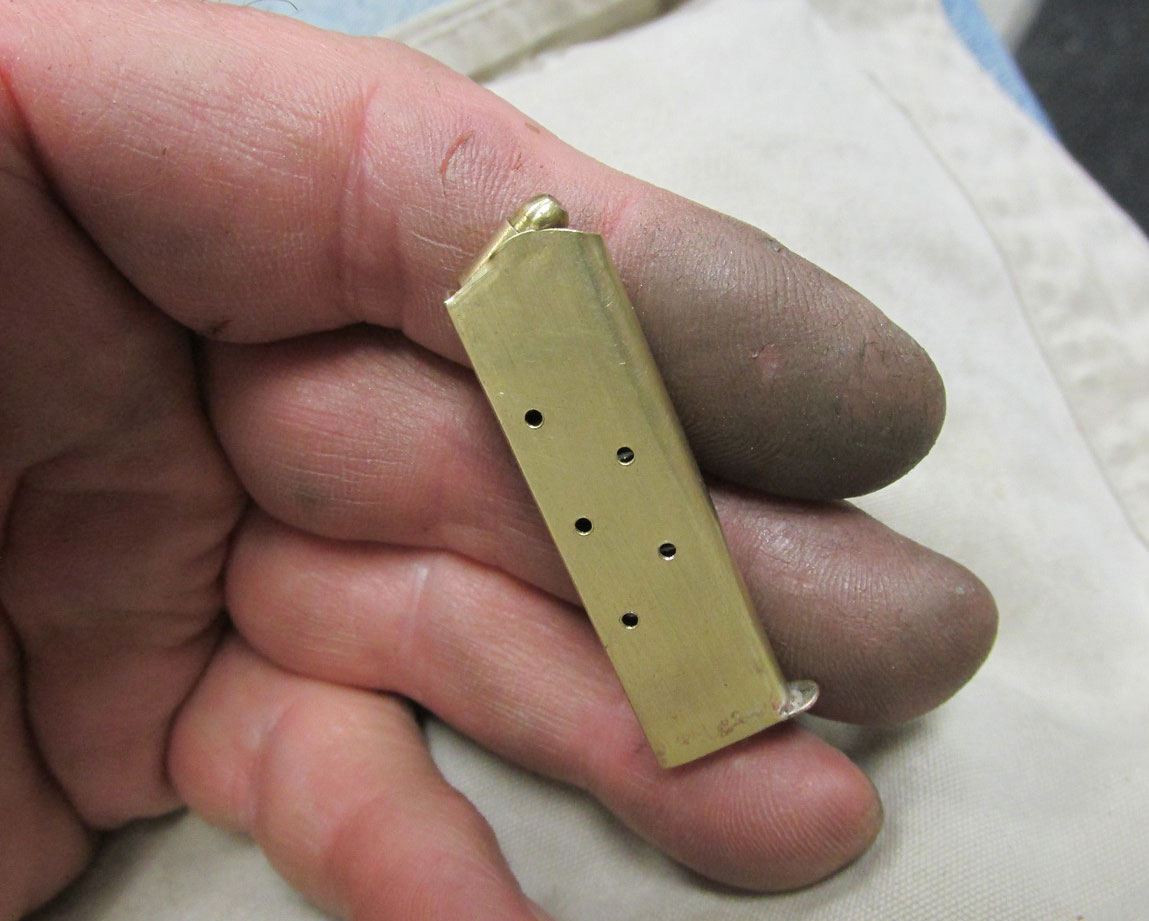
Finished Magazine
The finished magazine loaded with dummy rounds.
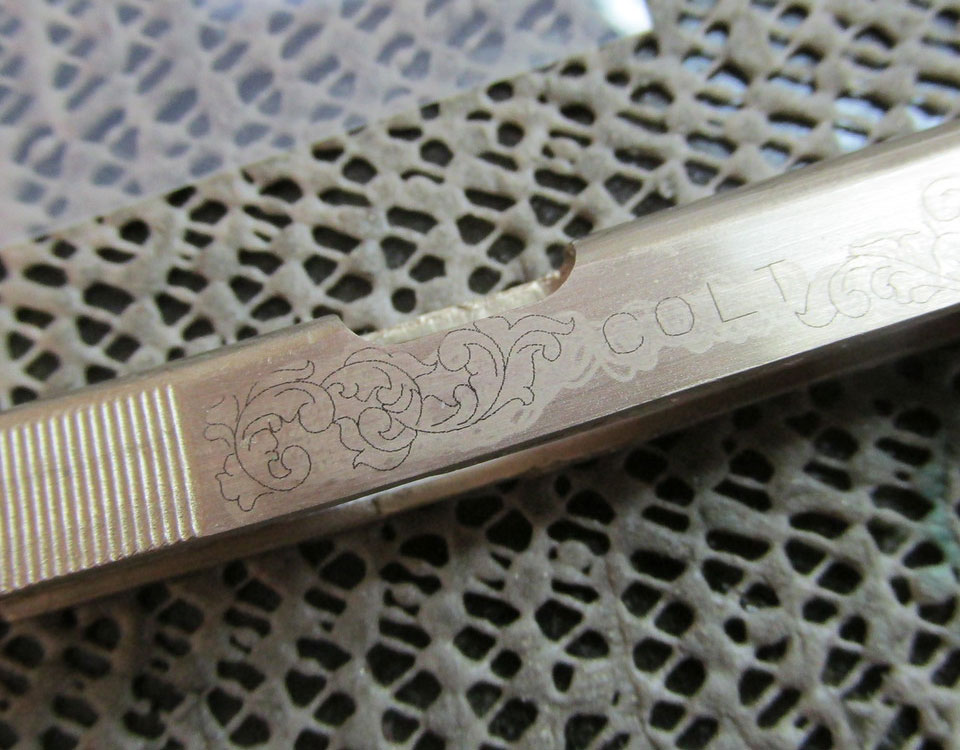
Engraving Process
The engraving process starts with marking where the design will go.
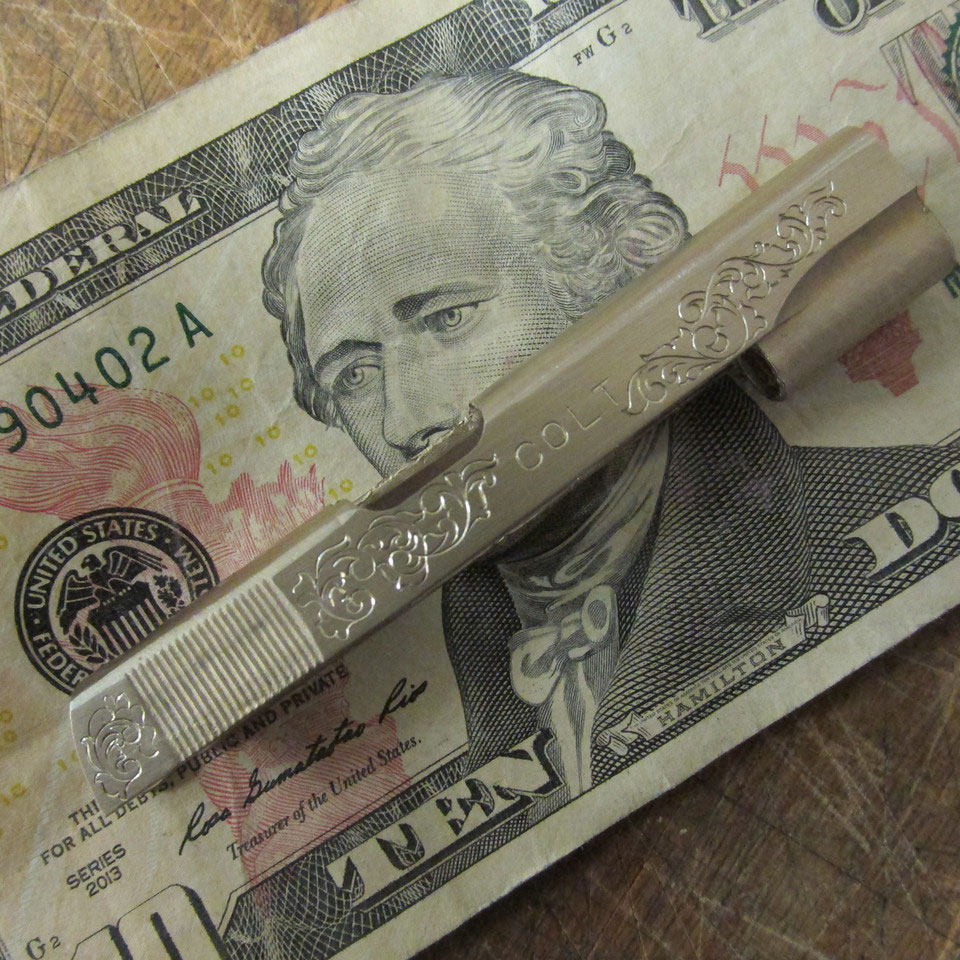
Engraving Process
The major shapes are then cut.
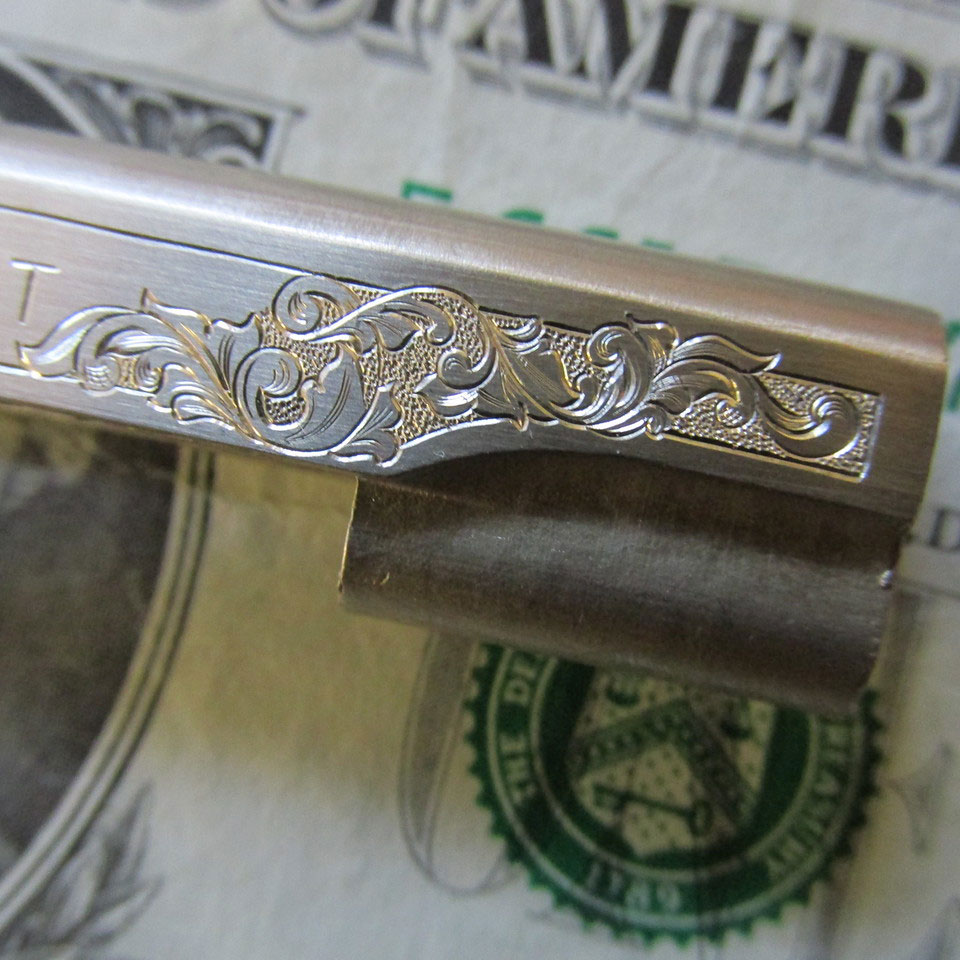
Engraving Process
The main pattern is filled in with hand-engraved details.
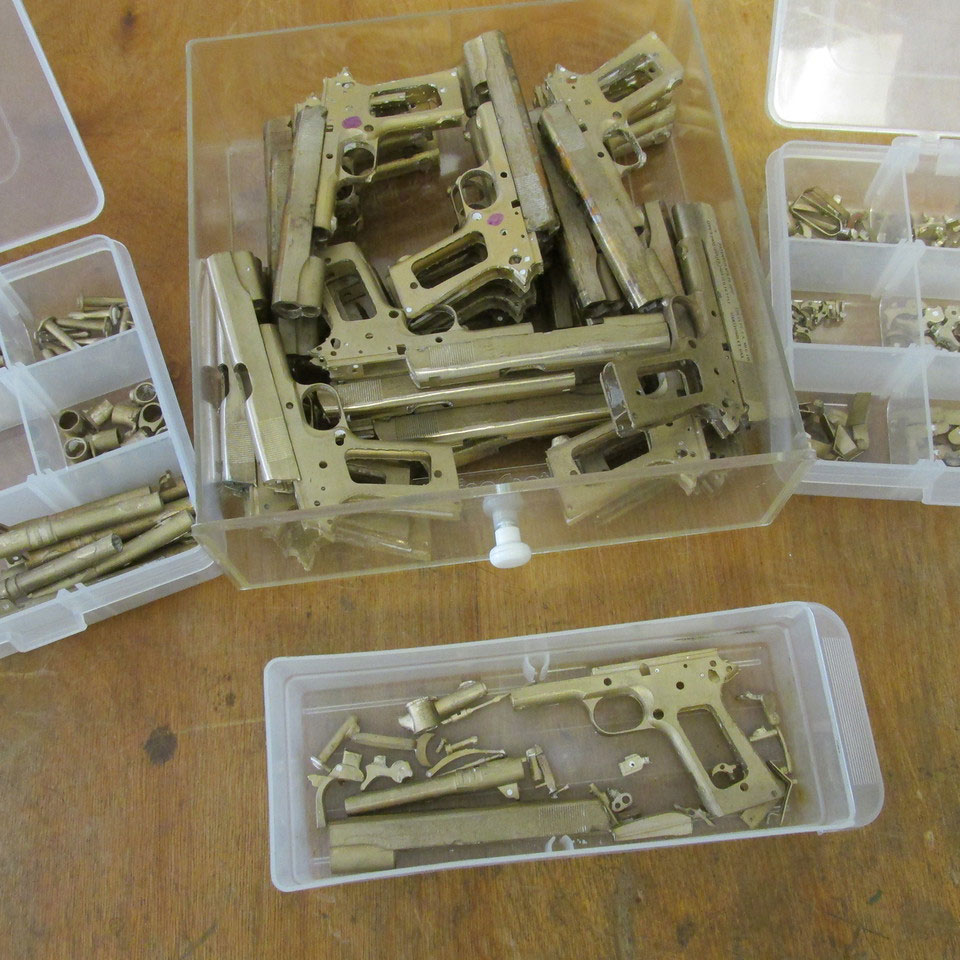
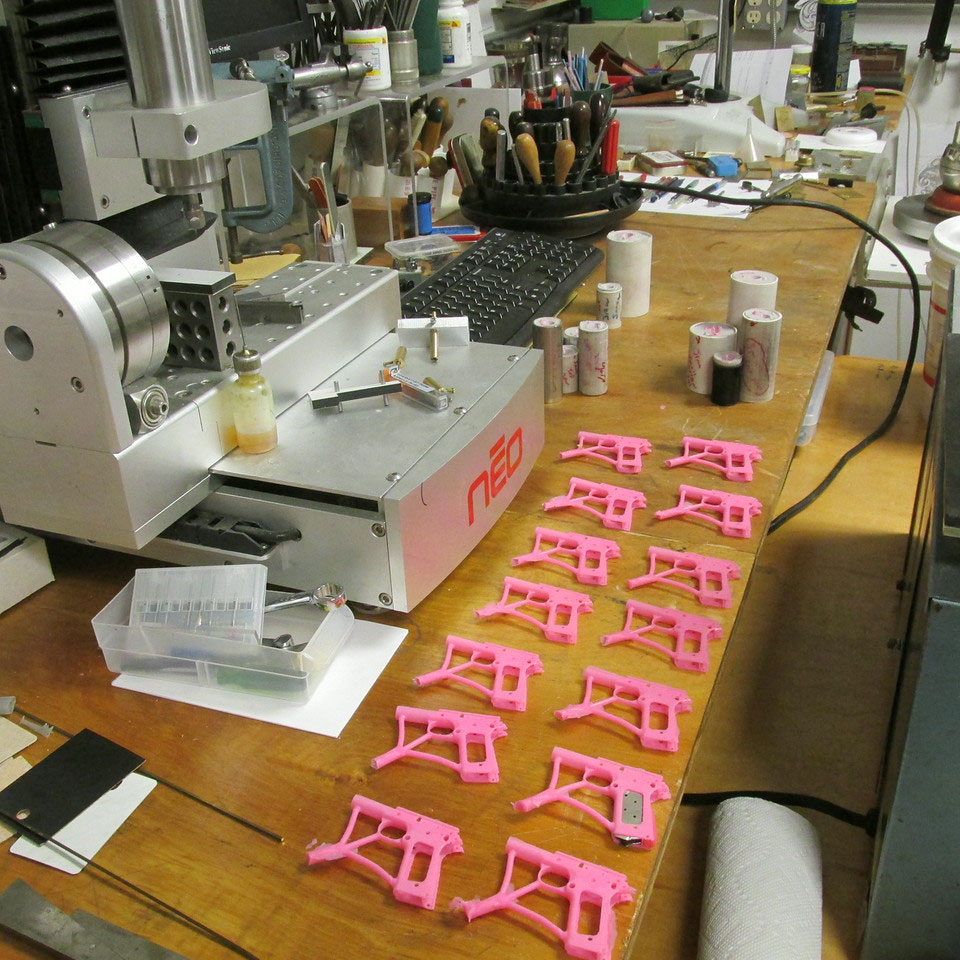
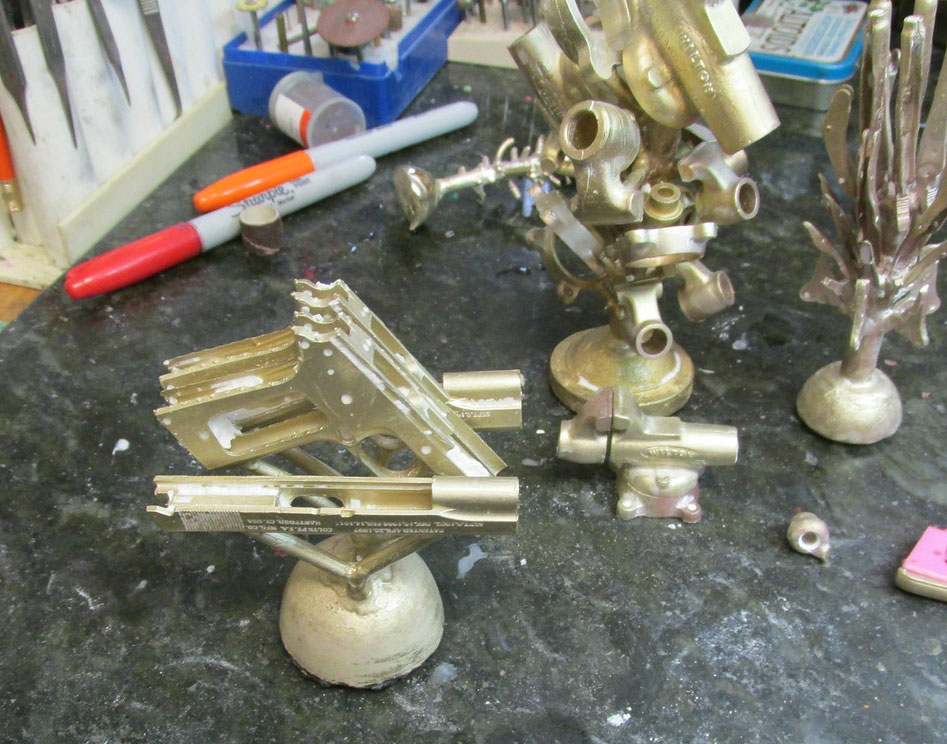
Colt Castings and Parts
Sets of castings and parts for Paul’s Colt miniatures. Before the final assembly is completed, the functional miniature weapons will have the appropriate parts either blued or nickel plated. Paul would later add different grips and engraving on some pistols.
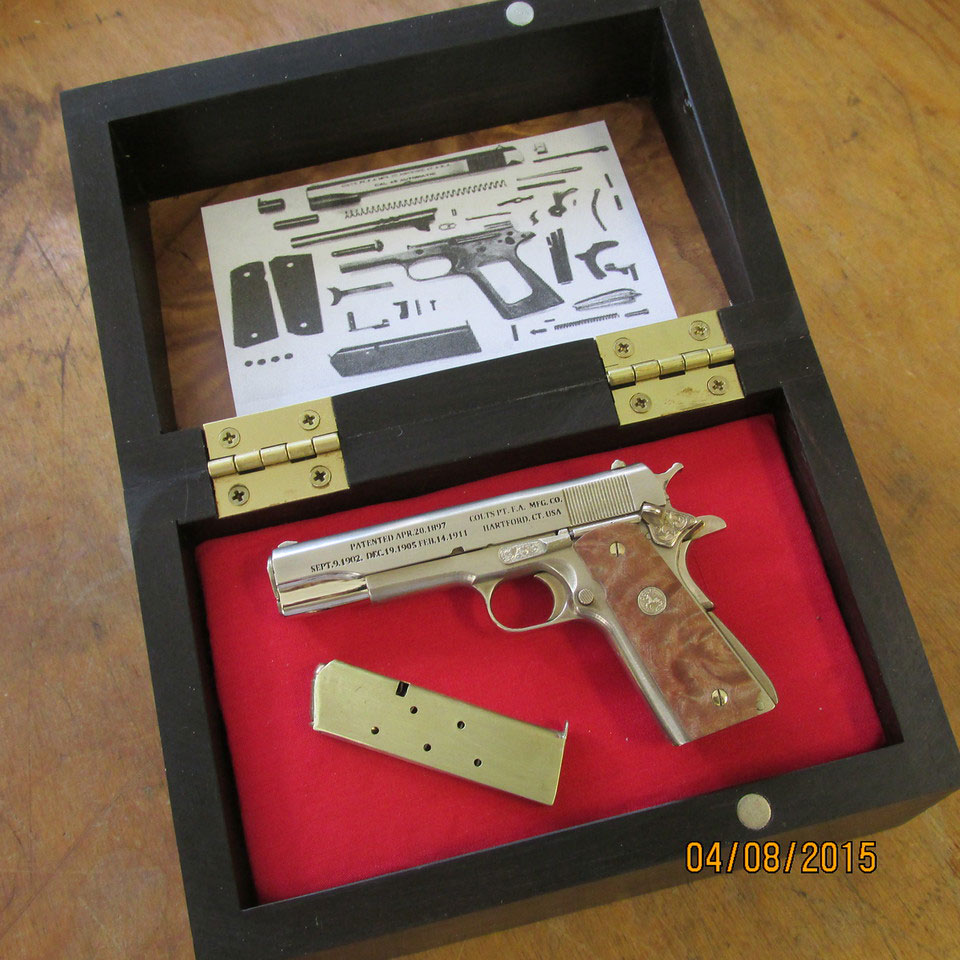
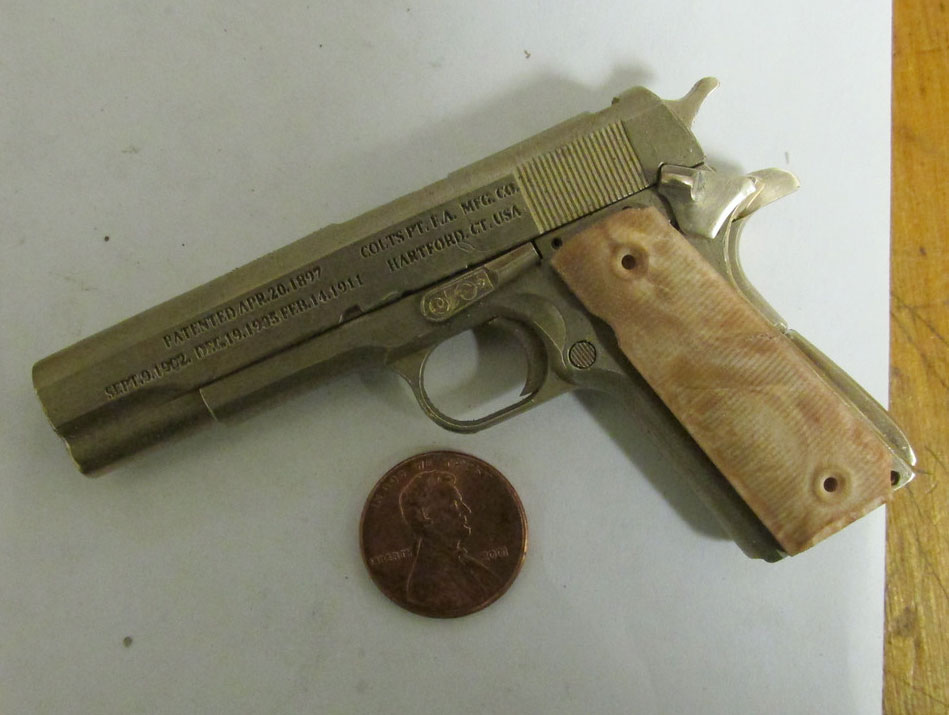
Finished Miniature Colt Pistol
A finished miniature Colt in its display case—a remarkable piece of craftsmanship.