Below you can view more photos of David Glen’s incredible scale model fighter planes. Click on images to enlarge.
1/5 Scale Supermarine Spitfire Mk I
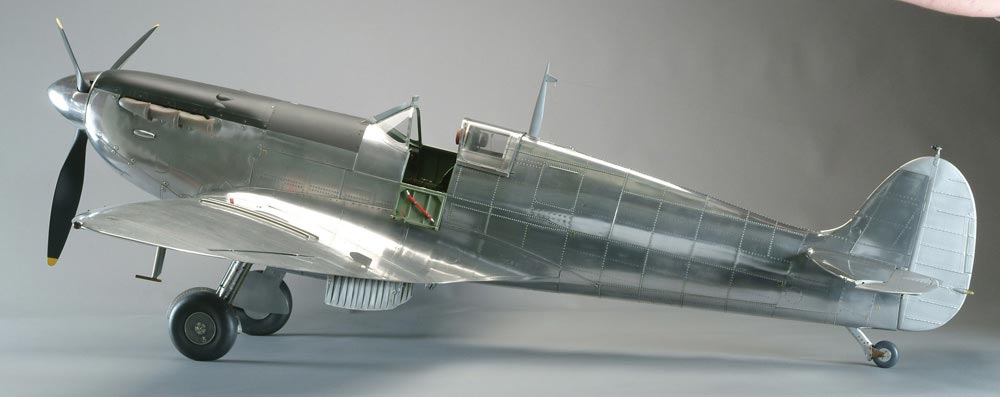
1/5 Scale Spitfire
A view from the left side shows how part of the cockpit opens up to allow entry for the pilot.
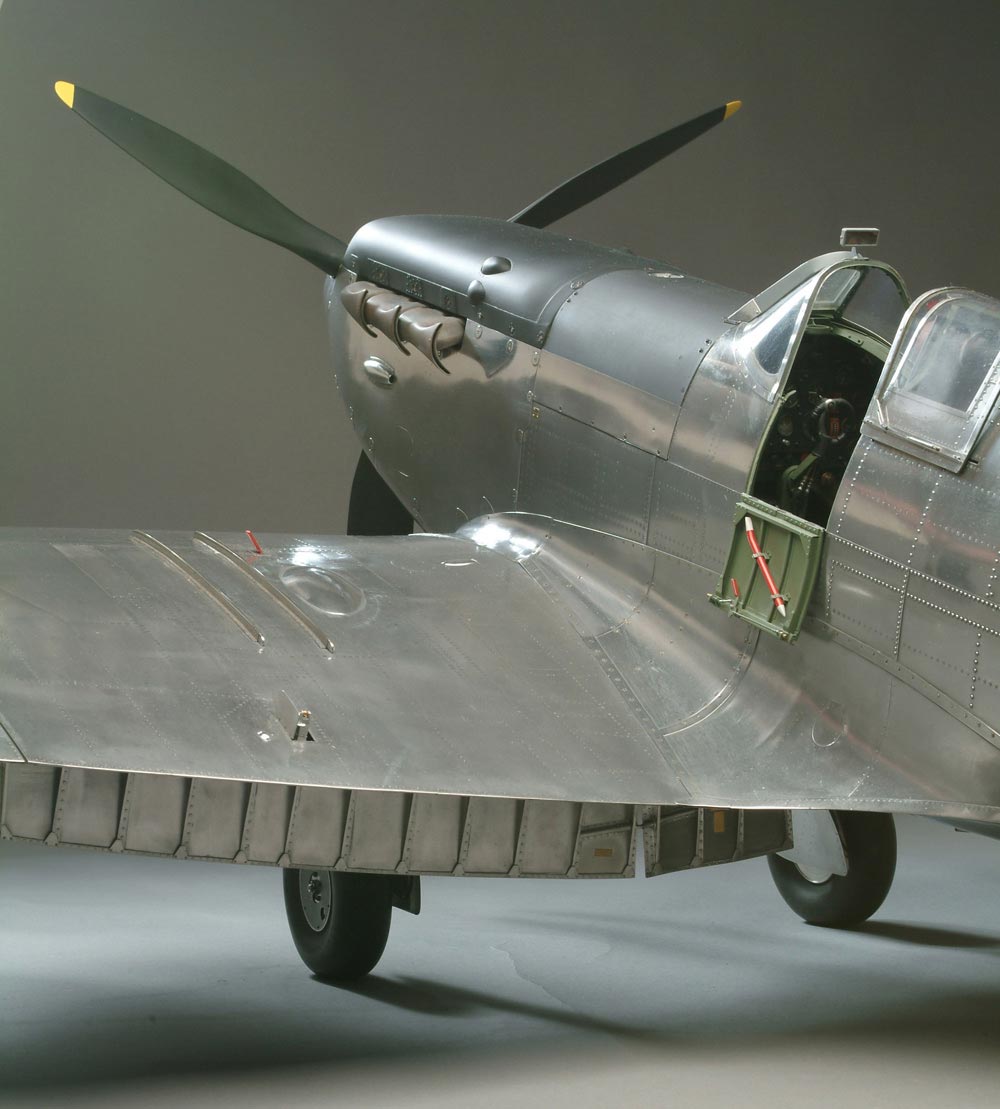
1/5 Scale Spitfire
This view shows the flaps lowered, and the unique shape of the exhaust pipes.
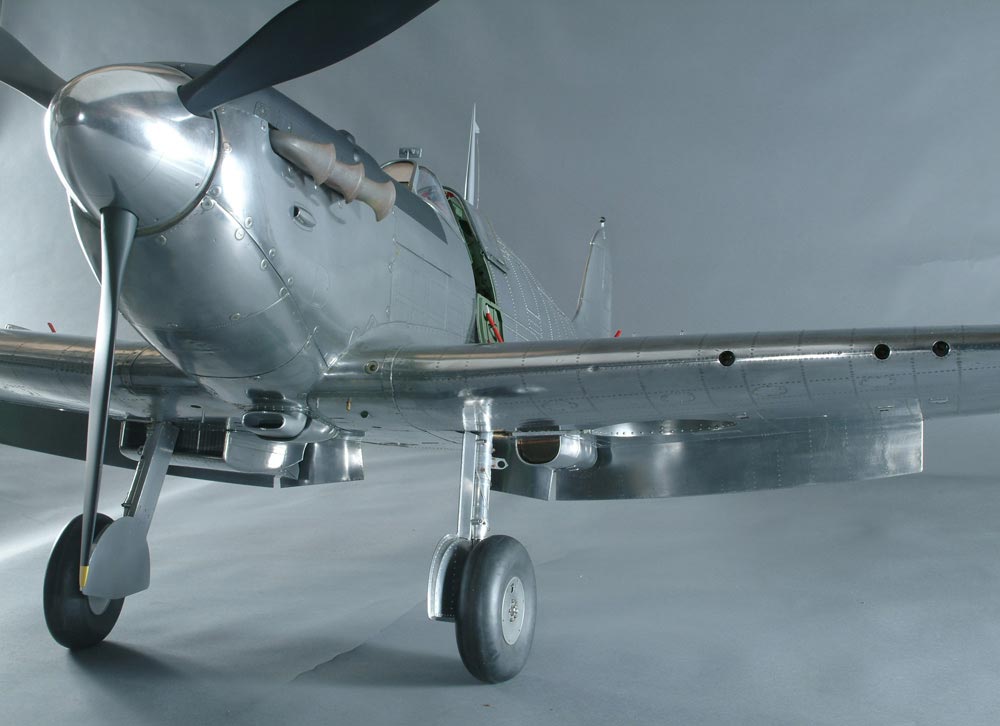
1/5 Scale Spitfire
A low frontal view shows the landing gear and some of the propeller detail.
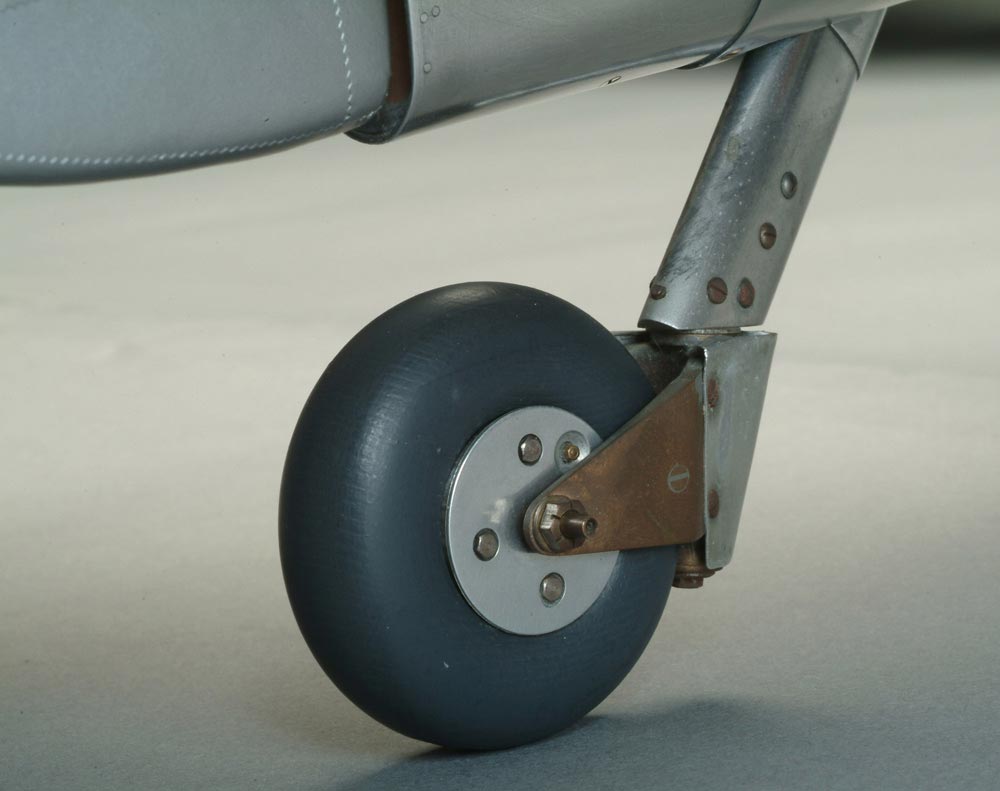
Spitfire Tail Wheel
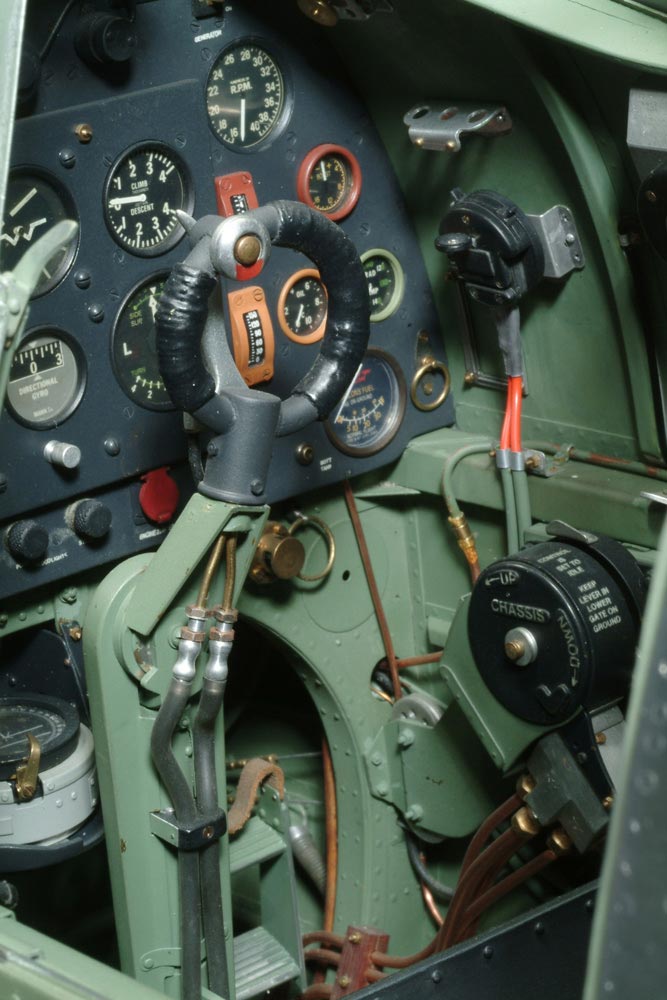
Spitfire Cockpit
The instrument panel, control column, and other cockpit details.
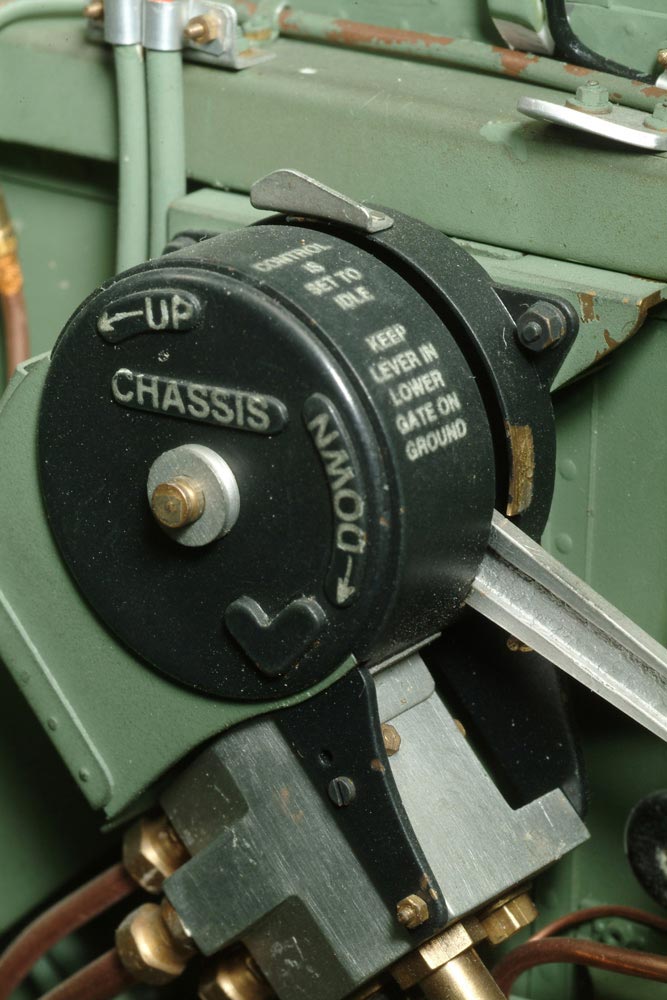
Spitfire Landing Gear Control
A close-up of the control for the landing gear.
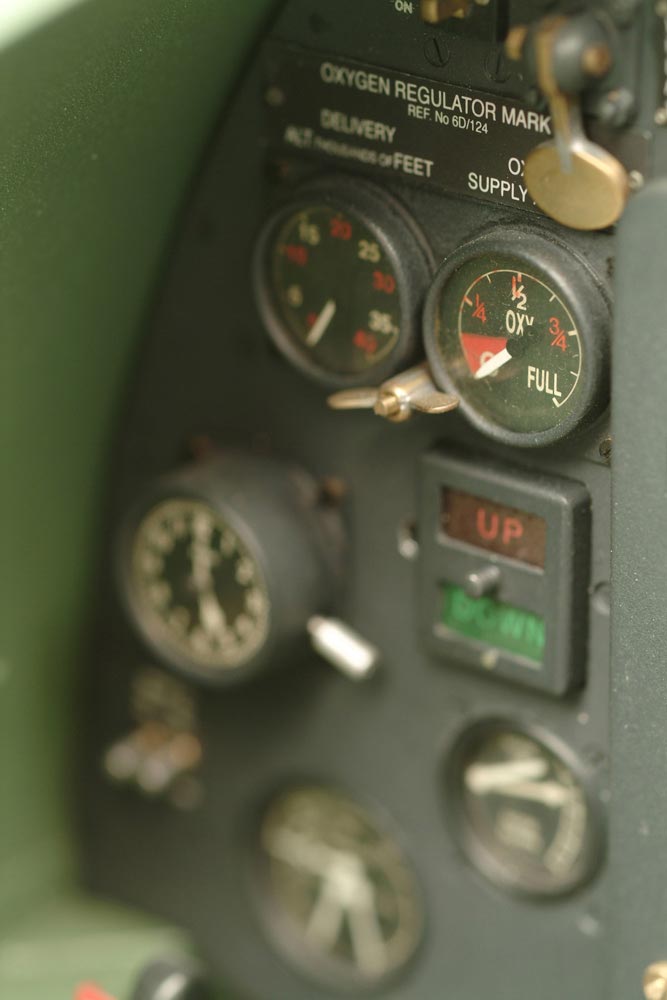
Spitfire Instrument Panel
Note that the instrument needles actually project above the surface of each instrument, under the clear glass covers. Though not actually functional, they sure look like they could be.
Spitfire Pilot Seat
The pilot seat and headrest.
Spitfire Carburetor Air Scoop
The carburetor air scoop has some very graceful, but difficult to make compound curves.
Spitfire Wing Flap
The wing flap detail is seen from the rear and below.
Spitfire Wing Flap
Looking even closer at part of the hinge, you can see more detail of the split flap.
Spitfire Wing Flap Close-Up
A detailed look at the same area shows how good the level of finished detail is down to the smallest parts.
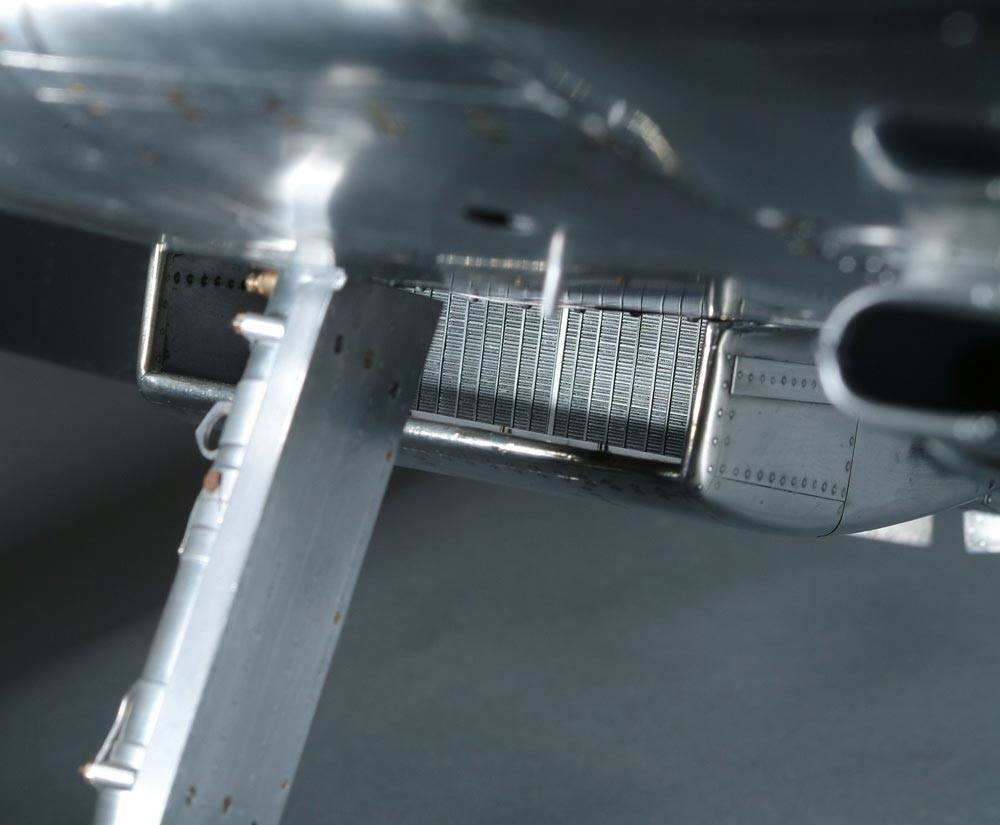
Spitfire Radiator
The radiator under the starboard wing. David explained how he created the radiator mesh on his website.

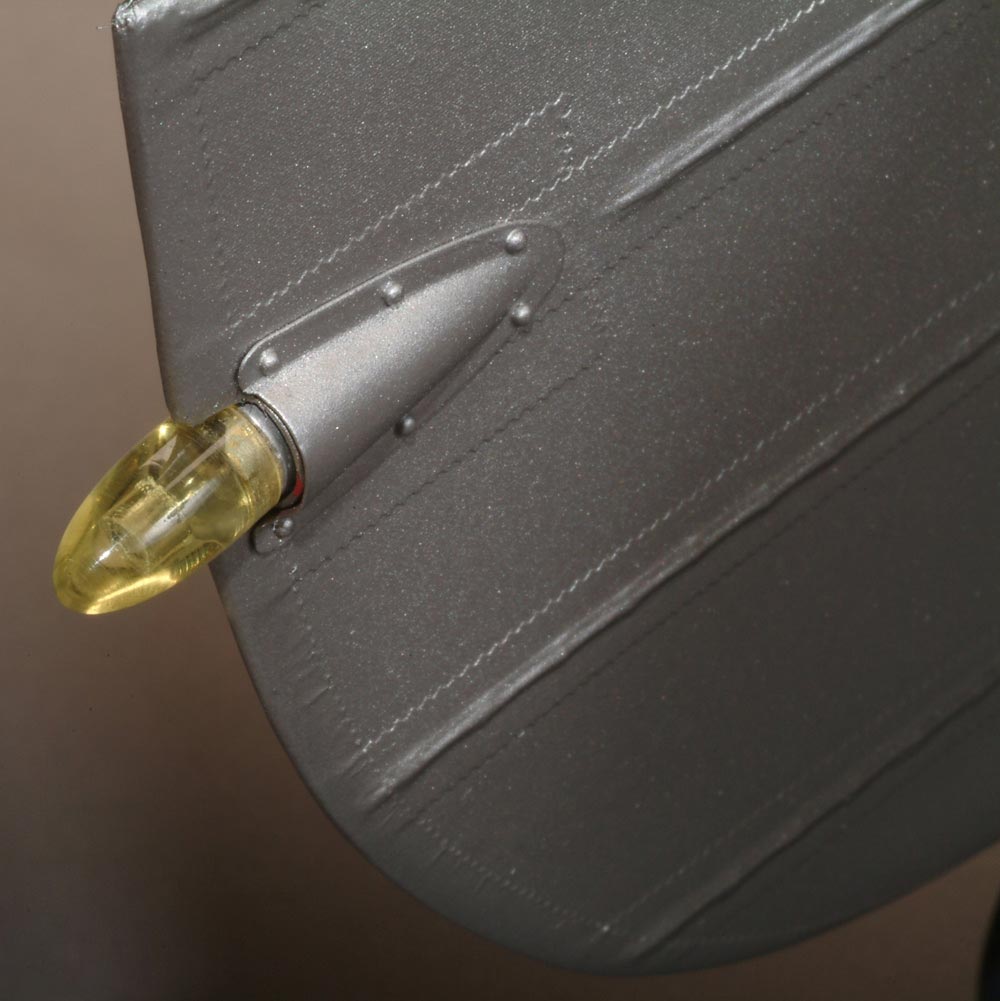
Spitfire ID Light
The underbelly identification light.
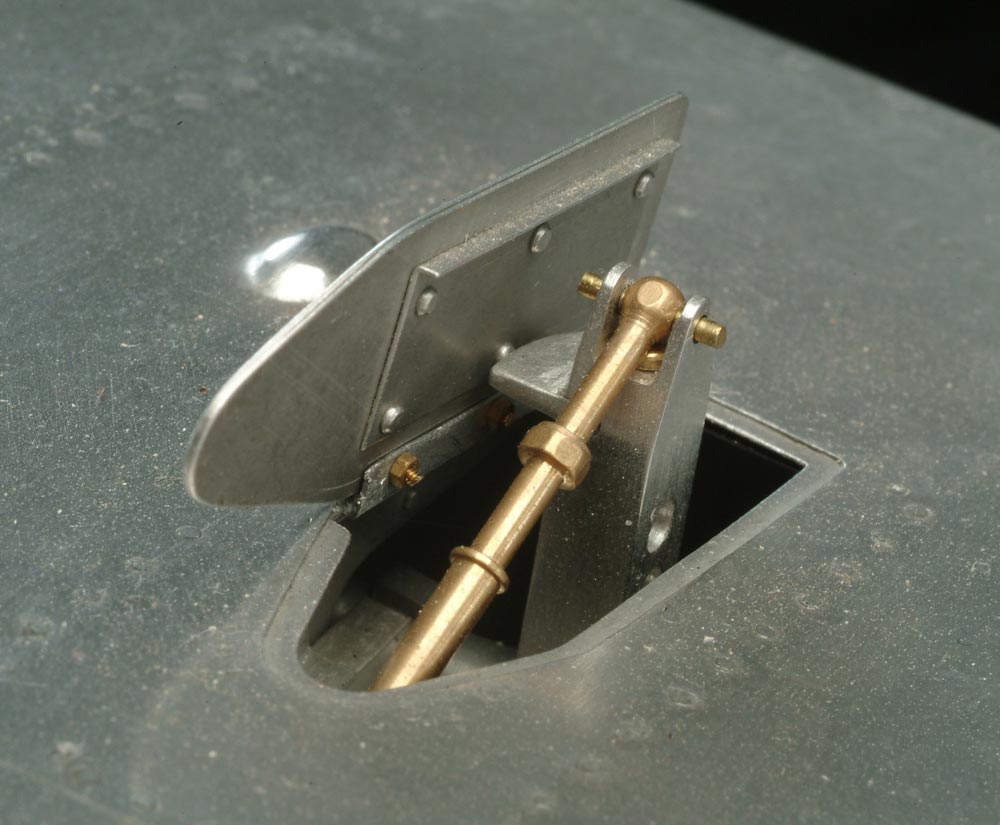
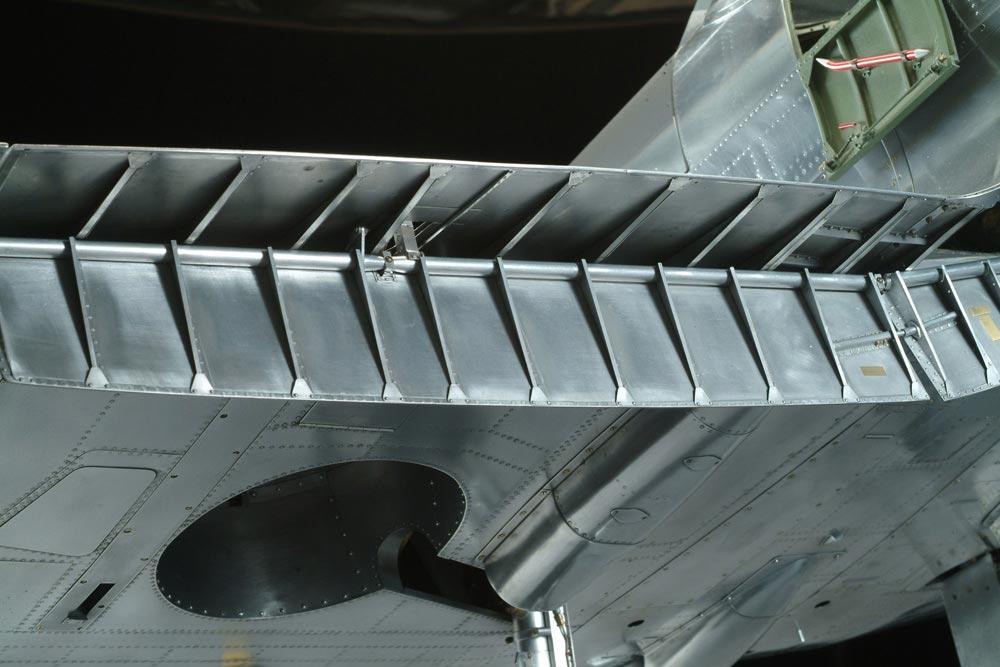
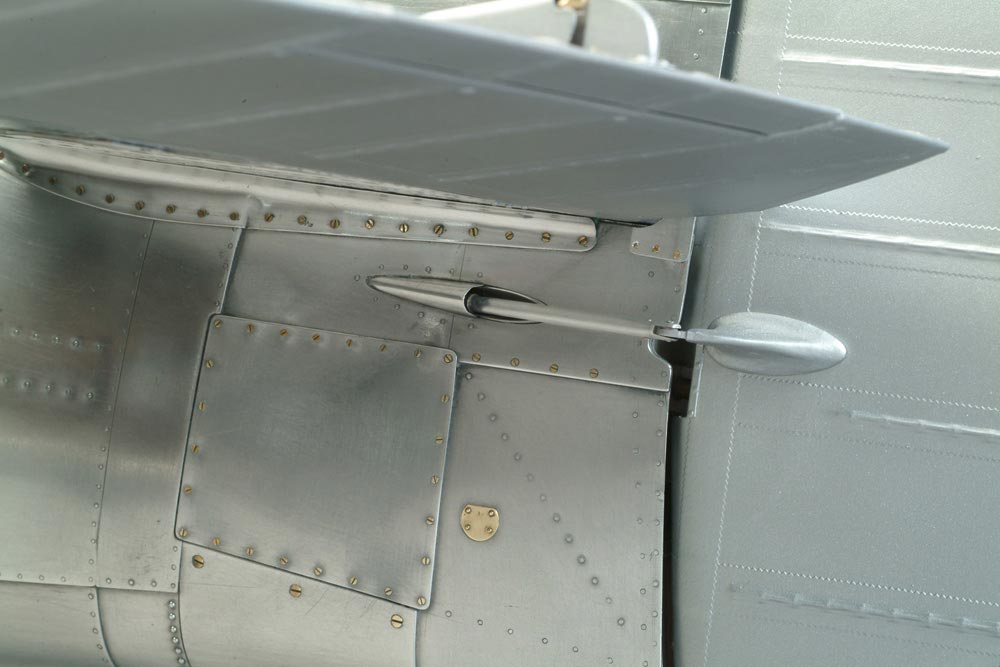
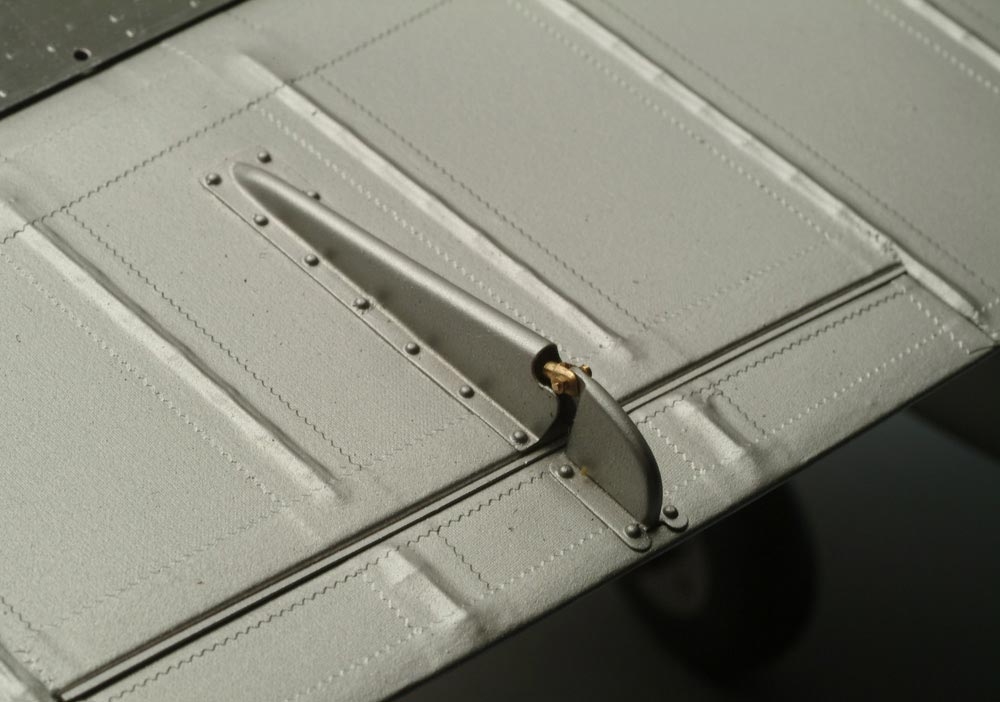
Spitfire Wing Detail
The Spitfire’s top wing skins have a small door which opens to accommodate the actuator mechanism when the flaps are lowered.
Spitfire Rudder Detail
A close-up of the rudder shows the tail light.
Spitfire Rudder Detail
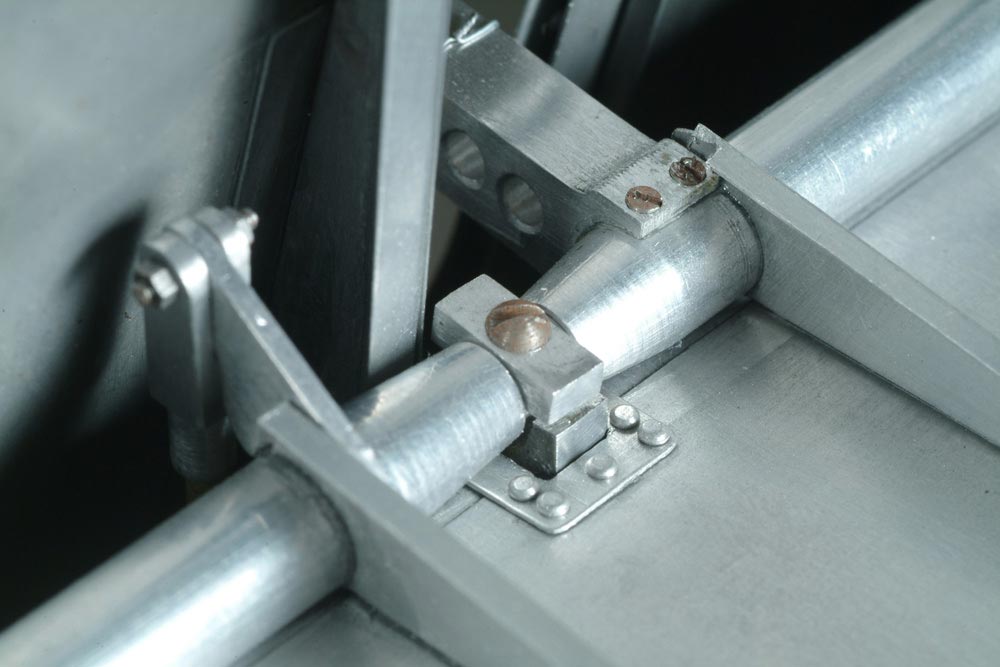
Spitfire Detail
This view shows the elevator trim tab control linkages.
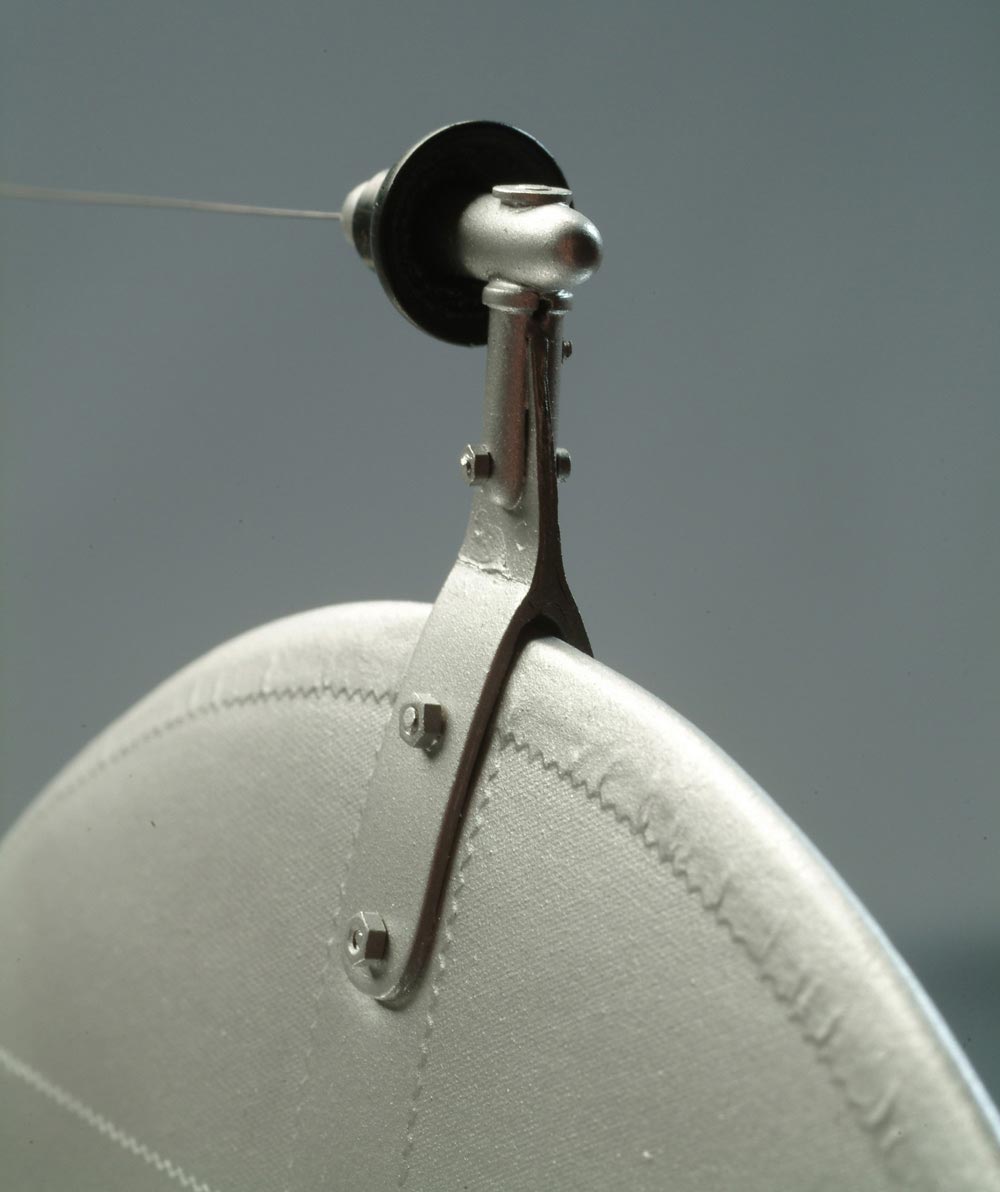
Spitfire Antenna Attachment
The antenna attachment point atop the vertical stabilizer.
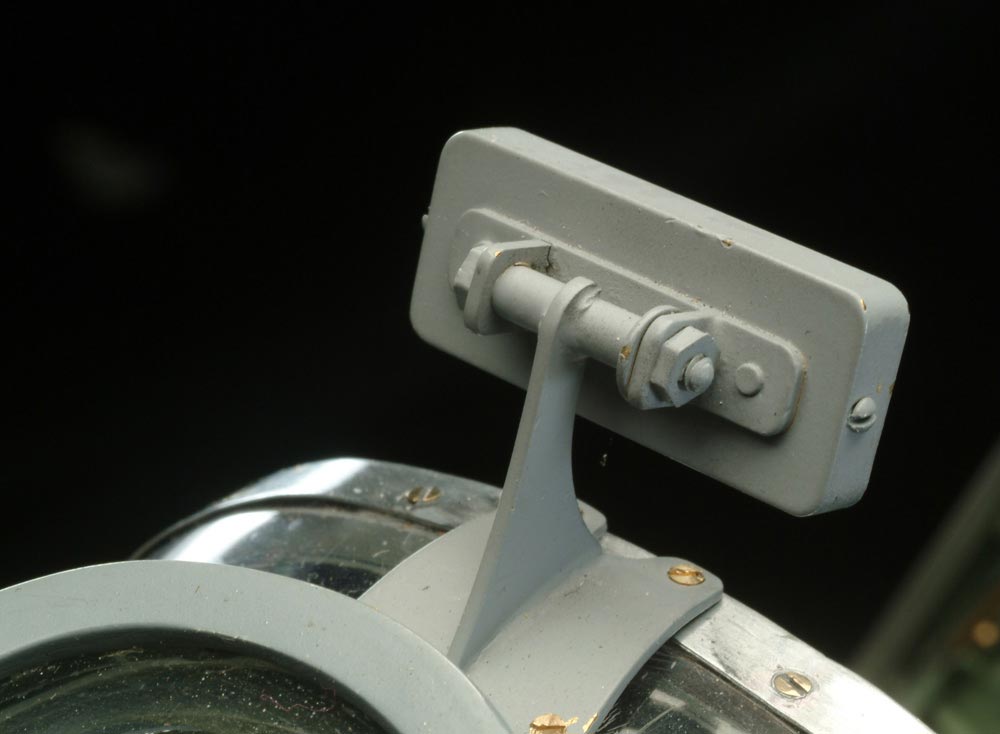
Spitfire Mirror
The pilot’s rearview mirror.
1/5 Scale P-51D Mustang
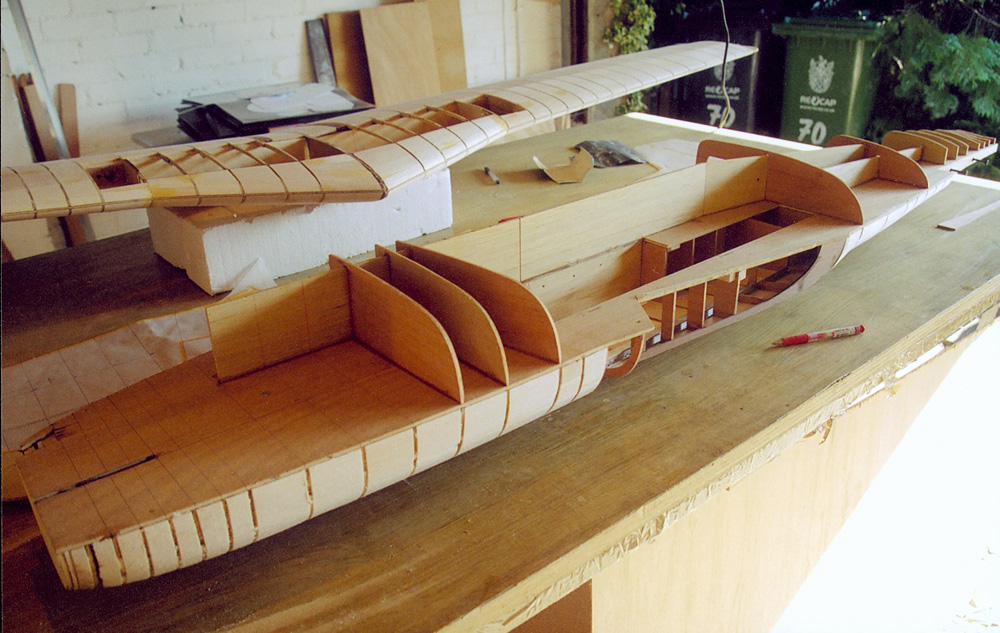
Fuselage Construction
Early stages of fuselage construction. The profile and transverse sections are cut from plywood, and in-filled with solid balsa.

Fuselage Construction
This photo also shows the four aluminum main longerons, fixed in place with epoxy glue.
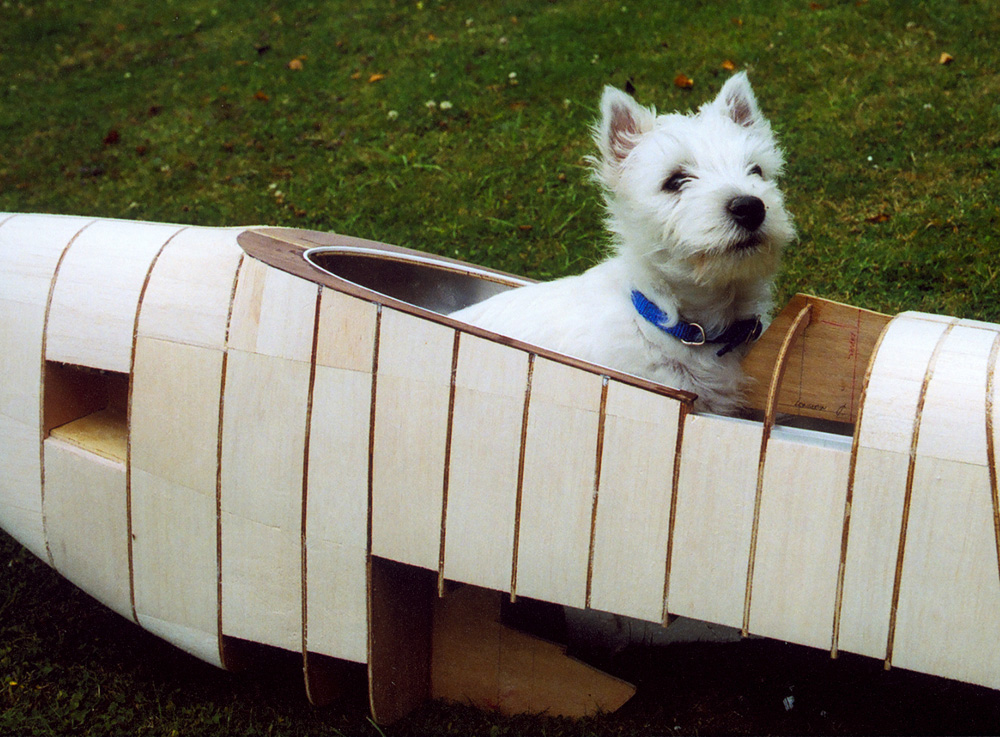
Cockpit Construction
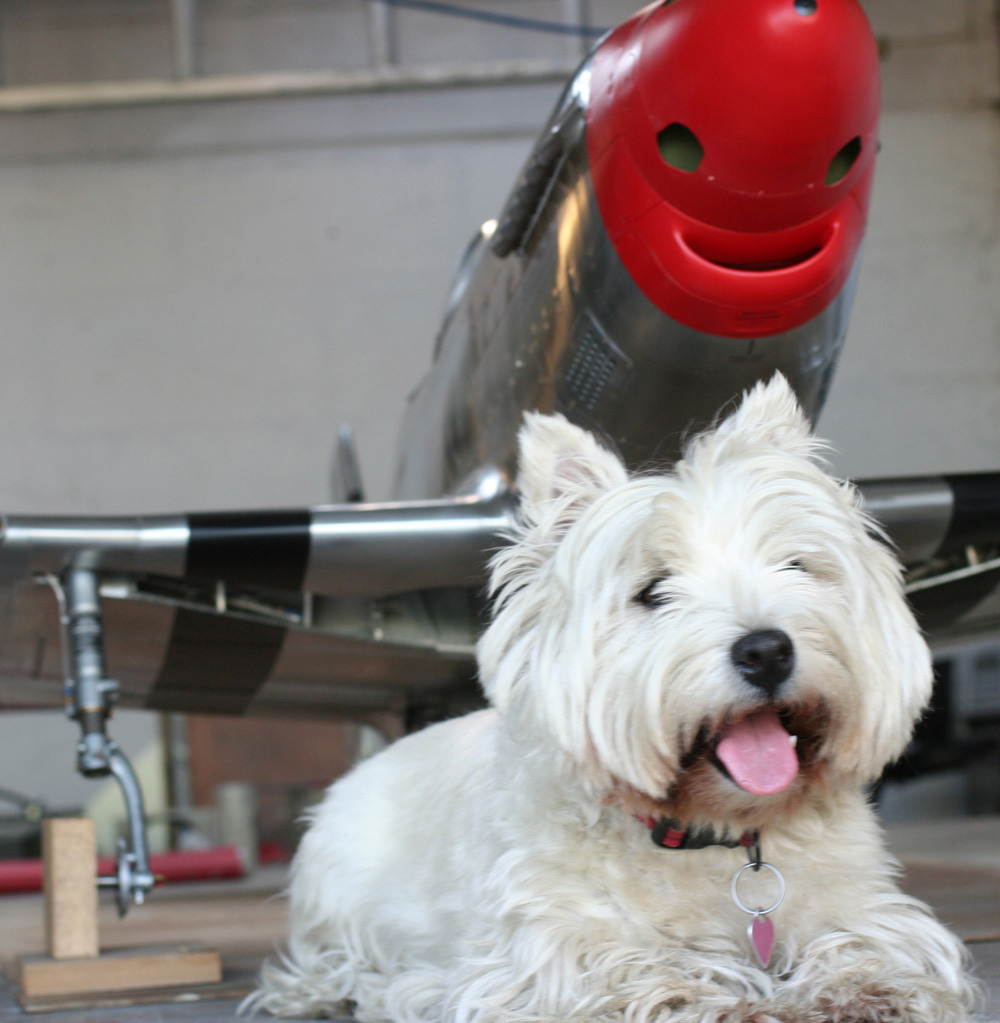
The frames around the cockpit opening are filled with thin balsa sheet. This renders the structure strong enough to remove the superfluous plywood, thus opening out the cockpit interior. David’s Westie puppy, Bonnie, has volunteered to be the test pilot.
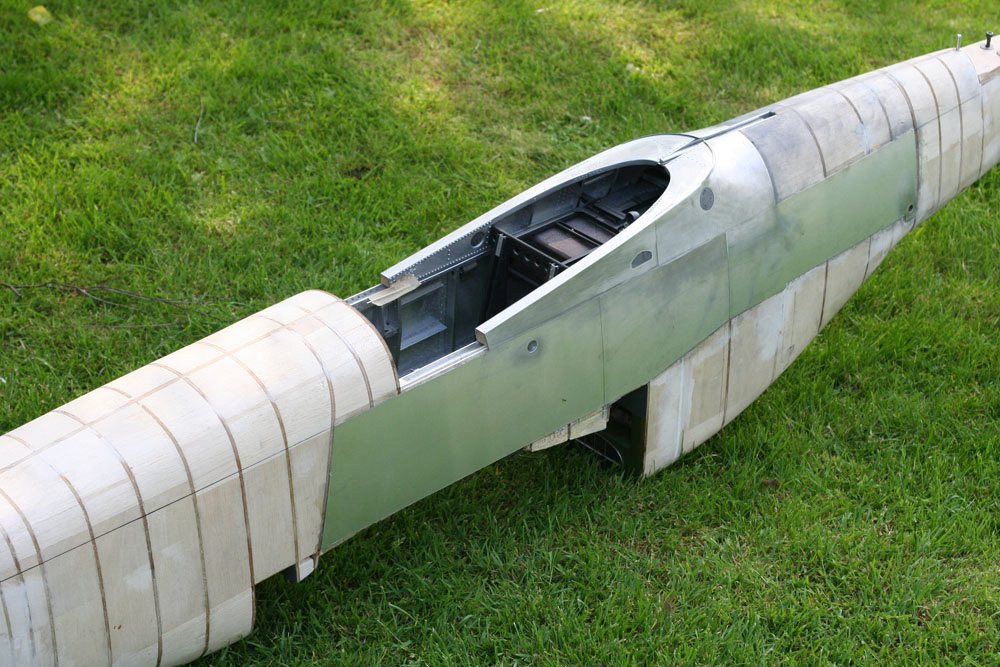
Cockpit Construction
This picture was taken several months later, when much of the interior structure and some exterior skin had been added—providing significant additional strength.
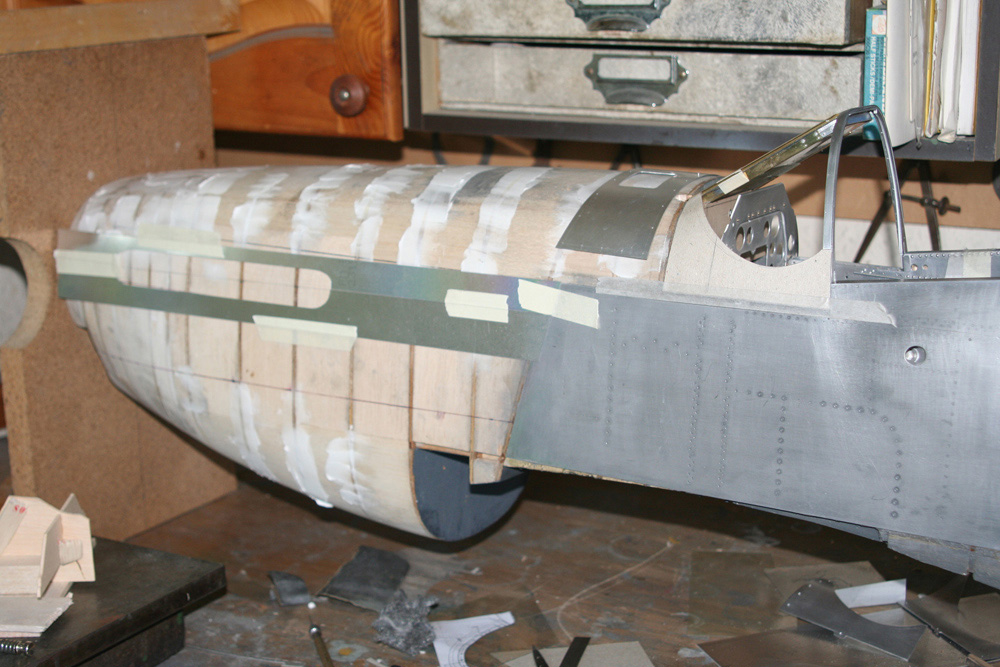
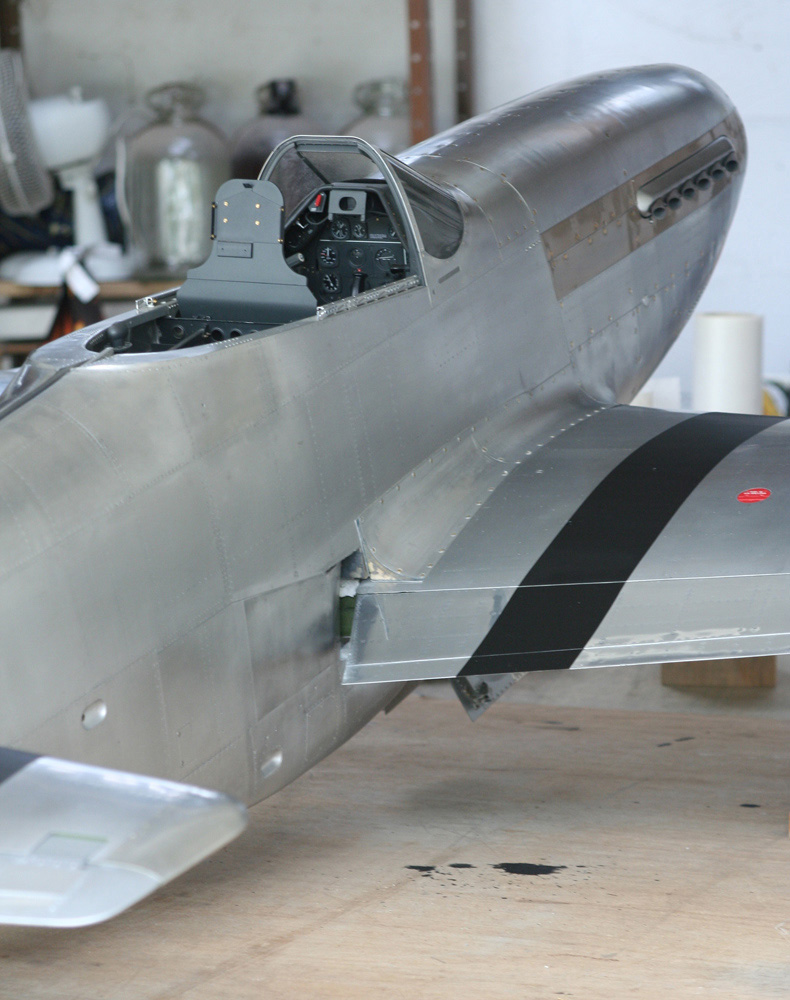
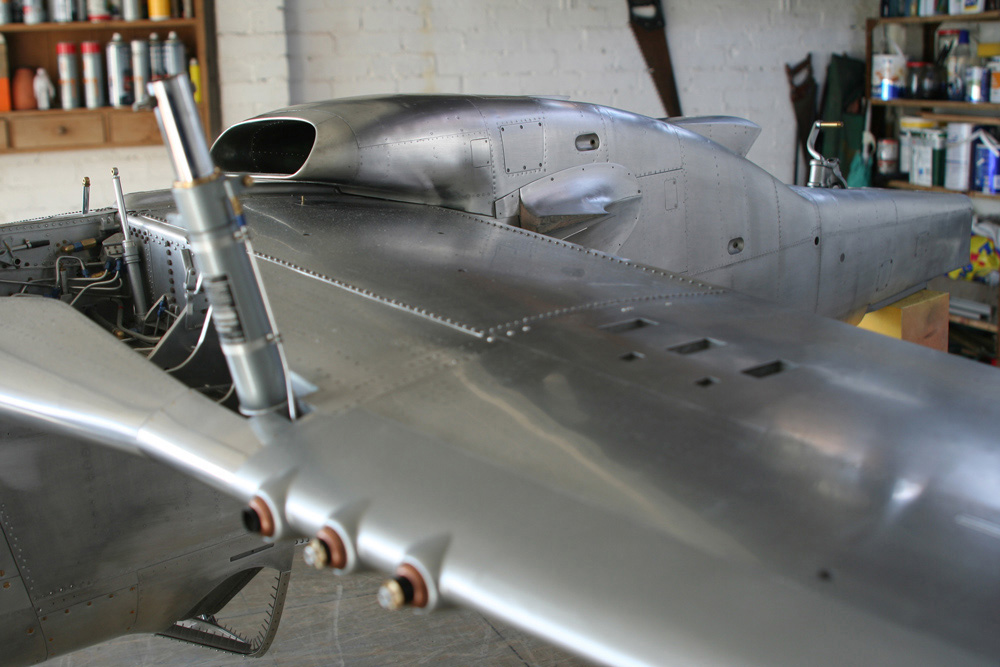
P-51D Exterior Progress
Work progresses on the exterior skin and rivet details.

P-51D Exterior Progress
Note the coloration of the panels around the exhaust manifold, which is characteristic of the Mustang. About a year’s work separates this image and the one before it.
P-51D Rudder
The P-51 has a fabric covered rudder, which is shown here in various stages of completion.
P-51D Rudder
Note the rib tapes and rib stitching detail.
P-51D Rudder
The rudder trim tab is metal skinned, and has prominent rivet details.
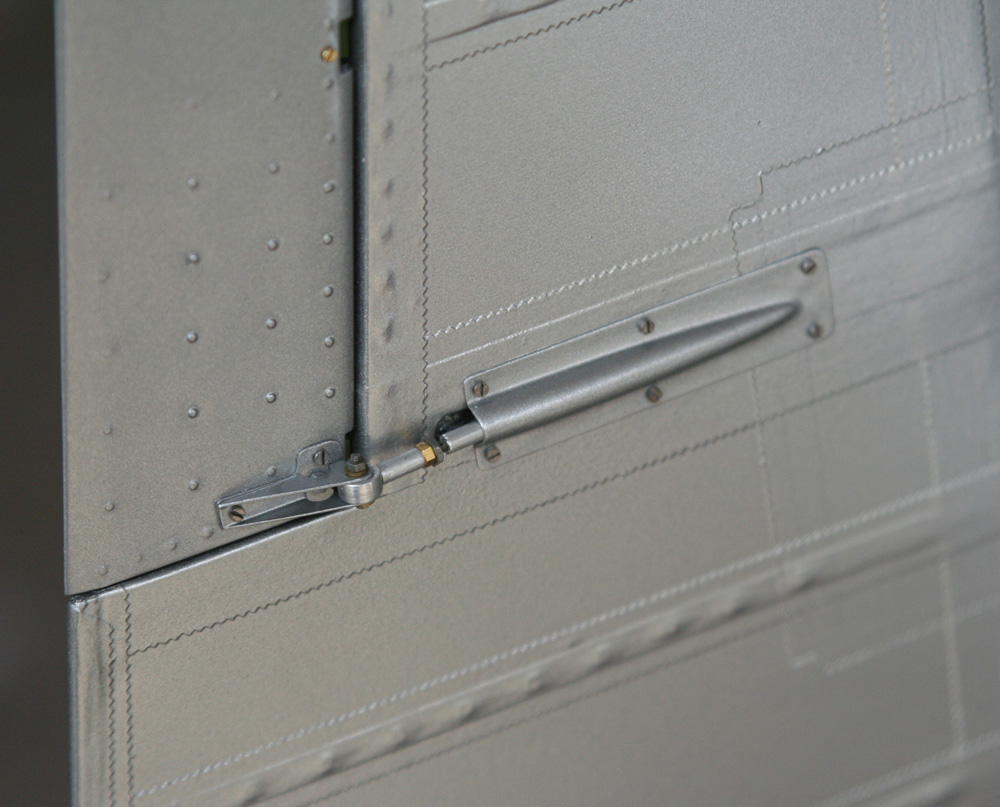
P-51D Rudder Detail
By adjusting trim tabs on the rudder, elevators, and ailerons during flight, the pilot removes control pressure. This makes the aircraft easier to fly.
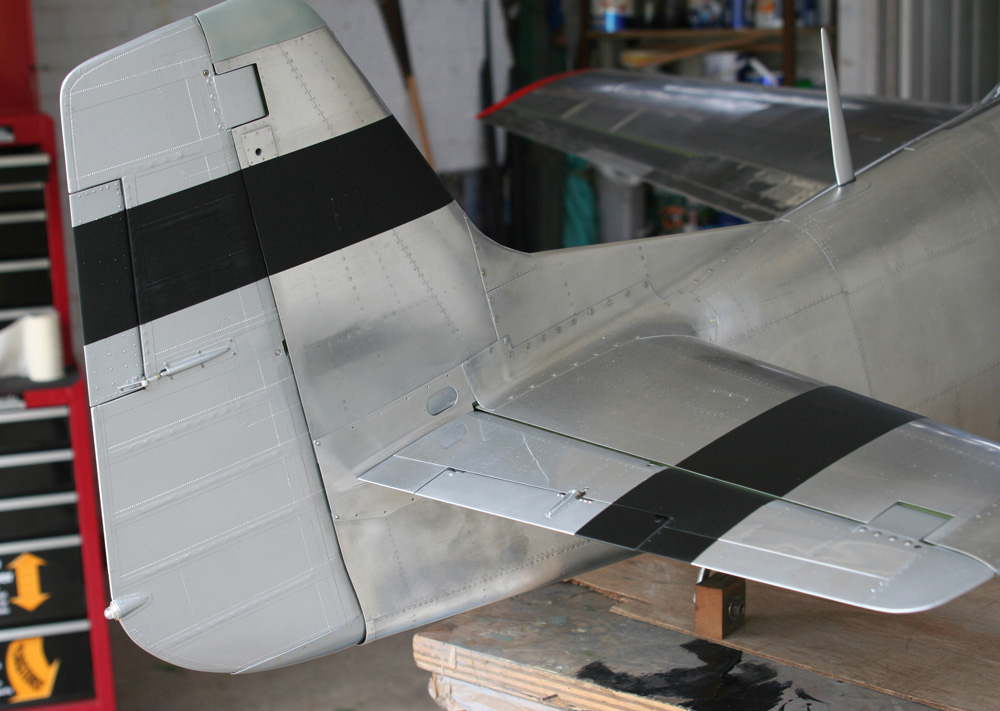
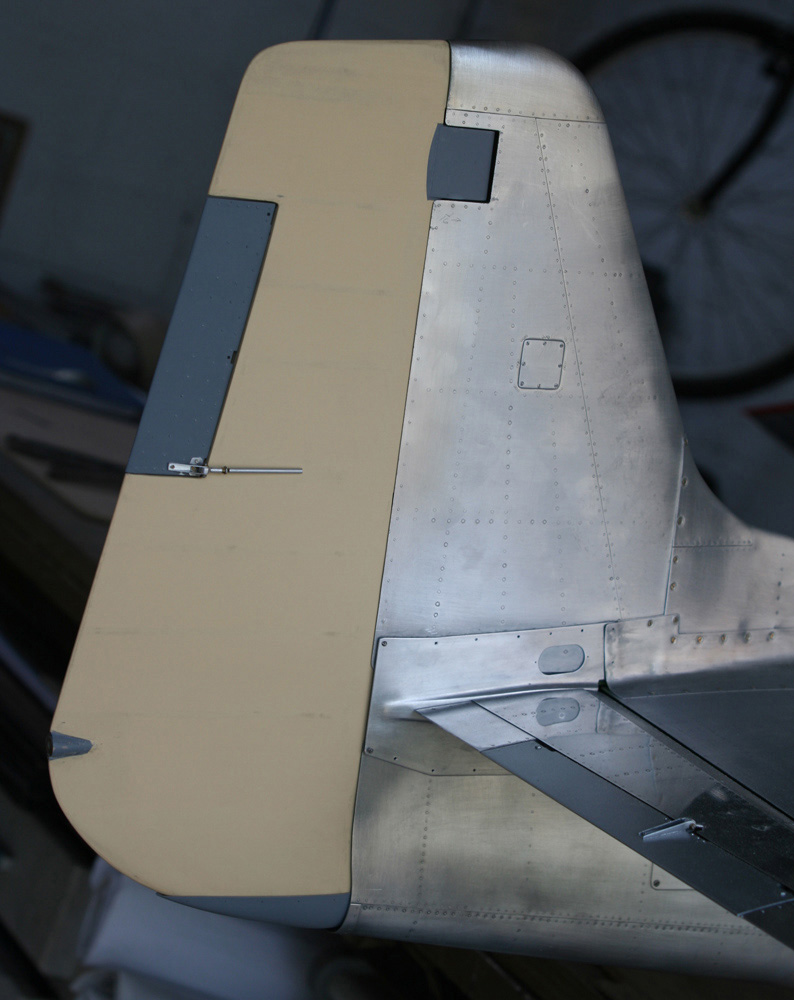
P-51D Tail Section
The finished and partly painted tail section.
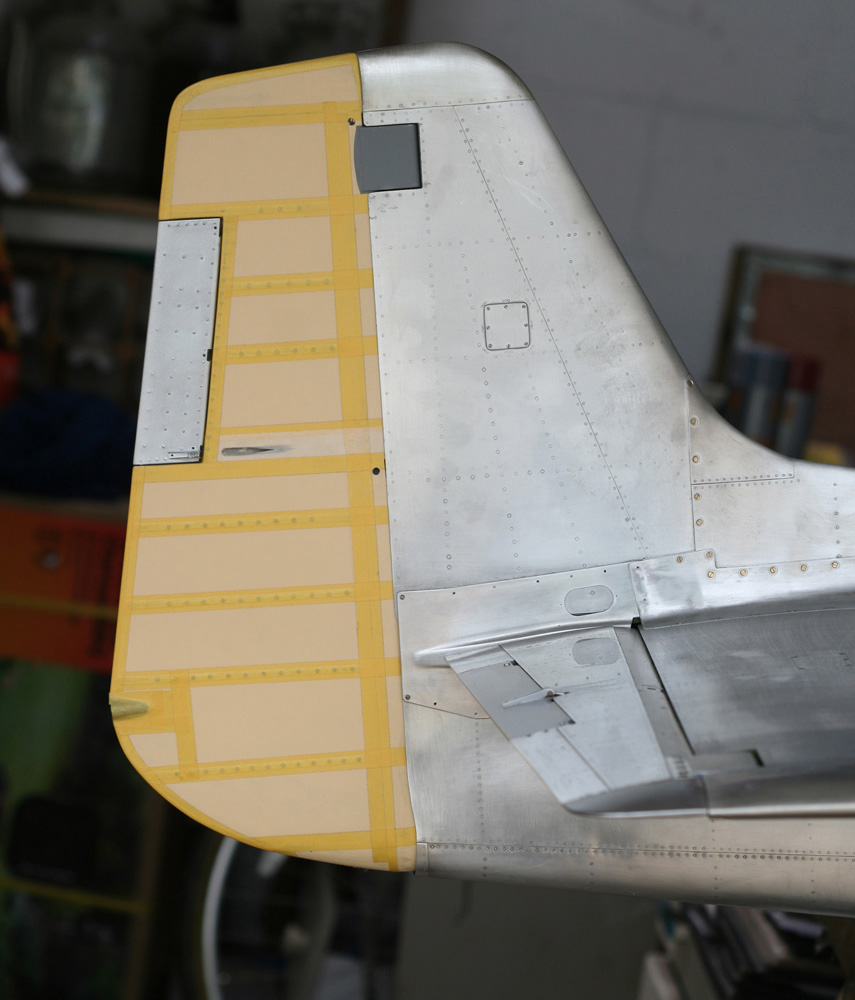
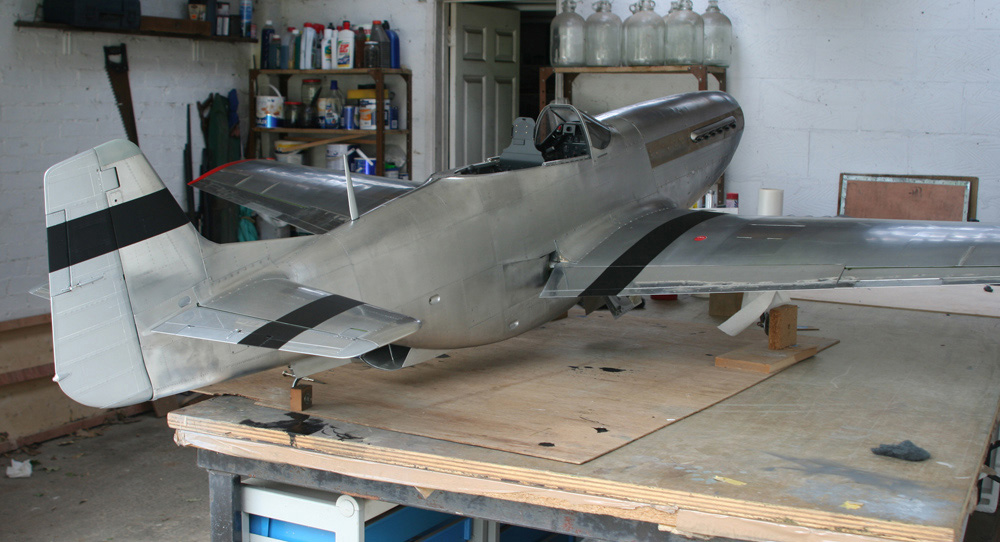
P-51D Progress
The model during the early stages of painting.
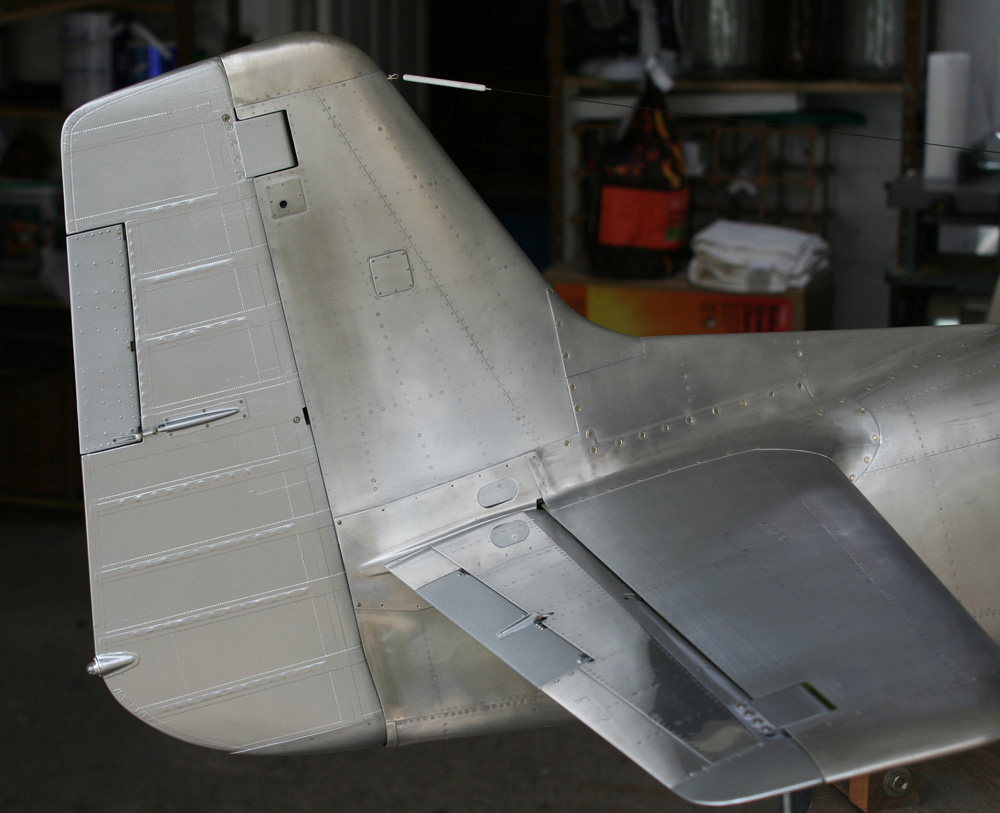
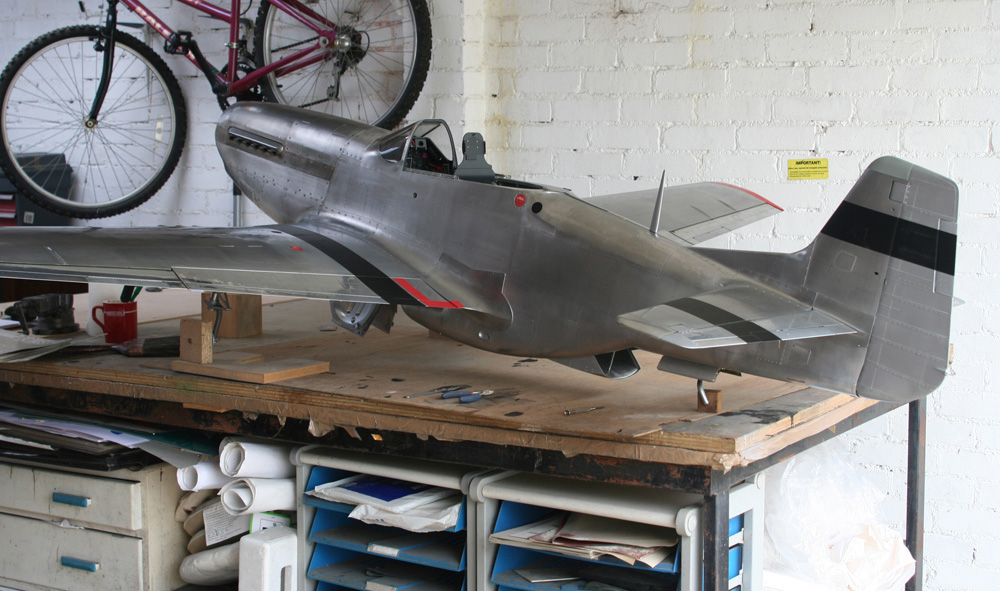
P-51D Progress
David deliberately chose a minimalist paint scheme, so as not to conceal the fine skin detail.
P-51D Progress
National insignia and codes have been added, along with some of the stenciling.
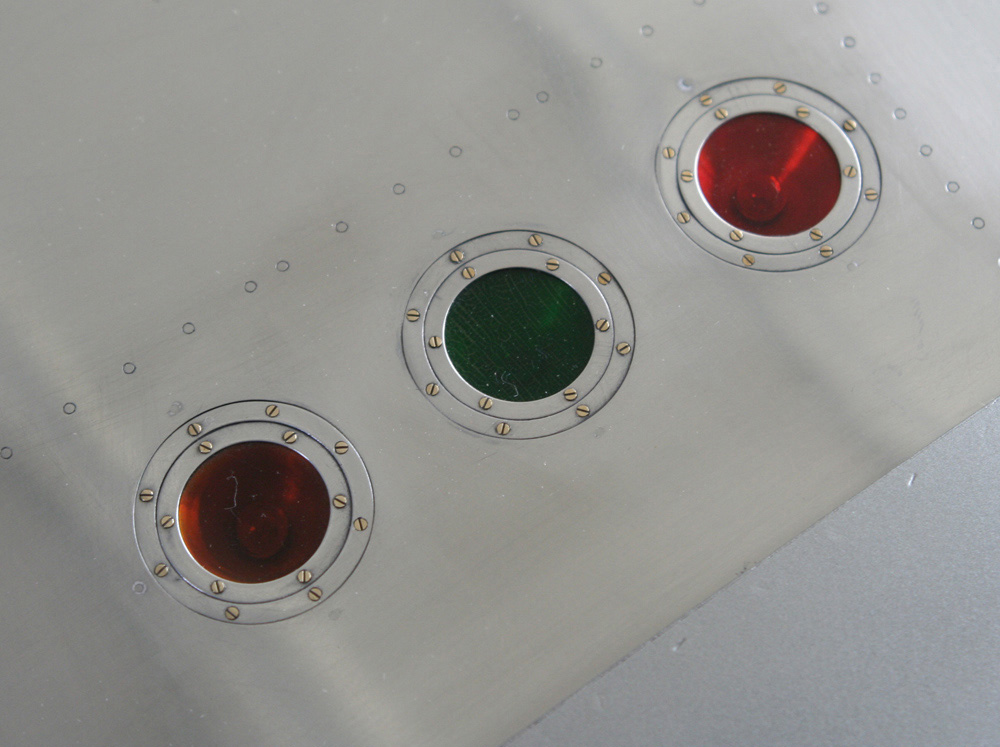
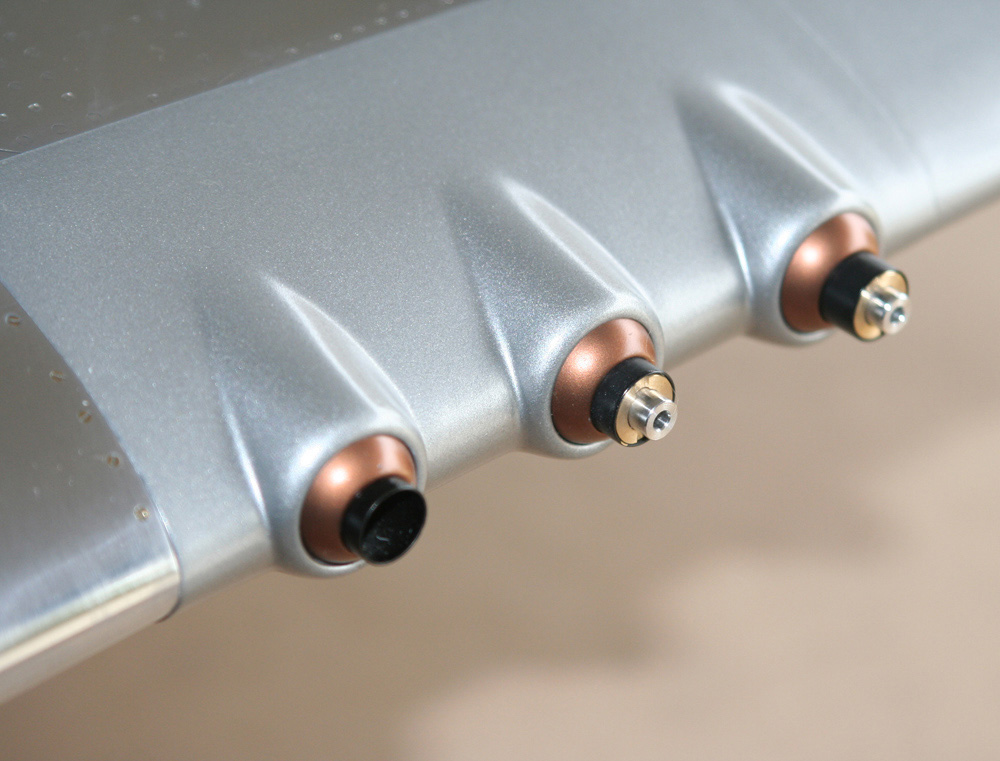
P-51D ID Lights
The red, green, and amber identification lights under the port wing. If you look closely, you can even see the bulbs.
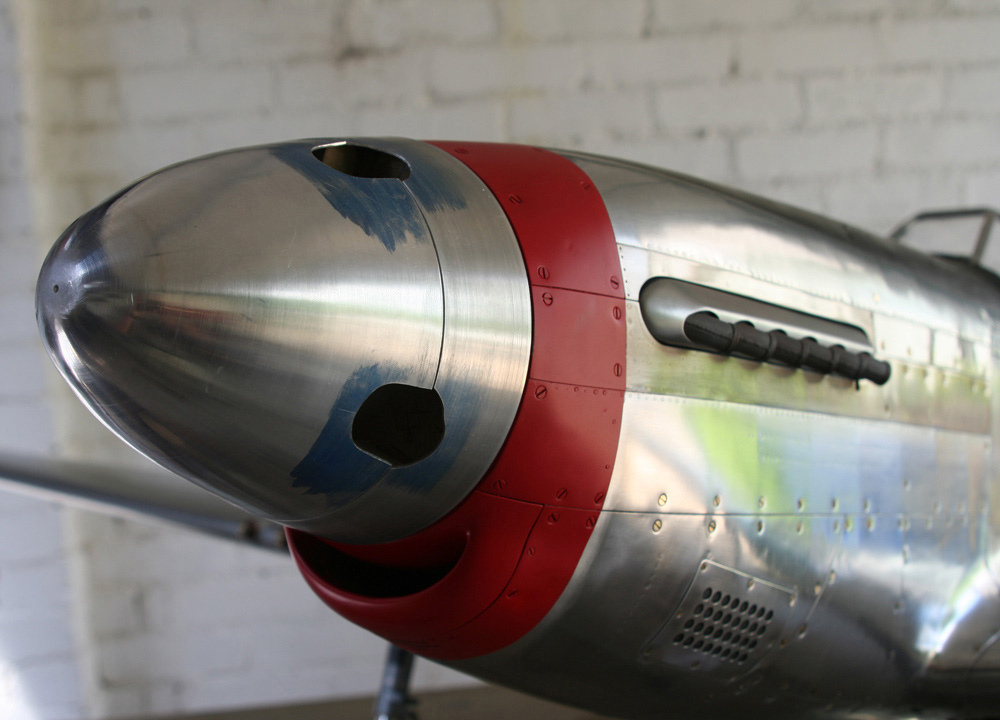
P-51D Spinner
The spinner was one of only two components that David “sub-contracted” (the other being the Perspex for the sliding hood). This photo shows progress on the rivet detail.
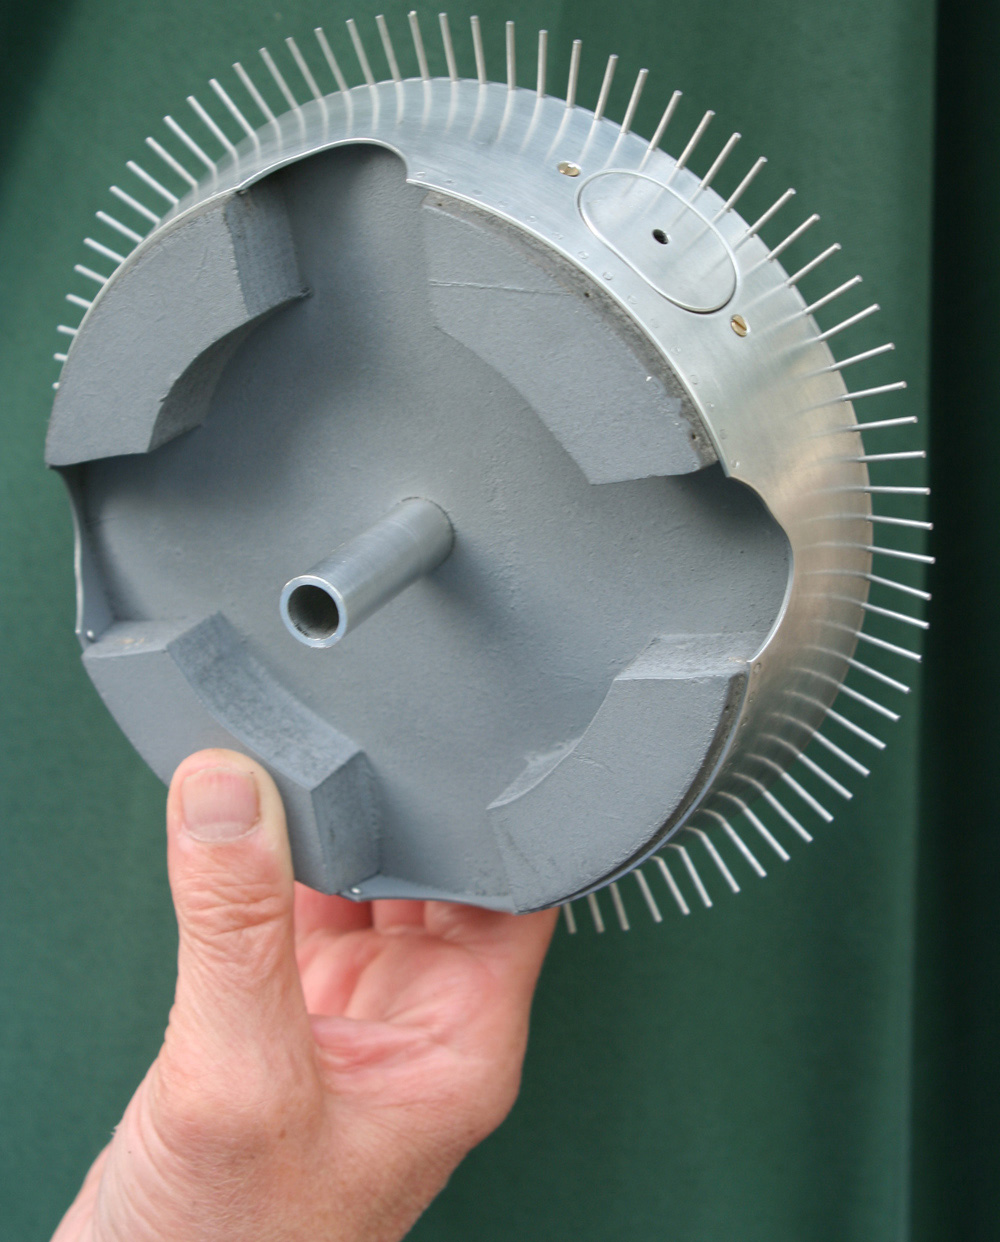
P-51D Spinner
The aluminum blank for the spinner was supplied as one spun part, and later sectioned on David’s lathe.
P-51D Underside
The underside of the P-51, showing the completed radiator air scoop, and the part-assembled landing gear.
P-51D Wheel-Bay
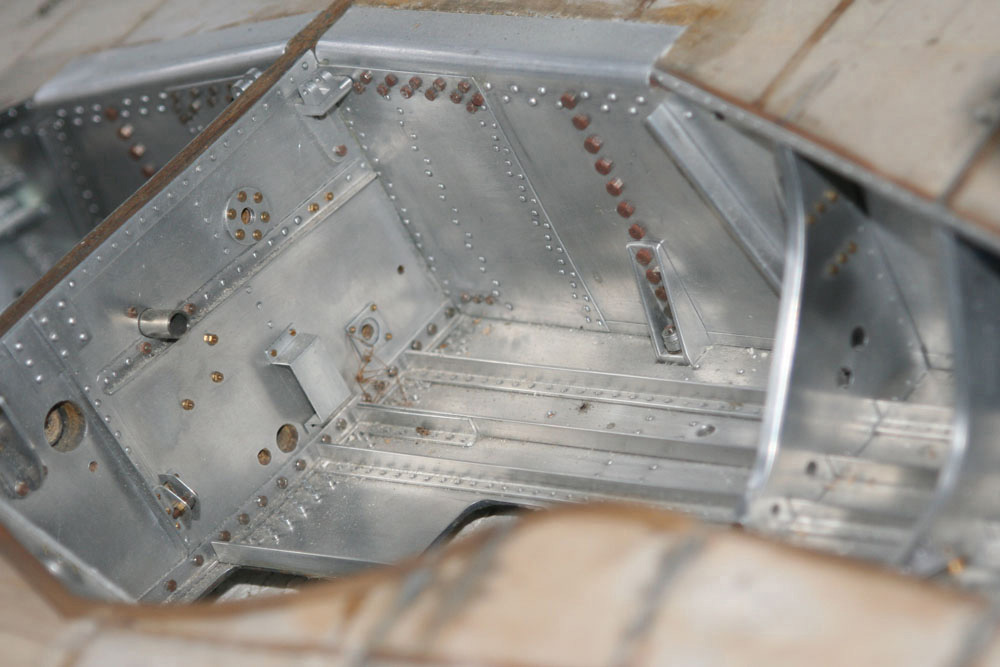
Early stages in the fitting out of the port side wheel-bay.
P-51D Wheel-Bay
For work like this, the factory drawings are indispensable!

P-51D Manifold Fairings
The manifold fairings were made of vac-formed styrene for convenience. The cast resin core provides a means to retain the individual exhaust stubs.
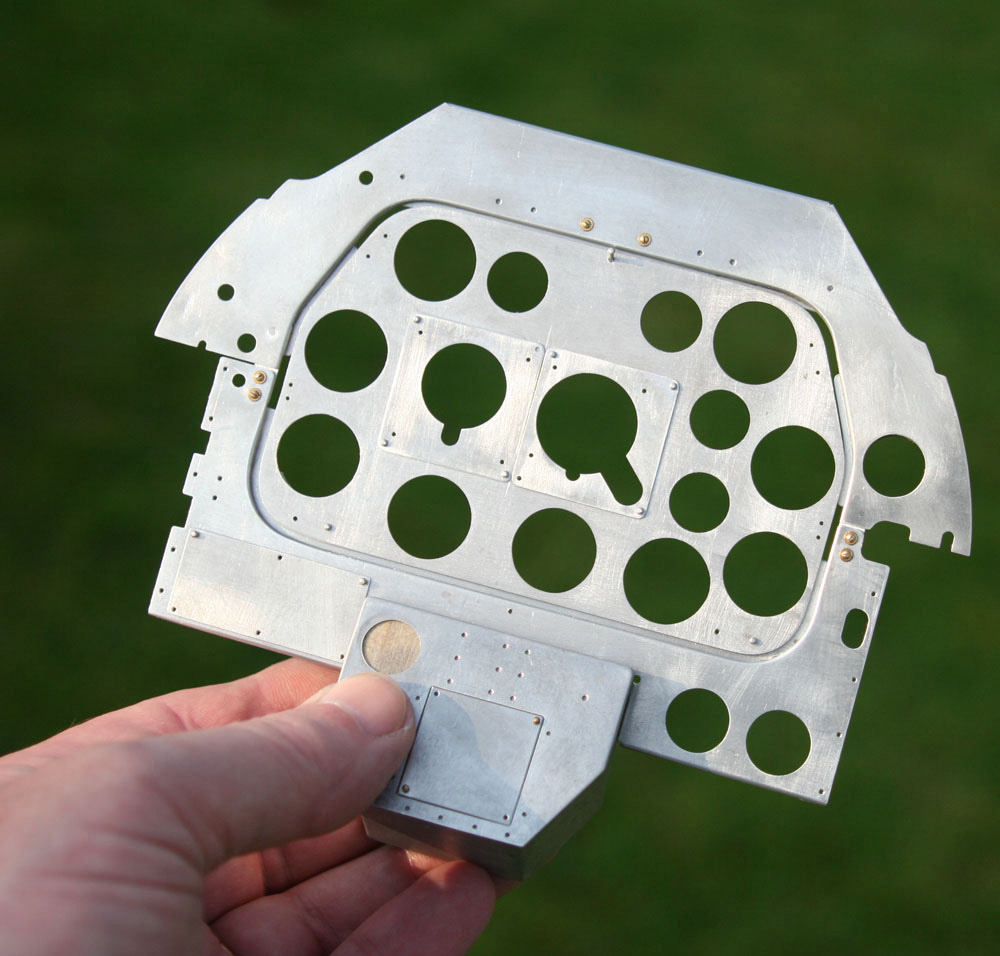
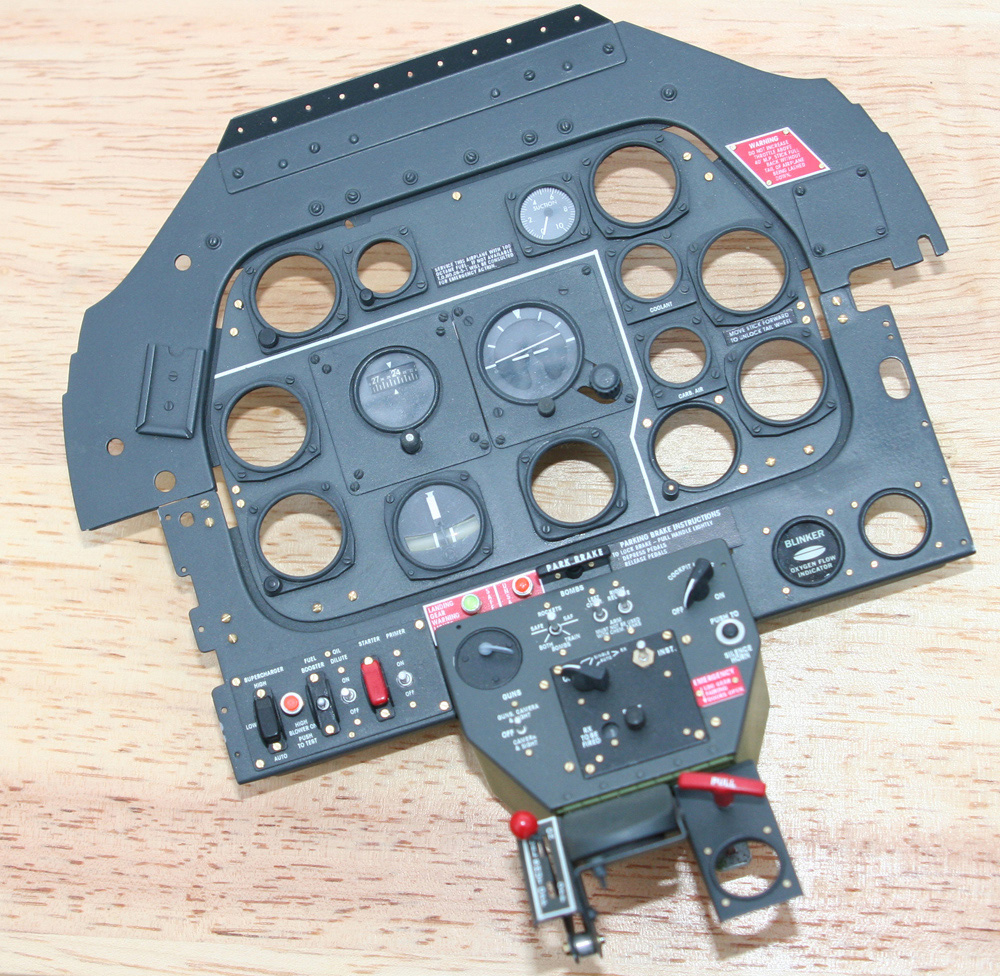
P-51D Instrument Panel
The partially completed instrument panel is dry-fitted.
P-51D Instrument Panel
Note the prominent central console with plate for the fuel control switch.
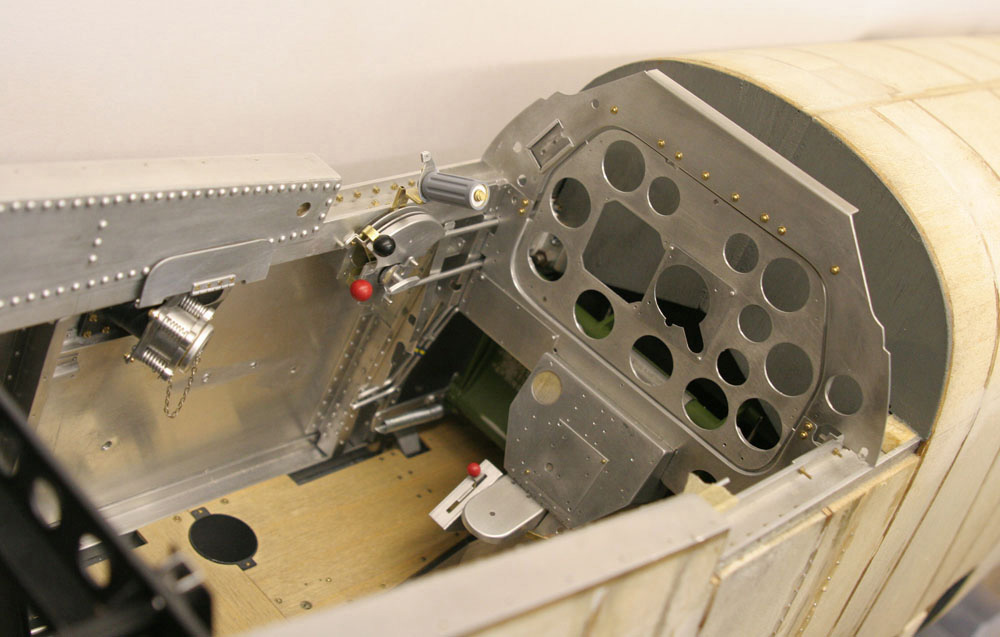
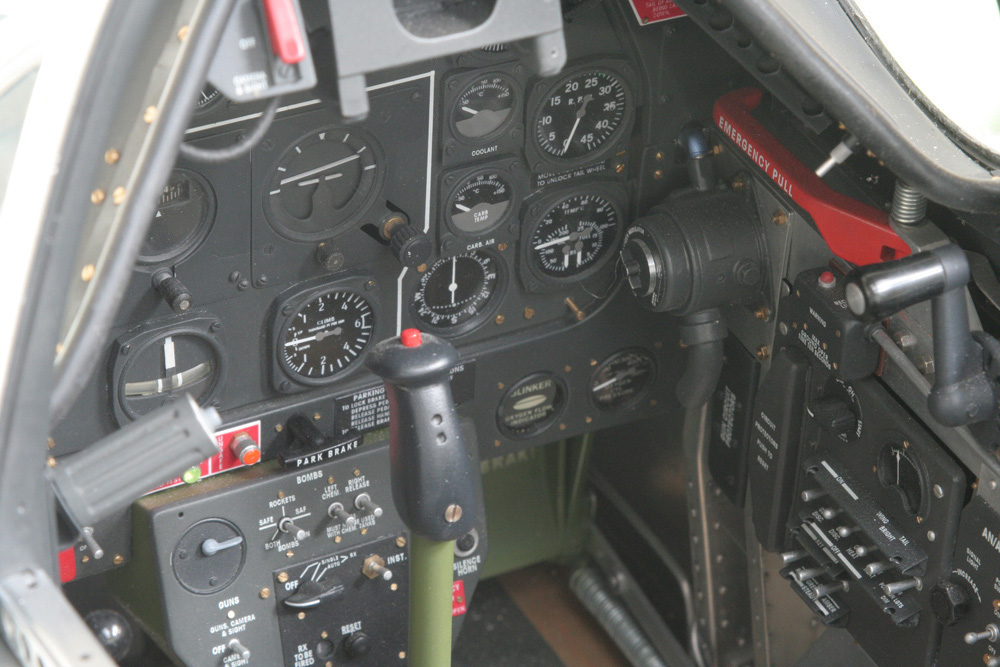
P-51D Cockpit
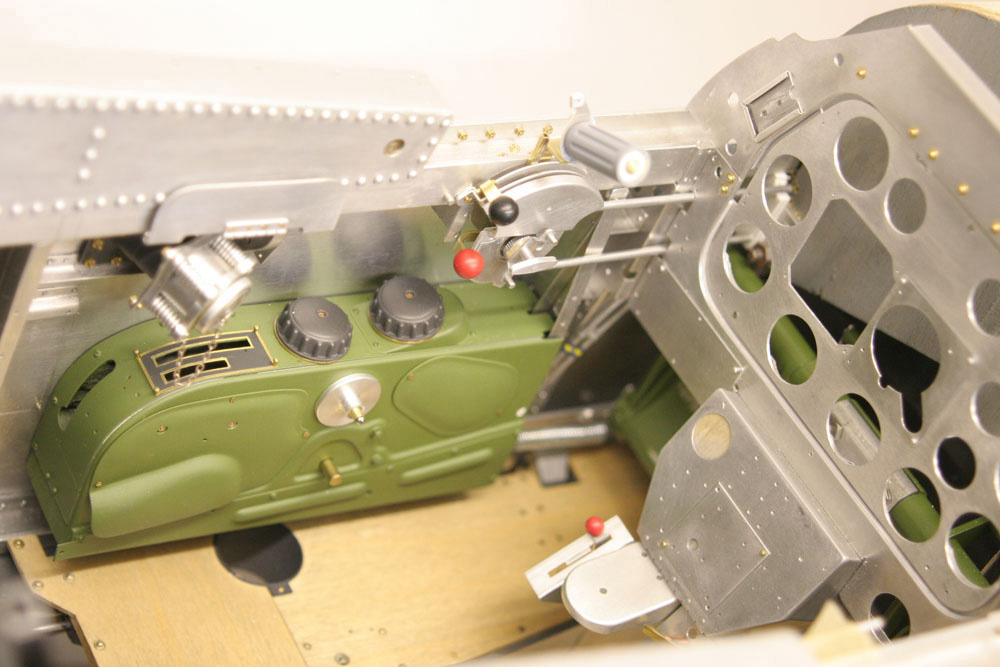
The port side of the cockpit during dry-fitting of the main console and throttle quadrant assemblies.
P-51D Cockpit
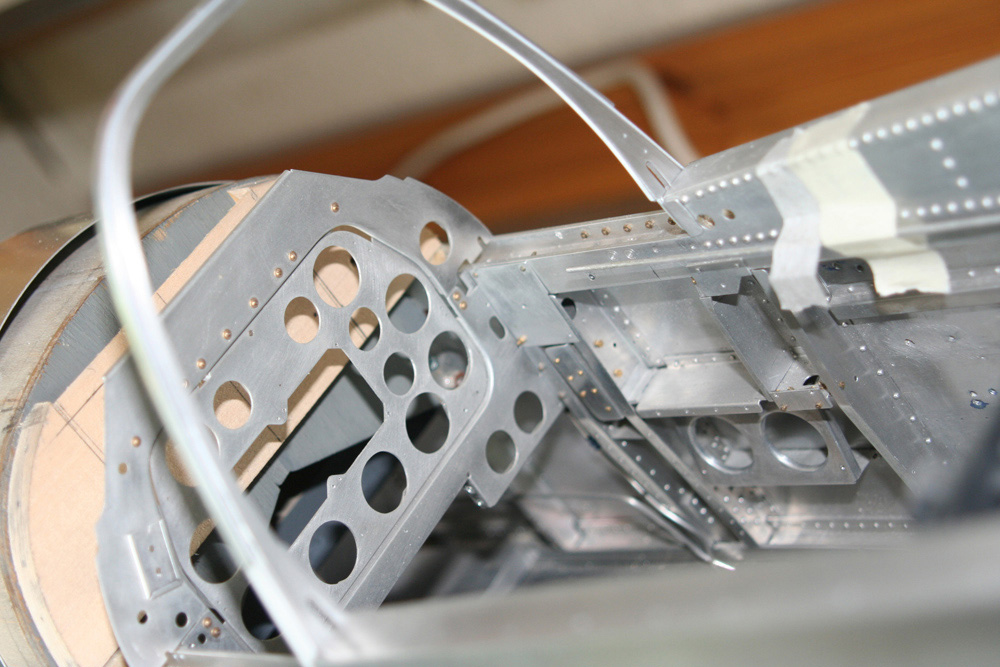
P-51D Cockpit
This view of the cockpit shows extensive detail, including the fuselage frames.

P-51D Data Placards
The Mustang’s cockpit has numerous data placards. These are replicated using custom rubdowns applied to thin alloy foil. The two curved placards are for the main landing gear.
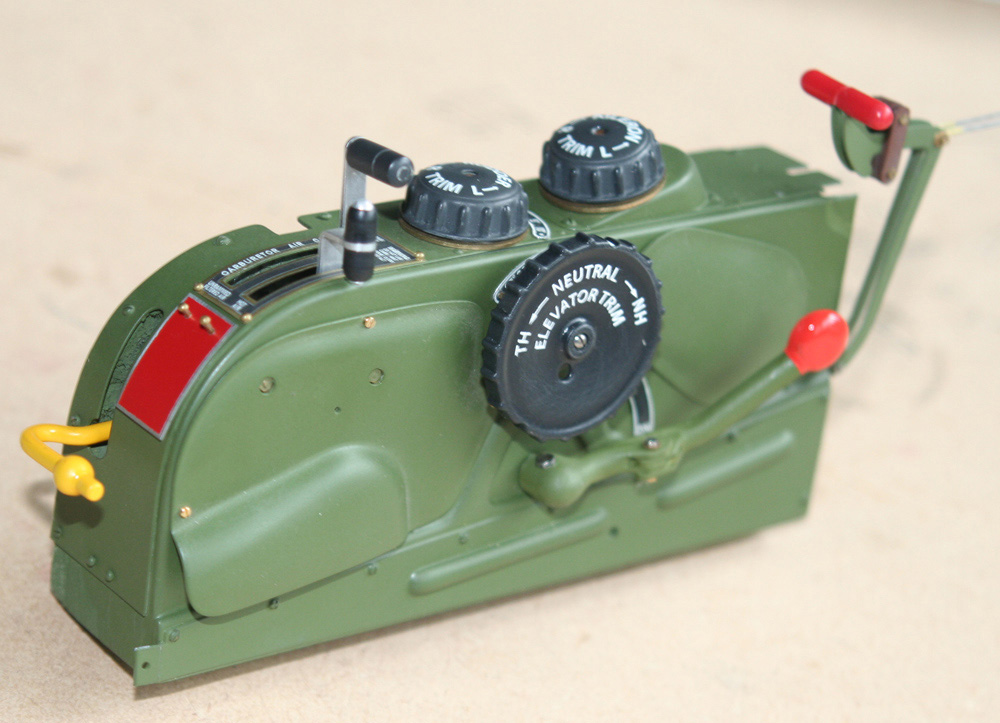
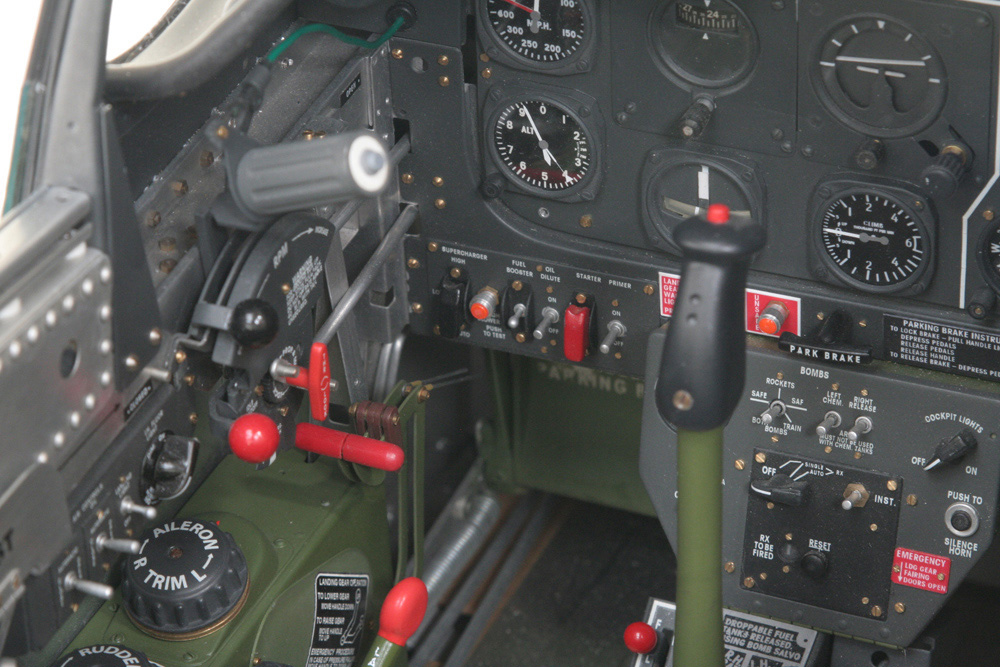
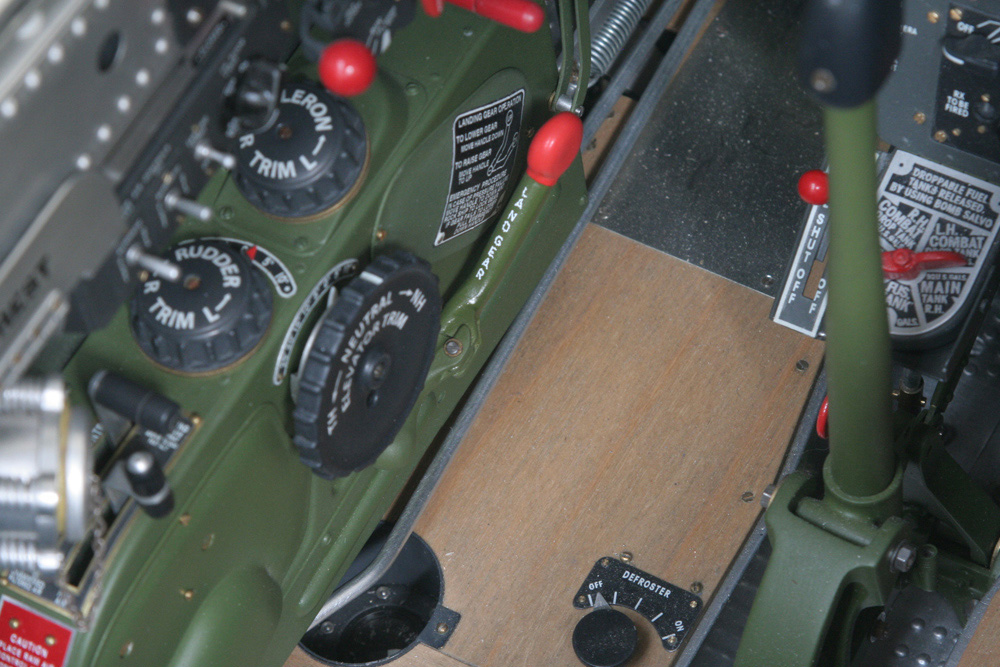
P-51D Console
The completed port side cockpit console, which includes the controls for the trim tabs (the large wheels), and for the flaps (yellow lever).
P-51D Instrument Panel
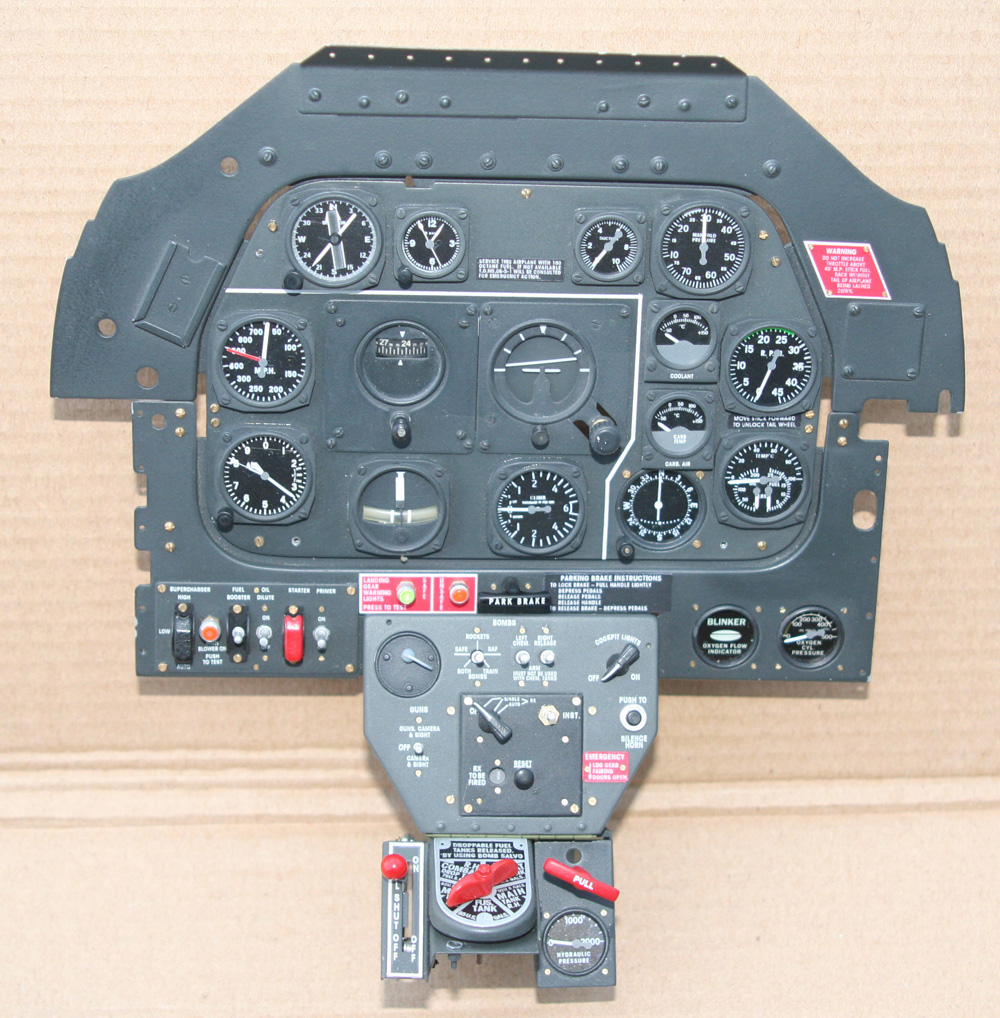
P-51D Instrument Panel
The completed instrument panel assembly.
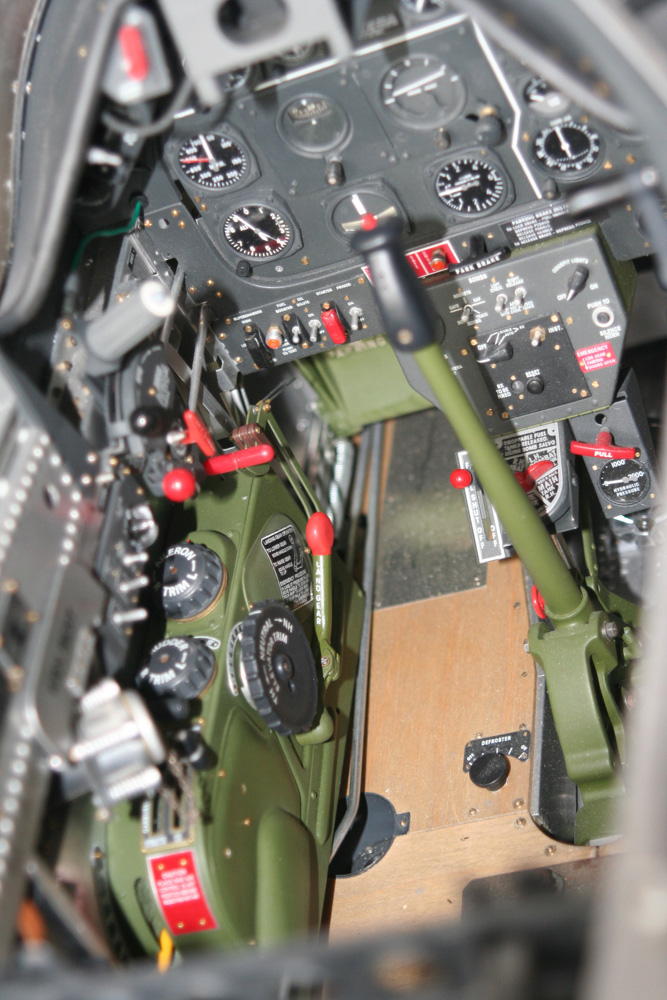
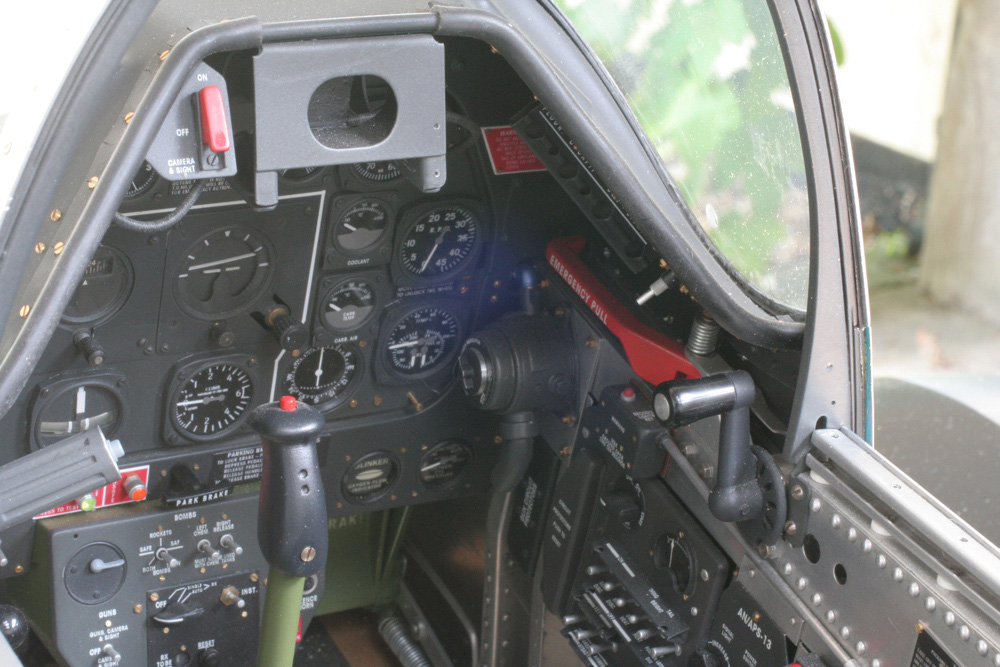
P-51D Cockpit
More angles of the nearly completed cockpit.
P-51D Cockpit
P-51D Cockpit
The red button at the top of the control column fires the 50-caliber machine guns in the wings of the real P-51D.
P-51D Cockpit
P-51D Cockpit
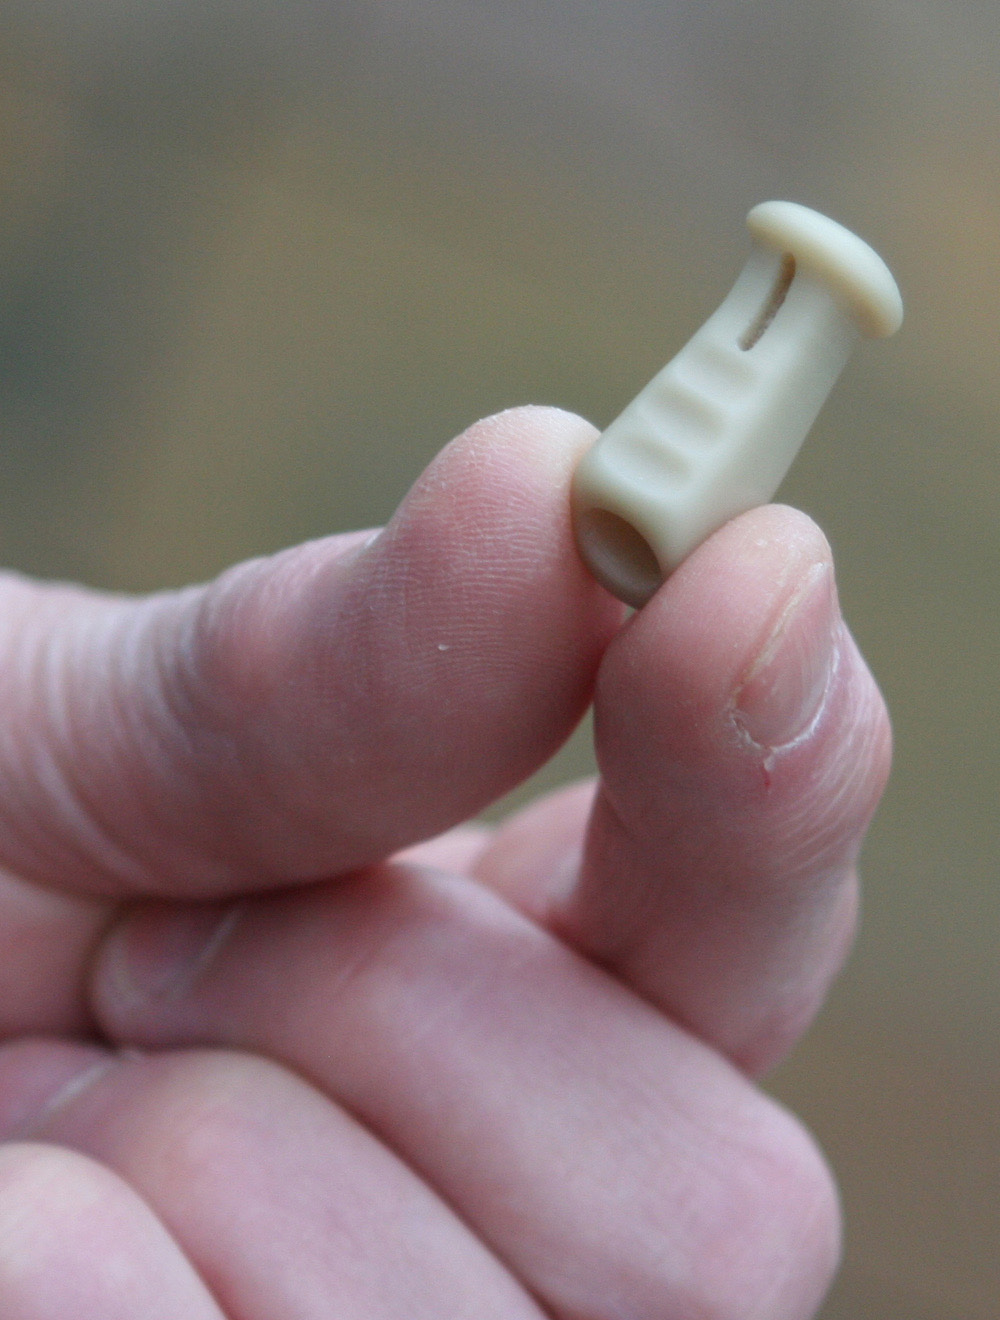
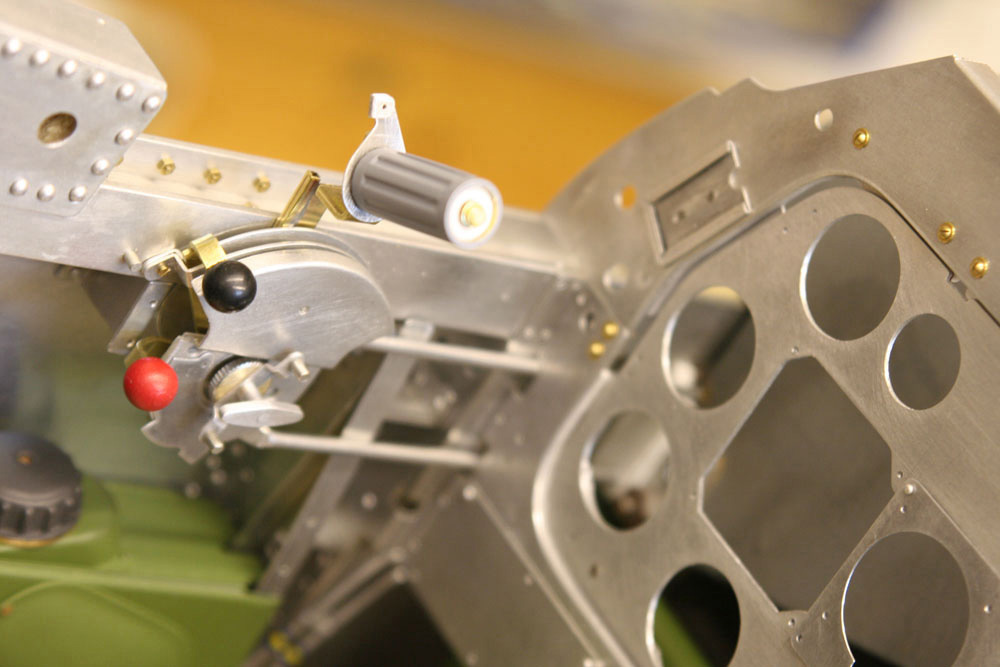
P-51D Control Grip
A close view of the sculpted grip for the top control column. This was carved from a scrap of two-part resin.
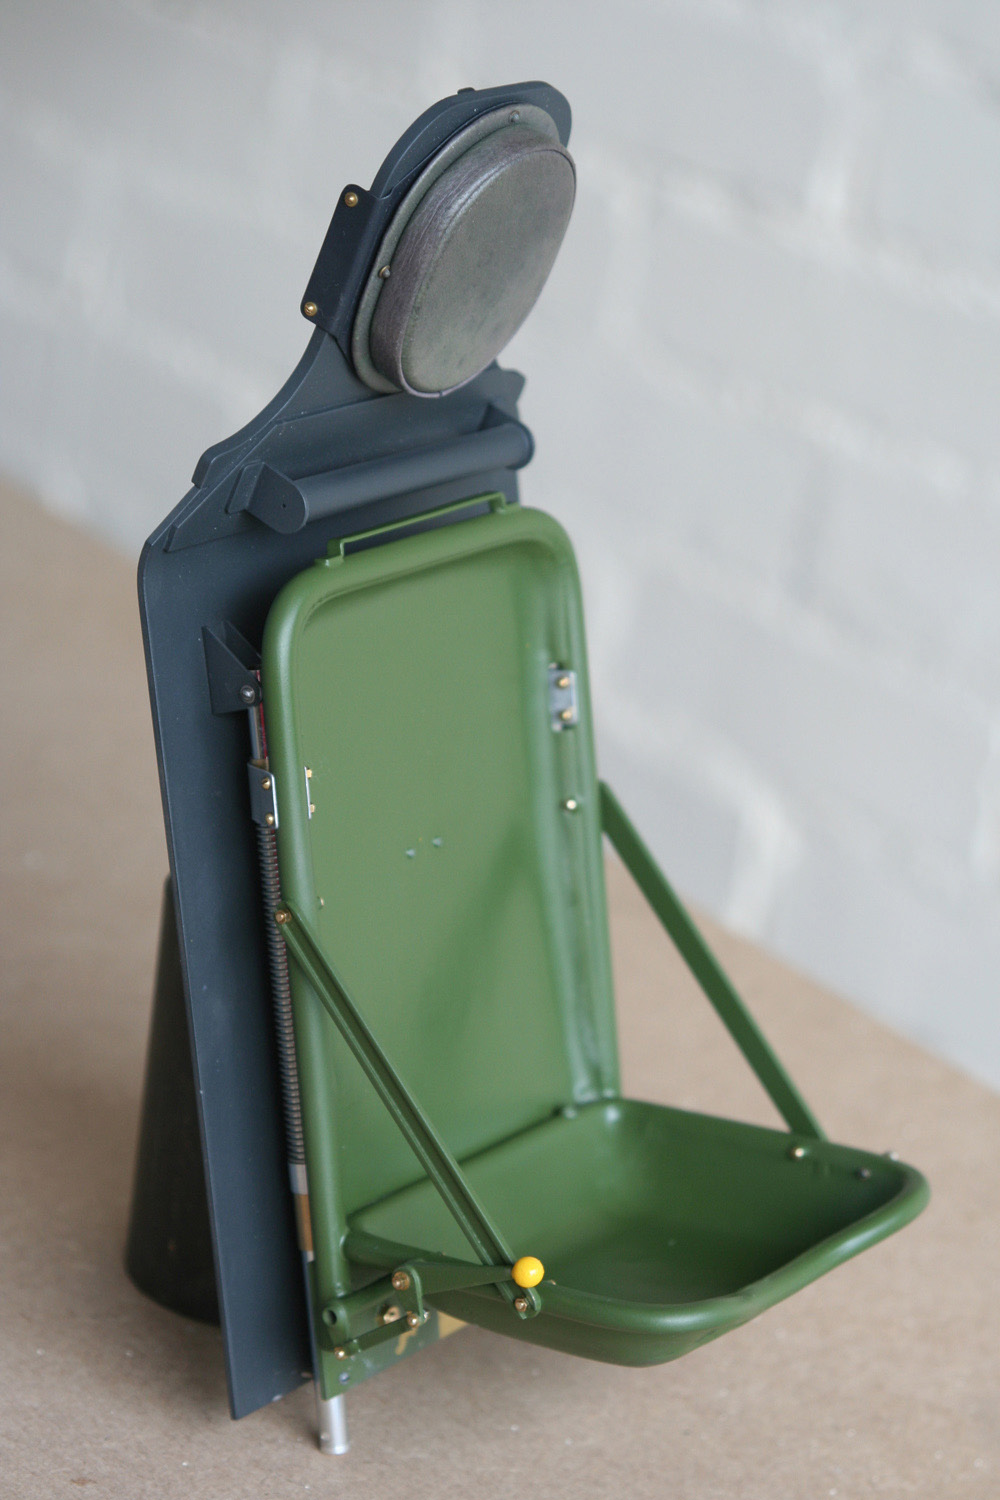
P-51D Pilot’s Seat
The pilot’s seat and armor plate. The seat frame is made of brass, but the back and seat-pan are aluminum alloy pressings. Note the head protector, which is made of real leather from a doll house supplier.
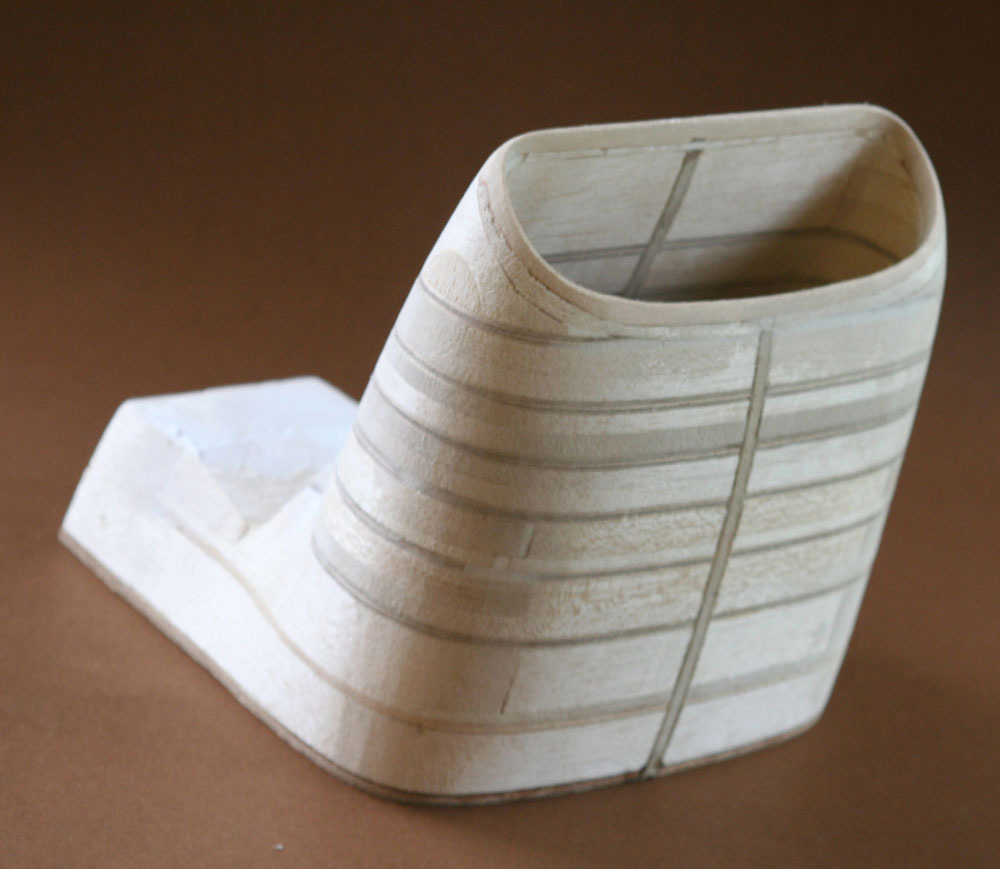
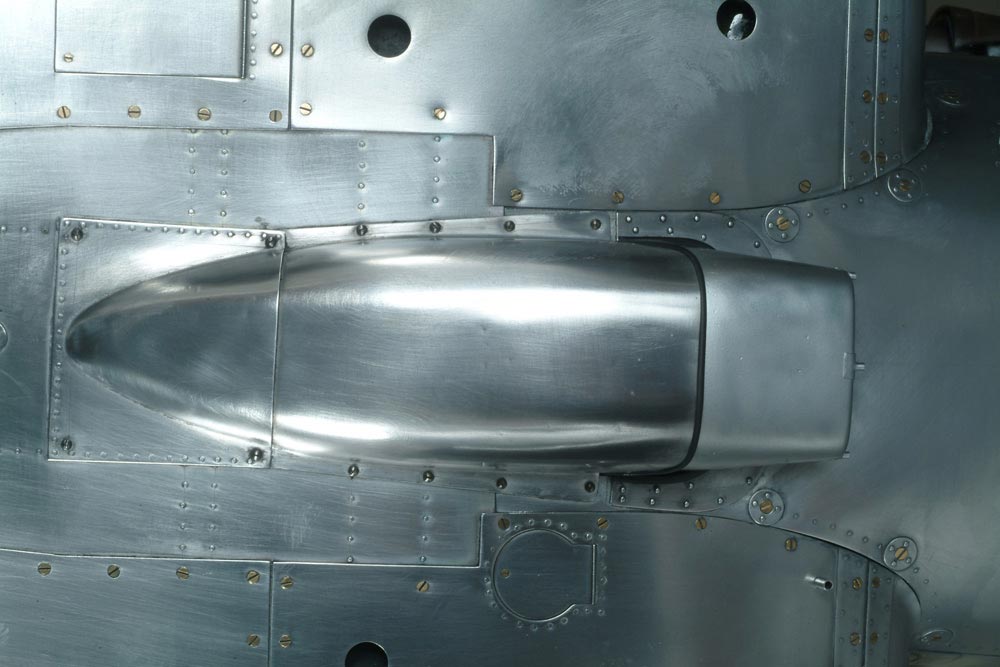
P-51D Radiator Air Scoop
The structure for the radiator air scoop before it was covered with an aluminum sheet.
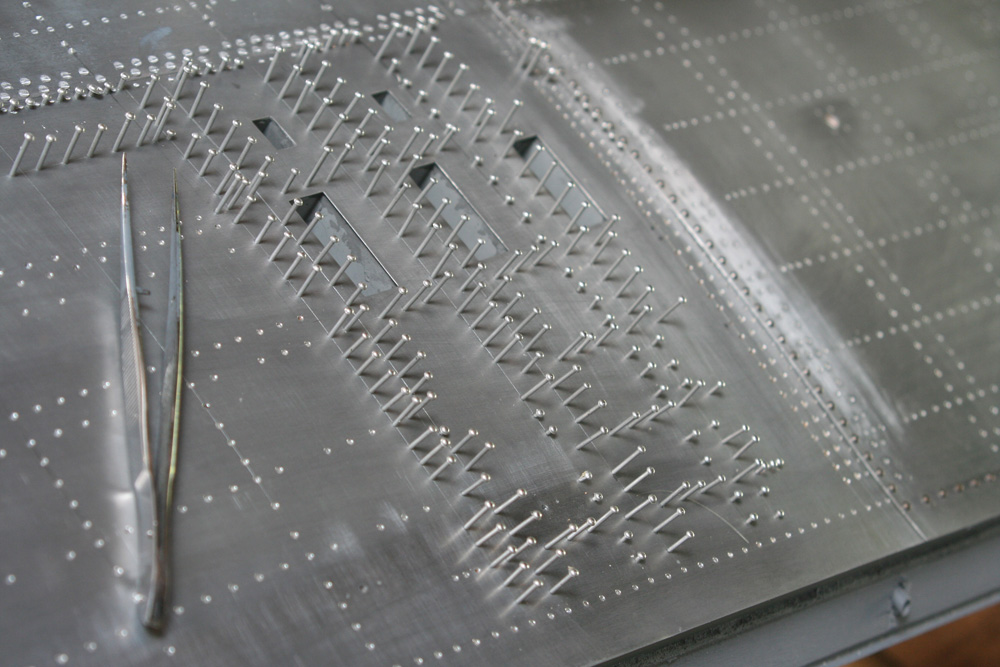
P-51D Riveting
This photo shows David’s technique for flush riveting. The rivet runs are marked off of the drawing, then drilled and chamfered. Then, the rivets are installed one by one, each with a tiny dab of cyanoacrylate glue. The excess was trimmed off with end cutters, and the rivet rows were carefully sanded flush before final polishing. The airframe features numerous rivet sizes. It takes a long, long time!
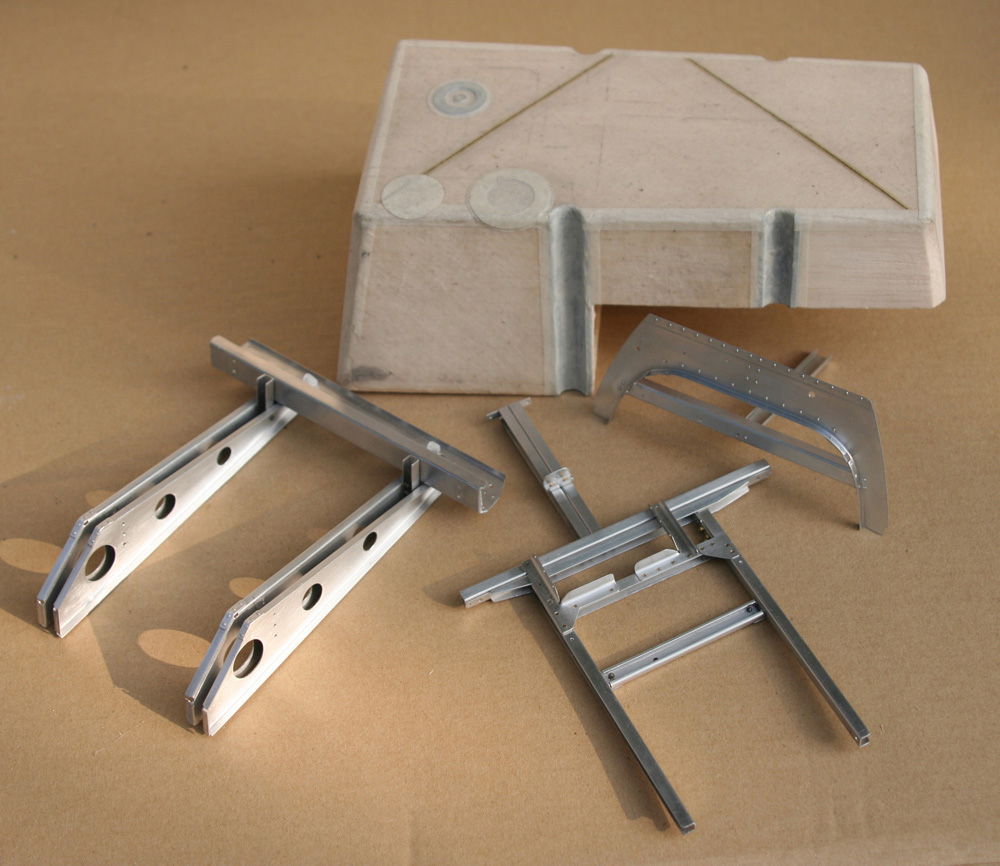
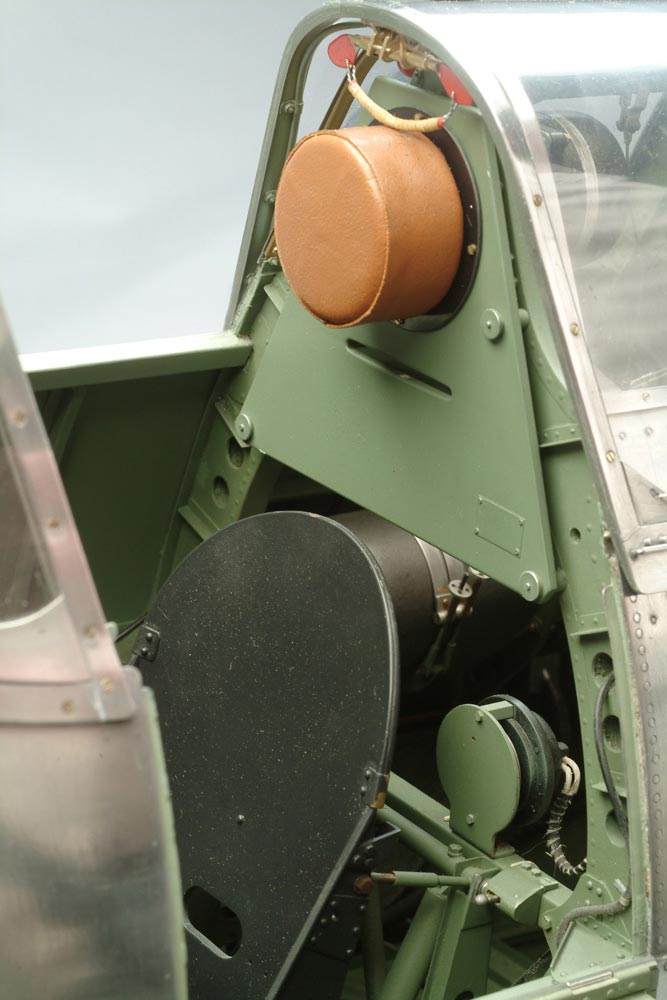
P-51D Fuel Tank
The fuselage fuel tank under construction. Note the various related sheet metal components, including: fuselage frame; seat supports; and the rack for the battery and VHF transmitter, which was installed immediately above the inflatable fuel tank.

P-51D Fuel Tank
The cutaway at the bottom is not visible, and only there to aid installation in the confined space.
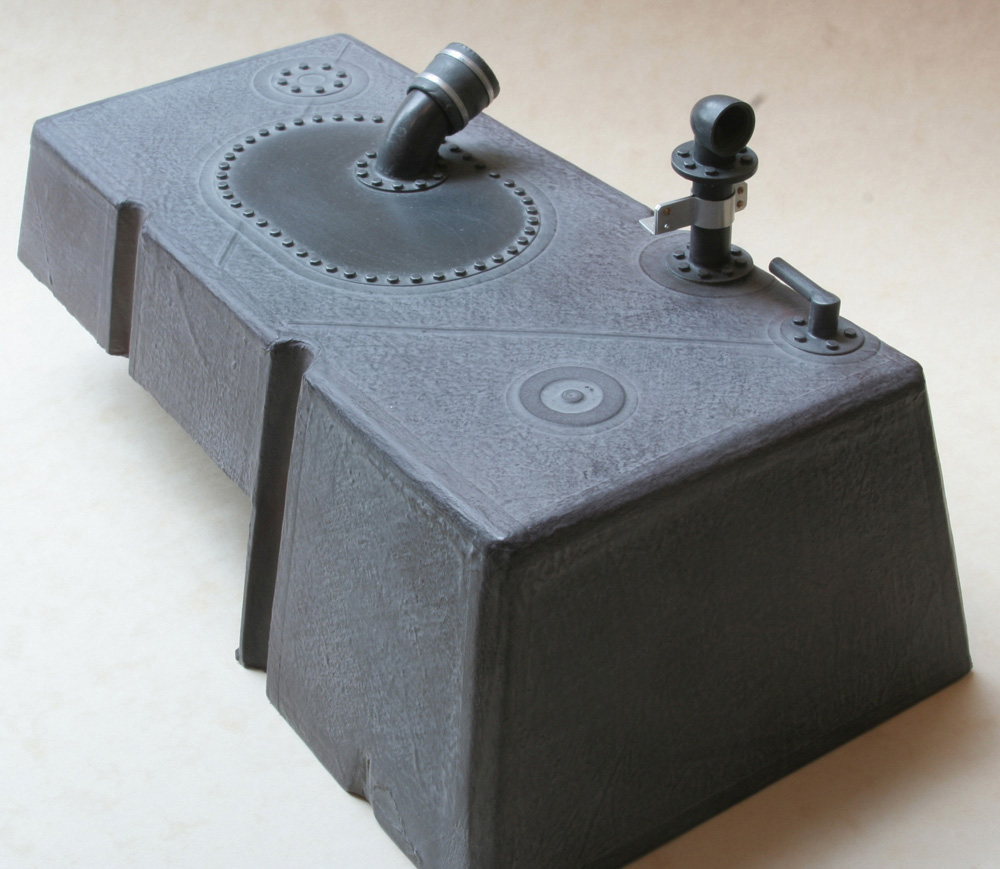
P-51D Fuel Tank
The finished fuel tank.
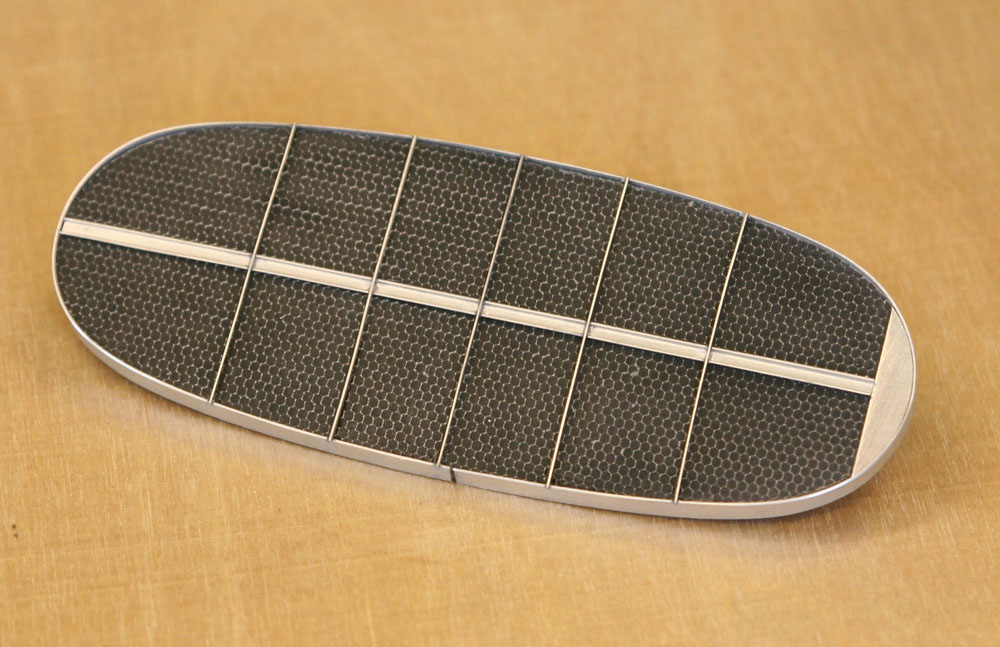
P-51D Radiator Panel
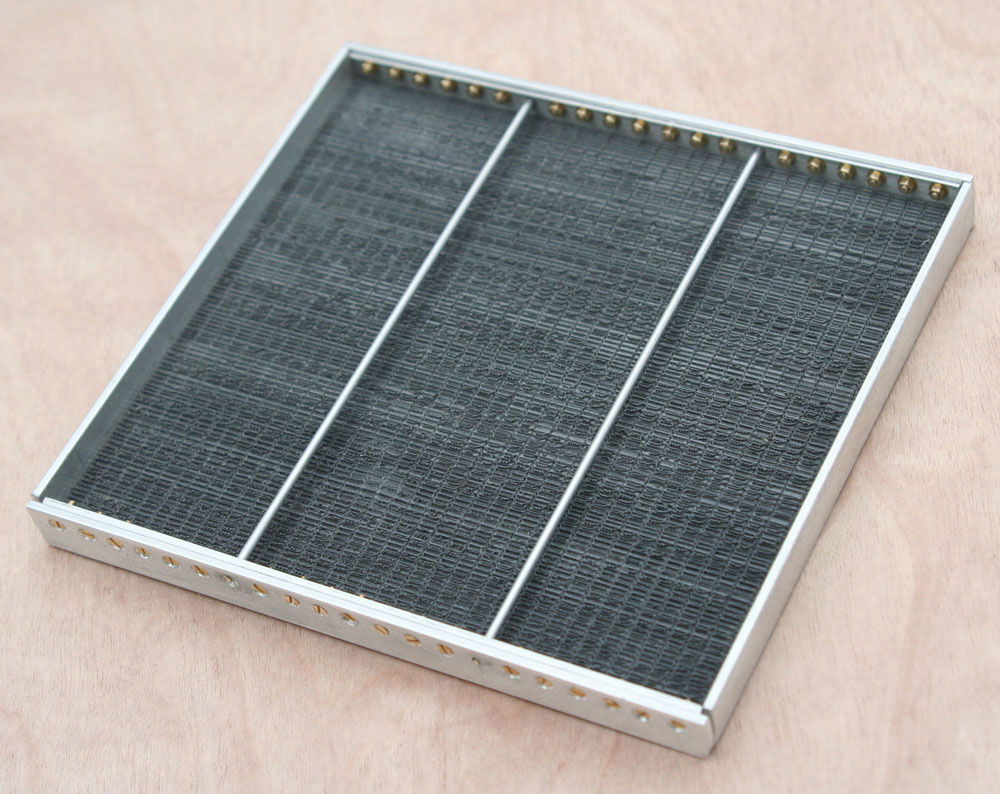
P-51D Oil Cooler Panel
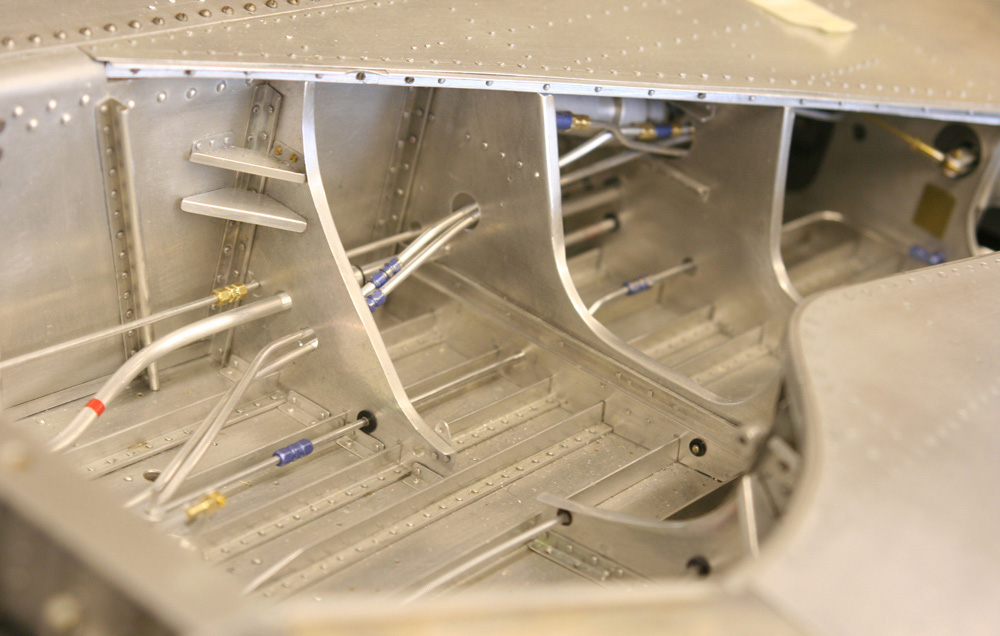
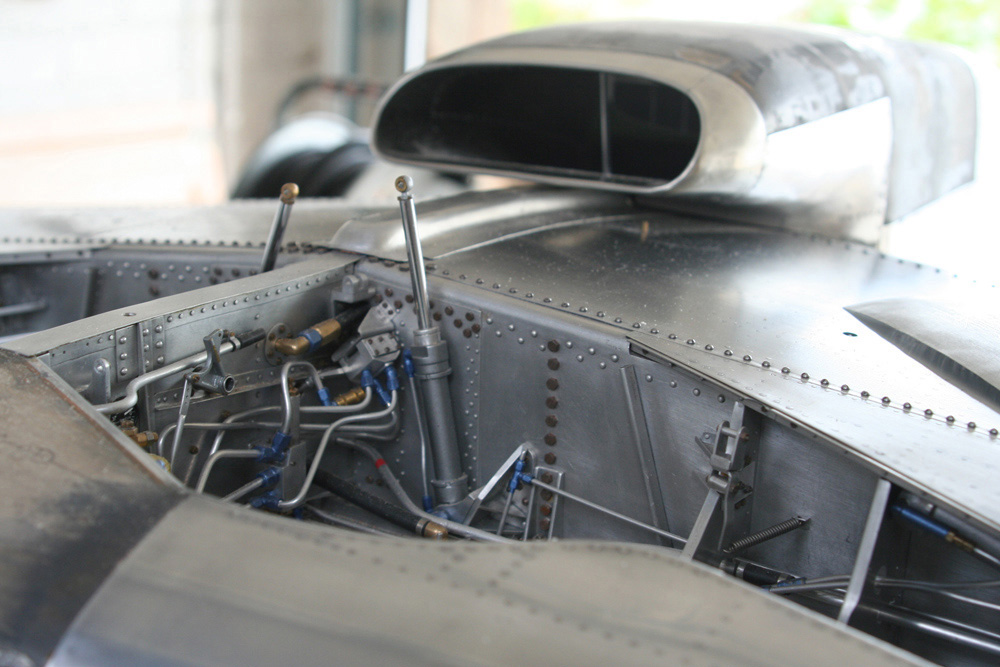
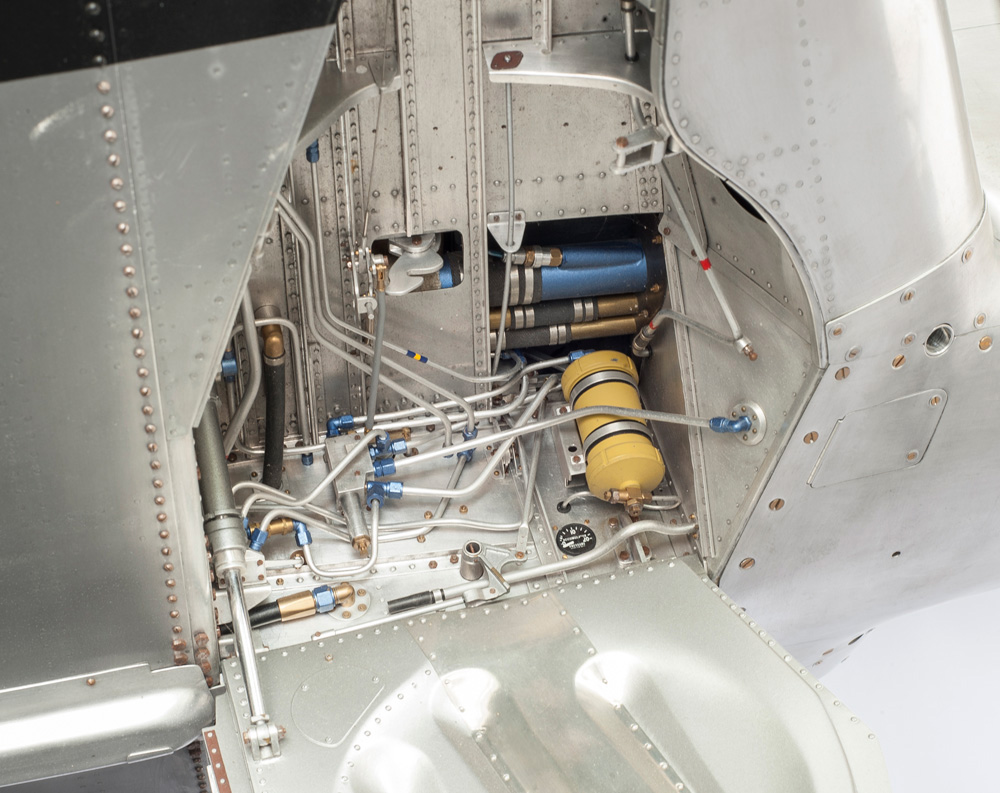
P-51D Interior Detail
Various hydraulic, pneumatic, and fuel lines are routed through holes in the wing ribs. One of the hydraulic jacks is just visible.
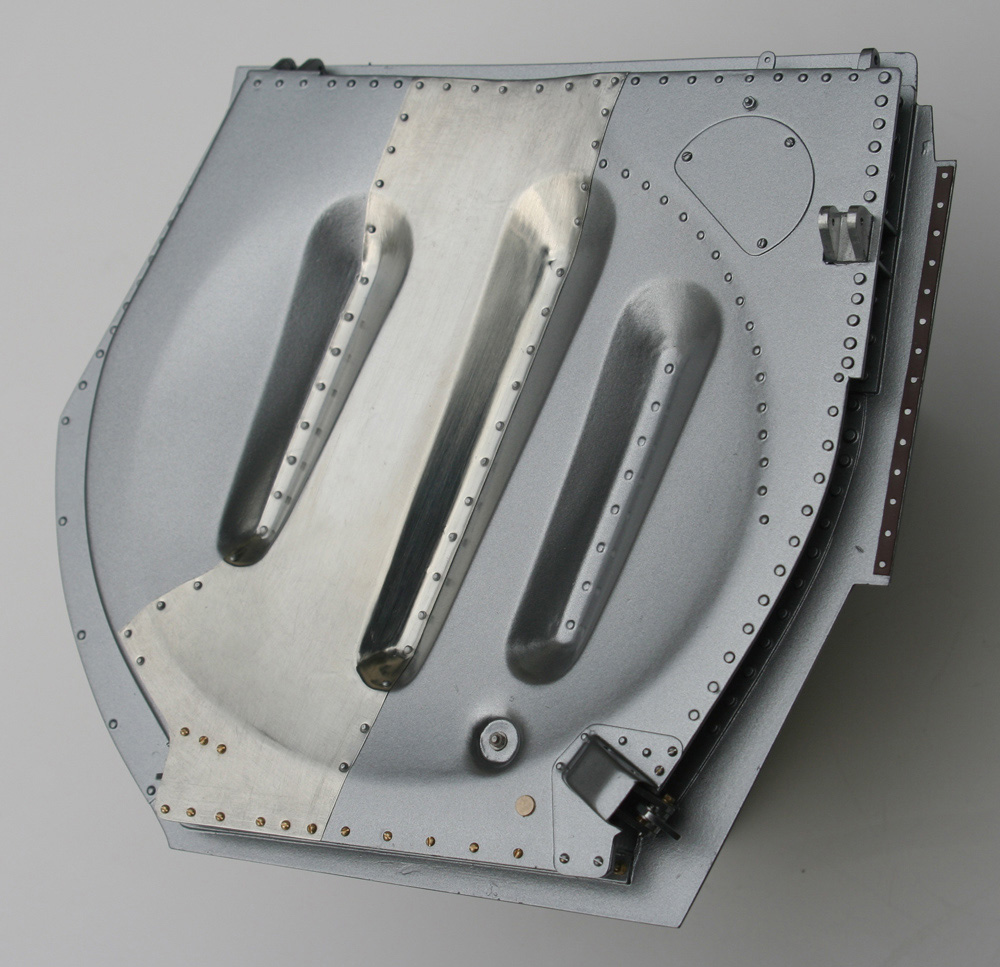
P-51D Landing Gear Door
One of the finished landing gear doors. The basic shape is from carved bass wood, but the entire structure is metal skinned.
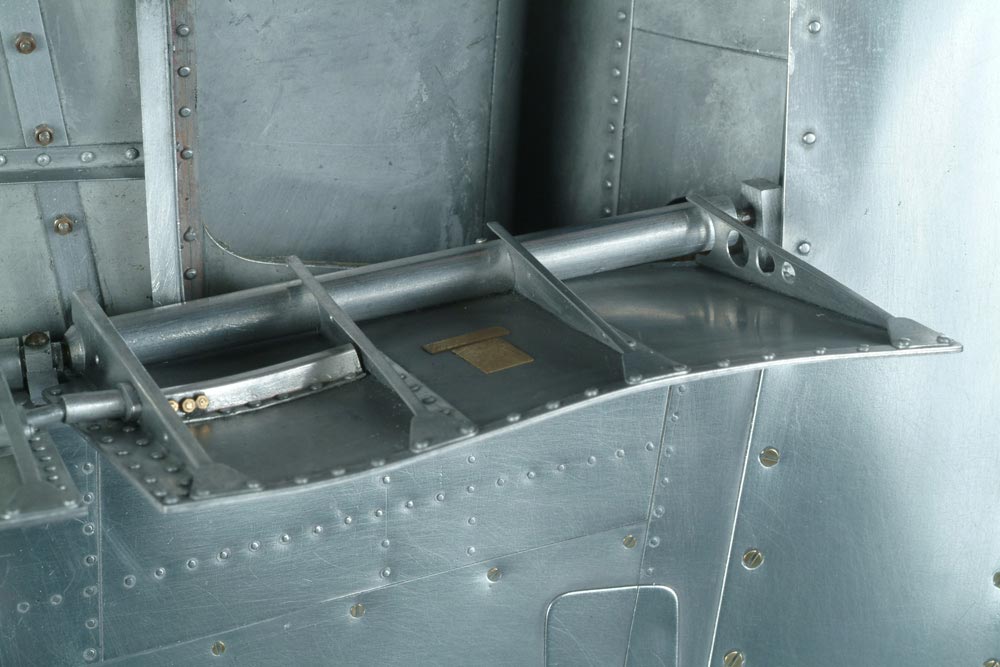
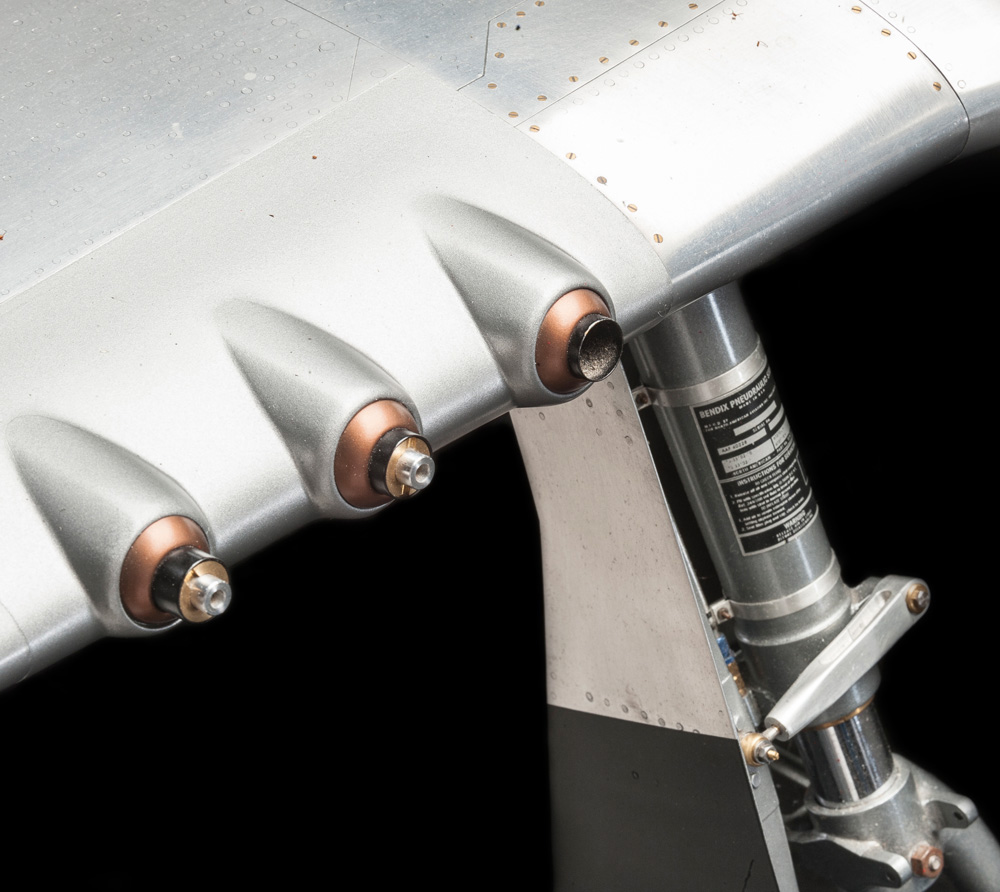
P-51D Machine Guns
The 50-caliber machine gun ports were one of the most challenging tasks on this model. David explains how he did them on his website.
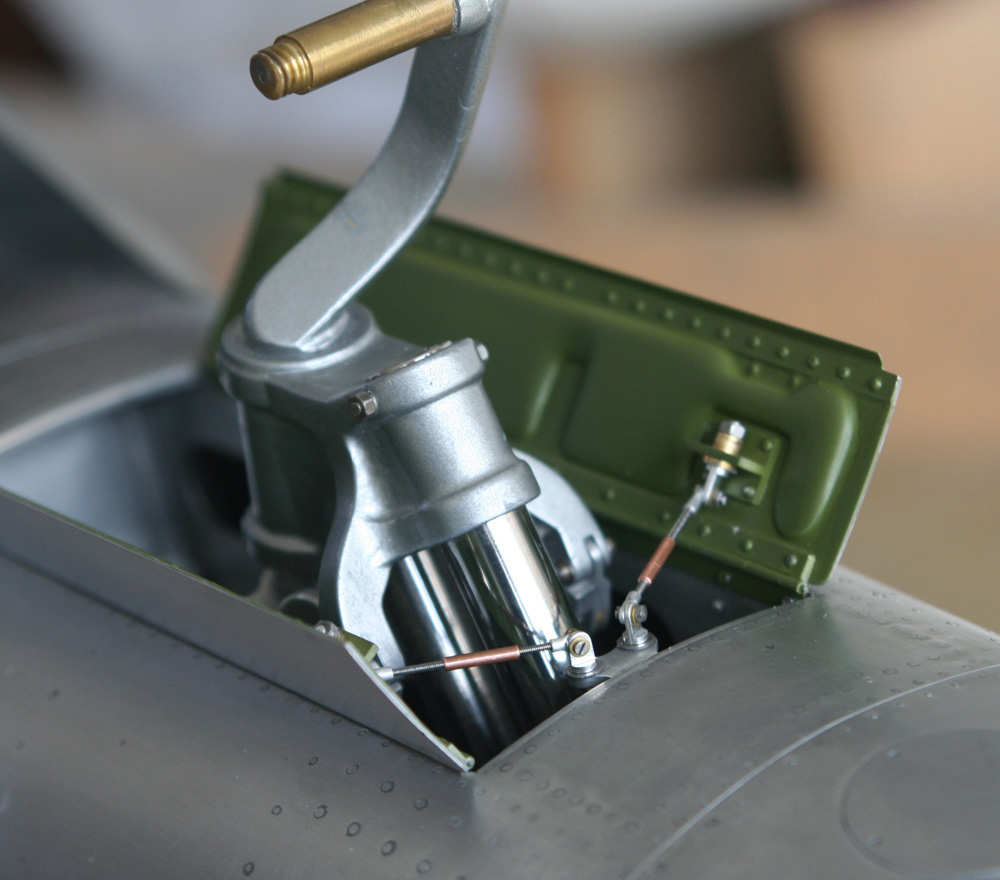
P-51D Tail Wheel Mechanism
A detail of the retractable tail wheel mechanism and doors. The wheel and tire had yet to be fitted at this point.
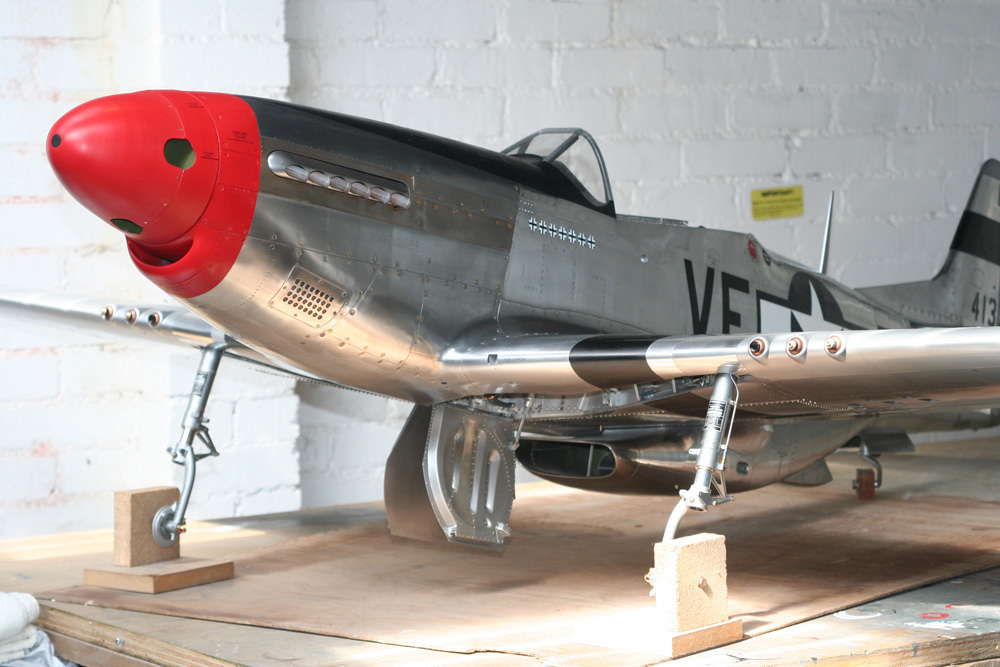
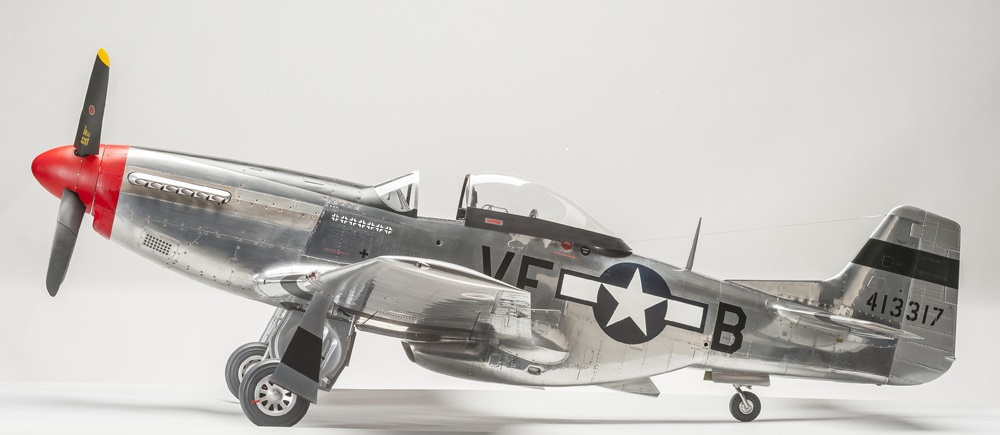
P-51D Mustang
The nearly completed P-51. The main wheels and tires had yet to be made and fitted at this point. Also, the aircraft lacks its Hamilton Standard airscrew, and beautiful sliding canopy in this photo.
P-51D Mustang
Bonnie, now seven years old in this photo, poses with the nearly finished P-51D.
Finished P-51D Mustang
David submitted these fine detail photos of the finished project, which were taken by a professional photographer.
Finished P-51D Mustang
Detailed view of the finished landing gear.
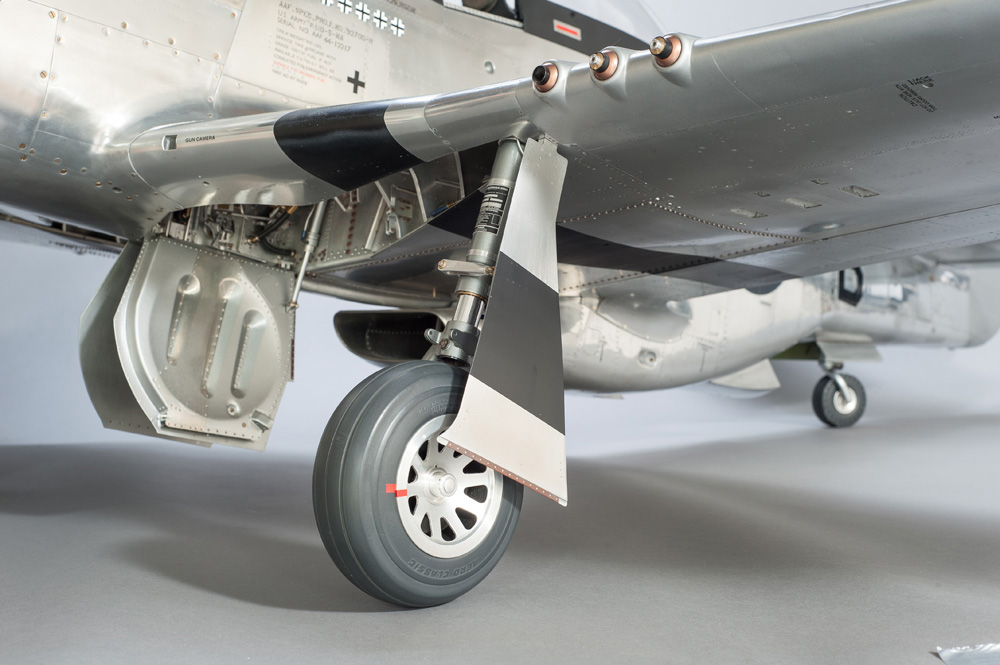
Finished P-51D Mustang
The machine gun ports can be seen along with the lowered landing gear. Note the detailed, engraved information plate on the main gear strut.
Finished P-51D Mustang
A close look at the inside of the wheel well.
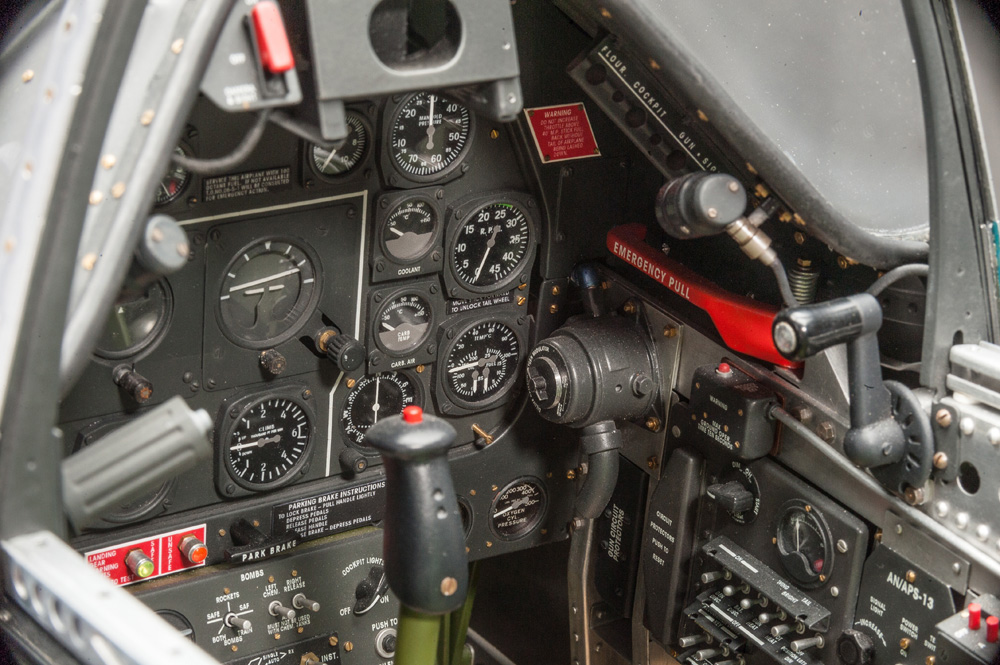
Finished P-51D Mustang
Cockpit controls and labeling are all completed. It looks like you could climb in and fire it up!
Earlier Model Projects
Pictured below are two of David’s earlier model projects—a 1/24 scale Daimler RE8, and a 1/24 scale Hawker Hurricane Mk1. The Daimler RE8 was only David’s third entirely scratch-built model. It can also be seen in the photo with David at the top of his craftsman page. On his own website, David noted the following about the RE8:
“My replica of the Imperial War Museum’s RE8, “Paddy Bird,” took the best part of a year to do, and I owe a debt of gratitude to restorer David Upton for allowing me access to photograph the machine at Duxford airfield during its most recent rebuild. Built by Daimler in 1918, F3556 never saw action. It is documented to have been test flown in October of that year, and with 30 minutes on the airframe, delivered to France on Armistice Day! Still in its original crate, the aircraft was acquired by the IWM, and unveiled at Crystal Palace in 1920. In 1974, it was transferred to Duxford in Cambridgeshire, and restored shortly afterwards before going on permanent display. Paddy Bird’s second major refurbishment (during which I photographed the machine) began in 2003. The aircraft, one of only two surviving examples, now resides in Duxford’s Airspace feature where, rather sadly, much of it is now inaccessible to close study as it hangs from the ceiling. By the time I started on Paddy Bird—my third totally scratch-built model in 1/24th scale—my confidence had grown, and I think it shows. The model has been featured in Windsock International, and by Scale Aircraft Modelling. Inevitably, my thanks go to Ray Rimell, of Albatros productions, for his excellent three-views.”
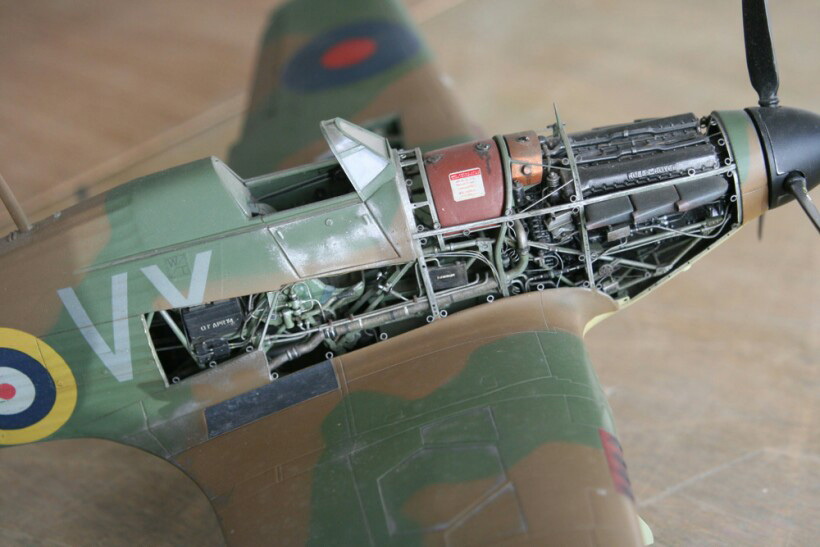
With regard to the Hawker Hurricane model, David noted that he started out in model building with plastic kits, but would remove panels to add more details. This model was a progression from basic kit bashing, of which David said:
“Completed in my early 30’s, this was my first serious attempt to go beyond ‘kit bashing.’ It is also my first 1/24th scale model, and building it sowed the seeds that grew into an obsession with detail, which later found expression in my big 1/5th scale endeavors. The model was inspired by Bruce Robertson and Gerald Scarborough’s little Airfix book on ‘superdetailing’ the Hurricane, for which I am forever grateful, since it opened the door to many, many hours of pleasure and a few of pain!!”
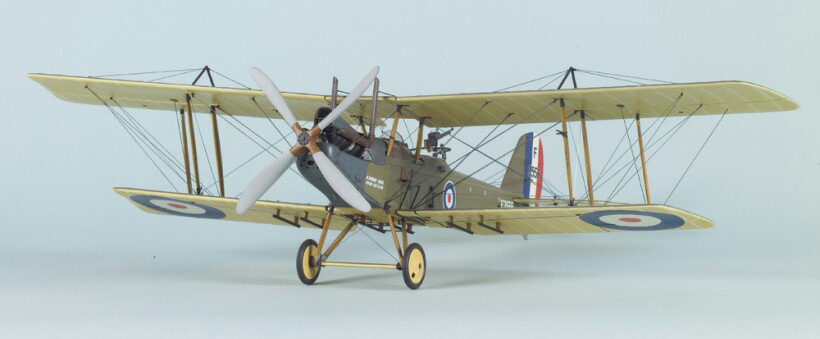
1/24 Scale Daimler RE8
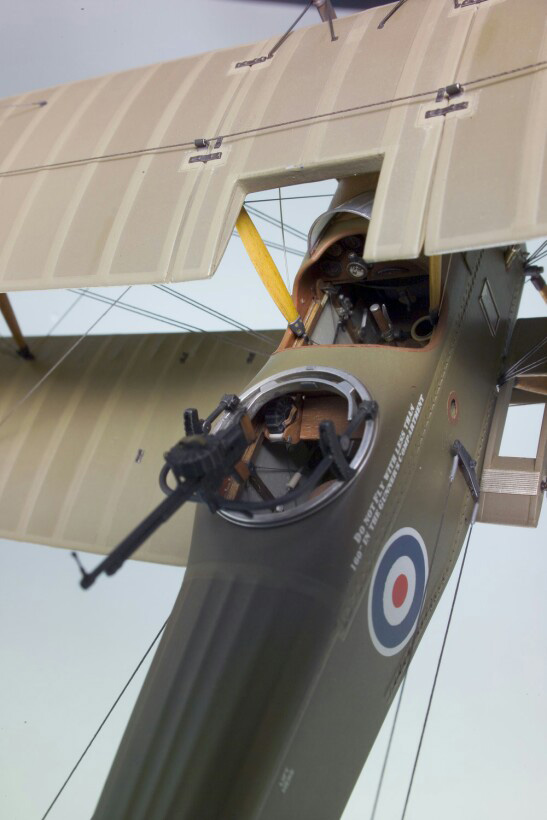
1/24 Scale Daimler RE8